More pancakes anyone?
Like I said, I haven’t been cooking much this week. So instead of a recipe I’m hoping a post on photography with pictures of food is almost as good.
I got my Canon Rebel for Christmas in 2010. I wasn’t really into photography back then but I figured I should get one like any good food blogger, and I’m pretty sure I’d dropped my old digital camera on the ground one too many times. For a long time I shot in automatic, because that was really easy and the pictures looked fine. But the more I used it, the more comfortable I felt playing with the buttons and nobs. And this year in my photography class using Manual was required, so the training wheels came off and I haven’t looked back.
There are 3 functions to keep in mind in a camera, and they all work together proportionally: ISO, shutter speed, and aperture.
The shutter speed is how fast the shutter opens and closes. The longer it’s open, the more light that gets in. It’s the easiest thing to control and usually the last thing you want to decide for a photo. If your shutter speed is too slow(1/30th of a second or slower) you might have to start worrying about shaking the camera and getting a blurry photo.
ISO is simply the quality the picture will have. A low ISO like 100 has a lot of detail, even if you make the picture big. A high ISO like 1600 comes out grainy when you try to stretch the photo. However, if you use 1600 ISO, your camera’s shutter speed can shoot 4 times faster than at 100 ISO, so it can be useful to stop blur. Generally, 400 ISO is a good compromise between quality and speed because it’s half way between 100 and 1600(I know it sounds like it’s a quarter way between the two, but trust me. It’s half).
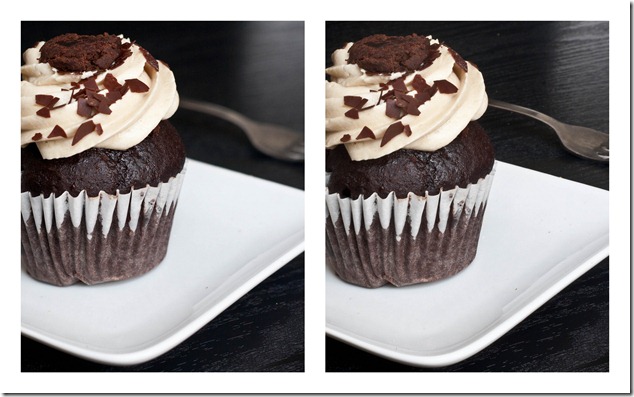
Aperture is the depth of field of a photo, or how much of the photo is in focus. This is easier seen then told:
The left one has a low aperture(5.0) and the right one a high aperture(22). You can see much more is in focus in the right one. Because of this, the shutter speed on the right one had to be about 10 times as long, which is when a tripod really comes in hand.
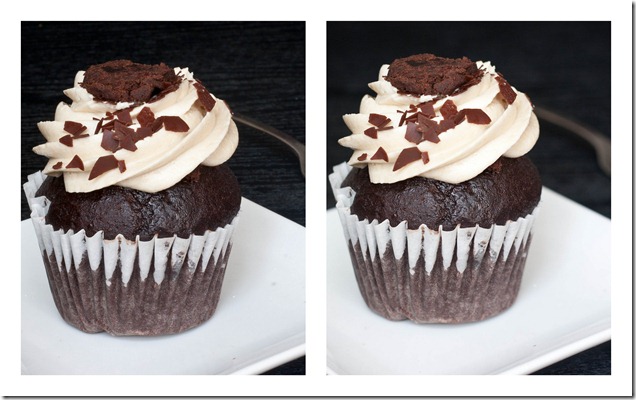
This time, the one on the left has a high aperture(22 again) and the one on the right has the low aperture(5.0).
In this case, I think the pictures with the low aperture look better, mostly because you can’t see the faux wood board I’m using as a table. Also, if you didn’t have a tripod, you’d want to use the lower aperture so that your hand won’t shake while you’re taking the picture. But neither one is universally better than the other; it all depends on what you’re shooting and what effect you’re going for.
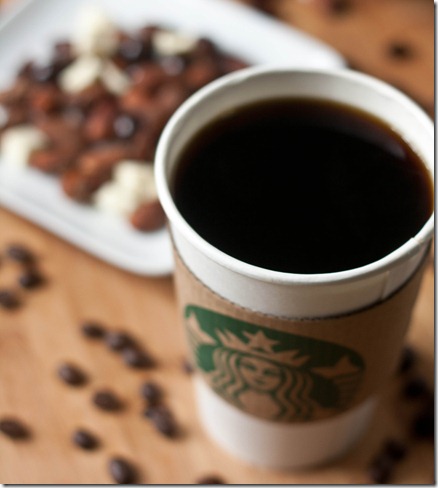
This photo has a really low aperture(2.8) so that only the lip of the cup is in focus. In this case, that was too low and I should have used a higher aperture for a better photo. A general rule is that, when there’s something in the foreground and something in the background, what’s in the foreground should be in focus over everything else. Then again, rules can be broken and no one’s going to arrest you for a bad photo; if that were the case I’d have a life sentence by now.
So how do you know if you’ve got it all right besides taking a photo and seeing how it looks on the back of your camera?
You’ve probably seen this little meter at the bottom of the screen when you look through the view finder. It measures the light in the photo before you actually take the photo. If the exposure is right, the arrow at the center should be at the middle(generally for food photos I think they look a little better if it’s closer to the 1 but that’s another story). If you’re letting too much light into camera, the arrow will be on the + side and you should either lower the shutter speed, lower the ISO, or raise the aperture. If there isn’t enough light in the photo, the arrow will be on the – side and you should slow down the shutter speed, raise the ISO, or lower the aperture.
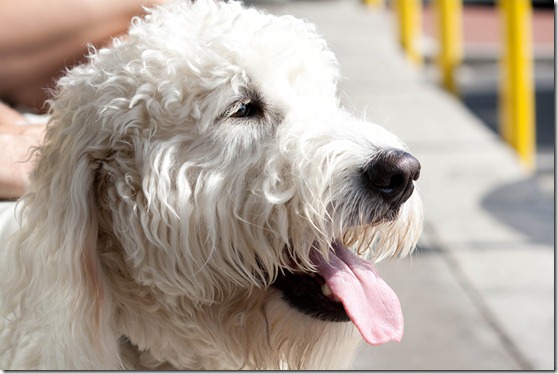
*Not a food photo*
When you’re taking pictures of family or friends(or dogs), this can be a lot to keep track of and you might be tempted to put your camera back on automatic. Compromise. Put your camera on AV, which stands for aperture priority. This lets you choose what aperture you want and it will automatically calculate the rest which makes it almost just as easy and you get total control of what’s in focus.
If all of this sounds confusing and overwhelming, that’s OK. This is much easier learned through practice than reading it on a computer screen, so pick up your camera and just start snapping. It’ll all make sense with enough practice under your belt.





Are you studying for finals?
Oh I finished those days ago.
So what is your excuse for not cooking…
I’m just too popular to be bothered.
lol! These type of posts are interesting 🙂
Thank you for explaining the light meter! I feel like people leave that out of these “basics” posts and it’s SO helpful to people who are new to the DSLR and struggling to figure out lighting.
I feel like it’s one of those things that’s easy to understand but hard to explain, especially through a computer screen. And it’s not like you can take a picture of the light meter or anything, haha.
Wow, this is such an awesome post! I don’t have a DSLR (yet), but part of the reason I’ve been holding off is because I was afraid I wouldn’t know how to use it properly. Thanks for the tutorial!
Great and informative post, Evan!
In social situations I tend to manually adjust the shutter speed and let the camera handle the rest. better for lighting 🙂
Thx for connecting with me on foodbuzz. I just subscribed to your blog feed and can’t wait to see what your next post will be!
Thank you so much for this post! I submitted to foodgawker and tastespotting but they were declined because of lighting issues… what does this mean?
Thanks! ~ nerdwithtaste.wordpress.com
Lighting can be tricky. They only really like photos with natural light, and will reject it if the shadows are too harsh or the white balance is off.