Tag Archive: Vegan

Chocolate Rum Truffles

chocolate-rum-truffles-bowl

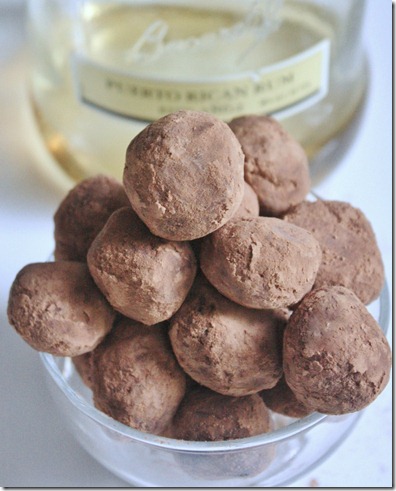
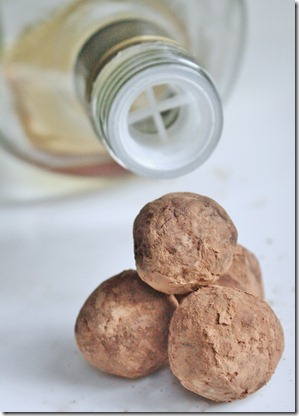
If you’ve been reading for a long time, you know I don’t really like alcohol, unless it’s in dessert and then I go crazy for it. If I wrote It’s a Wonderful Life, the line would have been, “every time chocolate is mixed with liquor, an angel gets its wings.” I think these are that good. The texture is soft and almost chewy, like a chocolate candy with a sweet, seductive twist.

chocolate-rum-truffles

Embarrassingly enough I’m a lightweight and one of these is enough to make me feel way too good. When I was tempering and tasting the chocolate I wasn’t sure there was enough rum in it, but once the truffles were cooled and I took a bite—wow! They pack a punch of flavor.

No rum? No problem. Improvise the recipe with a different liquor. I can’t wait to try these with Kahlua.

Chocolate Rum Truffles

Prep Time: 30 minutes

Cook Time:

Ingredients(makes about 20 truffles):

  • 1 cup plus 2 Tablespoons semi-sweet chocolate chips OR 9.7oz semi-sweet baking chocolate cut into chunks
  • 2oz Bacardi rum
  • 3 Tablespoons cocoa powder plus more for dusting

chocolate-rum-truffles-stack

Method:

  1. Melt the chocolate over a double boiler. Once it’s in a liquid state, slowly incorporate the rum until it’s all combined and evenly mixed.
  2. Cool the chocolate and rum in a refrigerator for 10 minutes until it’s hardened but still sticks to itself.
  3. Sift in the cocoa powder while mixing the chocolate until all the cocoa powder has been used.
  4. Tear off pieces of chocolate and roll it into 1-inch balls.
  5. Fill a shallow bowl with cocoa powder and roll each ball in the powder until covered all around.
  6. Store at room temperature in an air-tight container.

After making these we’re almost out of rum and chocolate chips. That’s what I call an emergency.

Chocolate Hazelnut Balls

Chocolate-hazelnut-balls

Something exciting happened last week: I went viral for the first time. No, that doesn’t mean I need to be put on antibiotics. My post on Raw/Vegan Chocolate Hazelnut Cake got picked up on StumbleUpon and things got a little crazy. In 3 days it obliterated almost every page view record my tiny little site had. Last I checked it had 26,000 views; I guess people like cake? I posted How To Use StumbleUpon To Promote Blog Content last February and had a little success since then but this was ridiculous.
chocolate-hazelnut-balls-serving

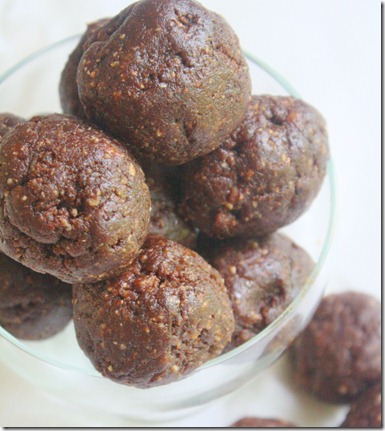
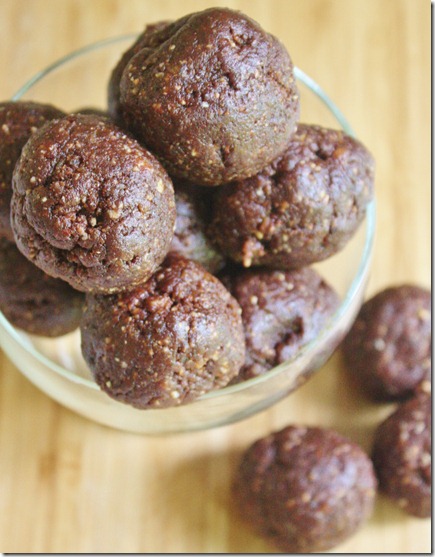
Because of that, I’ve had this cake on my mind pretty much non-stop since. Even though it’s raw and vegan, cake isn’t really a “health food”. I wanted something like it that I could eat any time, any place. These chewy little balls are just that. They’re flavorful, portable, and incredibly delicious. It’s almost like having the real dessert but much more socially acceptable for a mid-afternoon snack… or at 10am when you still haven’t put on clothes for the day.

Make sure when you’re forming the balls that there are no date pits in the final product. Even though store-bought dates are usually pit-free, it’s very likely that one or two slipped by, and those are not nice to bite in to.

Chocolate Hazelnut Balls

Prep Time: 10 minutes

Cook Time: 0 minutes

Ingredients(makes 14 balls):

  • 1 1/4 cup hazelnuts, raw
  • 2 cups pitted dates
  • 3 Tablespoons cocoa powder
  • ~2 Tablespoons water

chocolate-hazelnut-balls-bowl

Method:

  1. Blend the hazelnuts into a fine powder in a food processor
  2. Add in the dates and continue blending until the dates have broken up into smaller pieces
  3. Add the cocoa powder and continue blending
  4. Slowly add water into the processor while blending until the flour starts sticking to itself and becoming a dough. Stop adding water and turn off the food processor as soon as the ingredients hold together and form a giant ball.
  5. Store at room temperature in an airtight container.

These make a perfectly healthy snack…

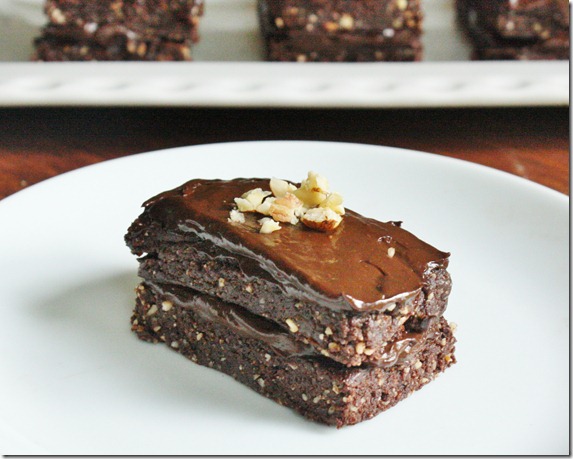
chocolate-hazelnut-balls-cake

…until you remember you still have leftover frosting and decide to make 2 balls into a cake. Still pretty healthy and incredibly delicious.


Sweet Freedom Bakery Review

August 22nd 152

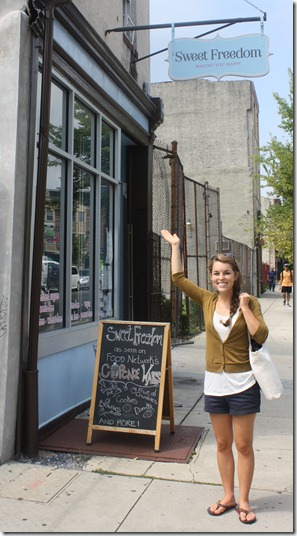
One place that kept coming up when I mentioned that I was going to Philadelphia was Sweet Freedom Bakery. So many readers, bloggers, and tweeters recommended this place that I couldn’t not go. I’m happy with anywhere that sells gluten-free treats, but Sweet Freedom goes above and beyond selling only gluten-free, soy-free, corn-free, and vegan desserts. I visited Sunday morning before lunch with Cynthia and Katie.

August 22nd 155

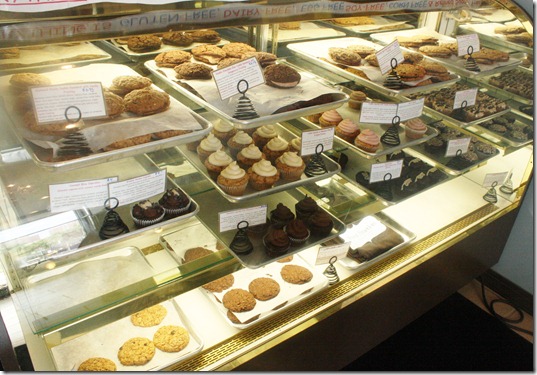
The selection was—in a word—overwhelming. There were cupcakes, cookies, hand pies, brownies, and bars. It took me 10 minutes just to settle on something.

August 22nd 162

I ended up getting a brownie sundae cupcake(top left) for myself and a Samoas(top right) and chocolate cupcake with chocolate frosting(bottom) for Madeline and Boots.

August 22nd 156

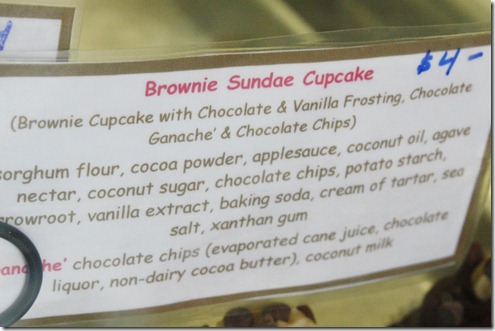
I love that they showed you the ingredients for all of the items. Not only does it help people with allergies know what they can have and can’t, but it helps nosy bakers like me know the secret ingredients of their baking.

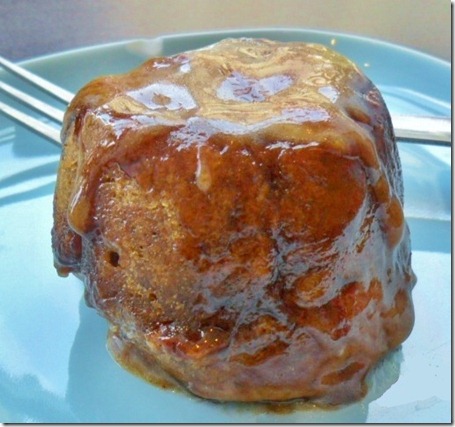
The brownie cupcake was good, but nothing outstanding. The frosting was delicious but then again when isn’t frosting delicious? The Samoas cupcake was seriously impressive, with a coconut cream filling that looked incredible. But the real stand out was the cinnamon bun. 

SAM_7015

Photo from Katie

I wasn’t planning on eating one of these, but Katie bought one and insisted that we share. Twist my arm why don’t ya? There was some serious moaning from our side of the table as we ate this. It wasn’t the best gluten-free, vegan cinnamon bun I’ve ever had; it was the best cinnamon bun I’ve ever had—period. It was so light and fluffy you could tell it had to be fresh and homemade. The glaze was sticky and sweet but didn’t overpower the spiciness of the cinnamon. Every part of it was pure bliss.

August 22nd 163

I can’t lie: I’m as excited as going back to Philadelphia in November for the cinnamon bun as I am the marathon. Carbs have never tasted so good.

Raw Pad Thai

raw-pad-thai

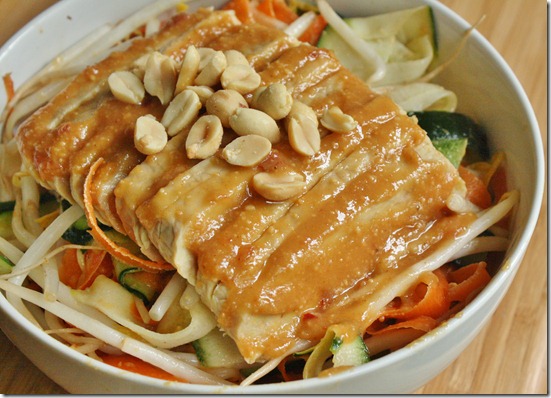
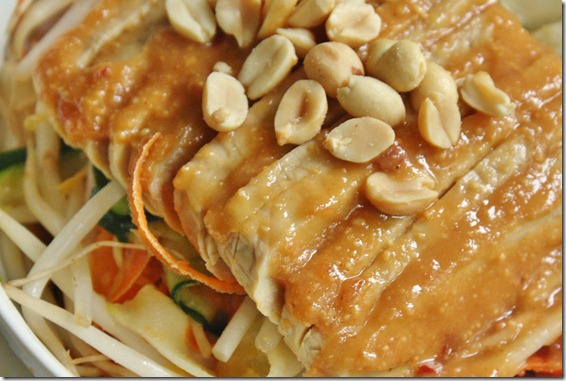
When I shared A Day In The Life Of A Restaurant Intern, a reader wanted to know more about the raw pad Thai bowl I had for lunch. This is something I’ve been making all Summer long and honestly I never blogged about it because I didn’t think it was that exciting. Healthy? Yes. Delicious? No doubt. An excuse to eat peanut butter for every meal? Totally. But not really exciting.

rw-pad-thai-miso

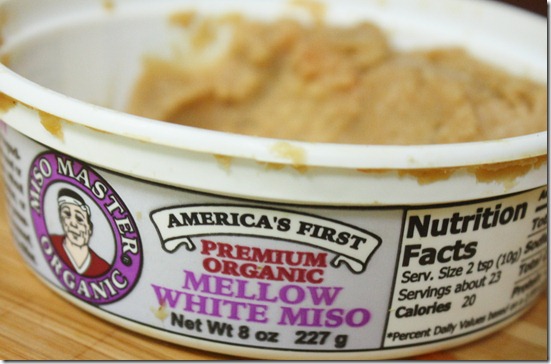
I never really make this the same way, sometimes adding sesame oil, sometimes using chickpeas instead of tempeh—you get the idea. One ingredient I highly recommend investing in is miso paste. I never really knew much about it before a few months ago and certainly never would buy it at the store. Now I wouldn’t keep a refrigerator without it. The salty/savory flavor is truly unique and adds a special depth of flavor that’s crosses cultures. I’ve used this in place of garlic, onions and salt in greens and beans and it tastes just as good. It’s definitely worth the investment.

Raw Pad Thai

Ingredients(For one serving):

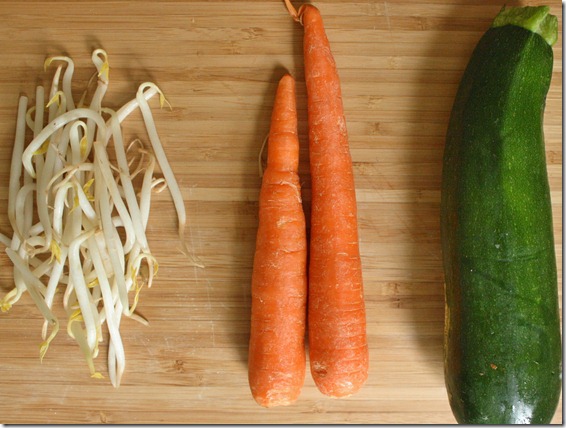
  • 1 zucchini
  • 2 carrots
  • 1/2 cup bean sprouts
  • 1/2 block tempeh
  • peanuts to garnish

For the sauce:

  • 2 Tablespoons peanut butter
  • 2 teaspoons maple syrup
  • 1 Tablespoon rice vinegar
  • 1/2 Tablespoon white miso paste
  • 1 teaspoon siracha sauce(optional)

raw-pad-thai-ingredients

Method:

  1. Using a vegetable peeler, peel the zucchini and carrots into long, thin “noodles” using as much of the vegetables as possible.
  2. Make the sauce by mixing together the peanut butter, maple syrup, vinegar, miso, and siracha if using until smooth. If necessary add a few teaspoons of water until the sauce is runny yet thick.
  3. Toss the sauce with the vegetable “noodles” and bean sprouts in a large bowl reserving about a tablespoon of sauce.
  4. Plate the noodles in a bowl.
  5. Slice the tempeh on a bias and plate it on top of the sauced noodles.
  6. Spread the reserved sauce on top of the tempeh. Garnish with peanuts if desired.

raw-pad-thai-tempeh

Like I said, you can play around with the ingredients to suit what’s in your pantry. I could eat tempeh and peanut butter all day long so this is how I like it best. 

Hazelnut Chocolate Cake {Raw/Vegan}

hazelnut-chocolate-cake

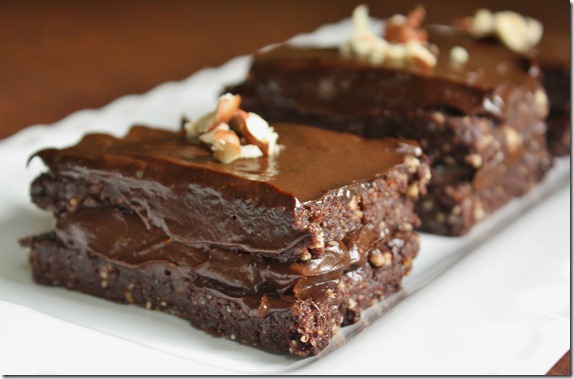
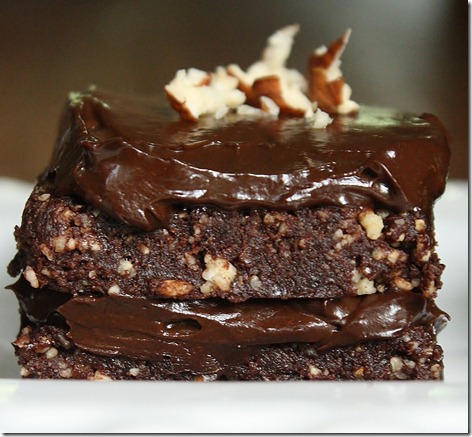
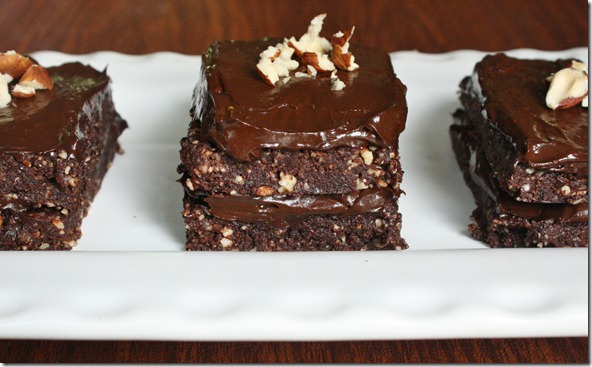
Saturday night we had a special dinner with family friends. For one weekend all 8 of us were around before starting vacations and school again; one of is even spending a year studying at Oxford(no, it’s not me; yes, I’m jealous). That called for cake. I had been wanting to make this recipe for a while and wanted to wait until just the right celebration. Everyone loved it, although when I told them the frosting involved avocado you would have thought I told them my own hair was in it. They started eating it again 2 seconds later when they remembered how good it was and decided you couldn’t taste the avocado.

hazelnut-chocolate-cake-front

I actually made this cake for Father’s Day last year and featured it as a guest post on Gena’s blog. Since then I’d completely forgotten about it and had to go look it up to remember how to make it. Now that I remembered, I kind of wish I could forget again. The ones that we didn’t give away didn’t last long in this house. It’s hard to say no to a piece of cake, and even harder when you can tell yourself it’s “healthy” because it has fruits and nuts in it.

Hazelnut Chocolate Cake {Raw/Vegan}

Prep time: 20 minutes

Cook time: 0 minutes

Ingredients(makes 5 2×3-inch frosted cakes):

  • 2 cups hazelnuts
  • 1 cup pitted dates
  • 3/4 cup cocoa powder, divided
  • 1/2 cup + 2 tablespoons maple syrup, divided
  • 1 medium avocado
  • Crushed hazelnuts for garnish

hazelnut-chocolate-cake-plated

Method:

  1. Pulse the hazelnuts in a food processor until finely ground into a flour
  2. Add in the dates, 1/2 cup cocoa powder, and 1/4 cup maple syrup and process until it forms into a thick dough that sticks together.
  3. Lay the dough out between two sheets of parchment paper and roll to about 3/4-inch thickness.
  4. With a sharp knife, cut the dough into either 8 or 10 equal sized rectangles. If there’s excess dough you can form it into a ball, roll it out, and cut again.
  5. Make the frosting by blending together the remaining maple syrup, cocoa powder, and the meat from the avocado until it’s uniform in color and texture. Taste it and adjust the sweetness if need be.
  6. Spread about 2 tablespoons of frosting over half of the cakes. Layer with another slice and spread an equal amount of frosting on top of that piece.
  7. Garnish with crushed hazelnuts.

hazelnut-chocolate-cake-slice

These took from start to finish about 20 minutes to make, maybe a little more than that because I was distracted. Even so these are much quicker to make than traditional cake and certainly have all the show-stopping qualities.

Chocolate Raspberry “Ice Cream”

Chocolate-Raspberry-Ice-Cream

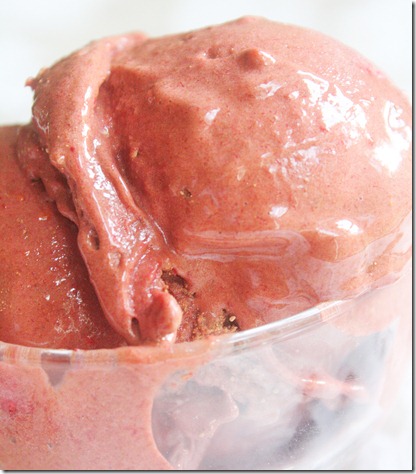
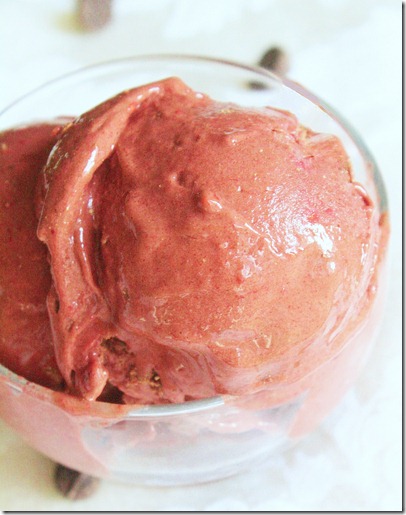
I’ve been going through bananas like crazy lately. Not because I actually like bananas, but because I love the creamy raw “ice cream” they become. I eat this once or twice a day to cut a sweet tooth craving, and this flavor is undoubtedly my new favorite. Cocoa powder and raspberries add the perfect sweet and bitter flavors that make this a true dessert, while the banana keeps it all smooth and creamy so you’d swear you’re eating actually ice cream.

A lot of people ask if these chocolate banana soft serves taste at all like banana. I’ll admit I’m not the most finicky when it comes to banana flavor, but I seriously cannot taste an ounce of banana in this behind the raspberry and chocolate. I’d love for a true banana hater to try it and leave a comment letting others know how it was for them.

Chocolate Raspberry “Ice Cream”

Ingredients:

  • 1 banana, cut into quarters and frozen
  • 1/2 cup raspberries, frozen
  • 2 Tablespoons cocoa powder
  • 1-2 Tablespoons almond milk(optional)

Chocolate-Raspberry-Ice-Cream-Scoop

Method:

  1. In a food processor, blend the bananas and raspberries until creamy. Add the almond milk as necessary if after a while the fruit still clumps together.
  2. Once smooth, add in the cocoa powder and continue blending until entirely mixed.
  3. Scoop and serve immediately.

Chocolate-Raspberry-Ice-Cream-Bowl

Spicy Maple Baked Beans

Spicy-Maple-Baked-Beans

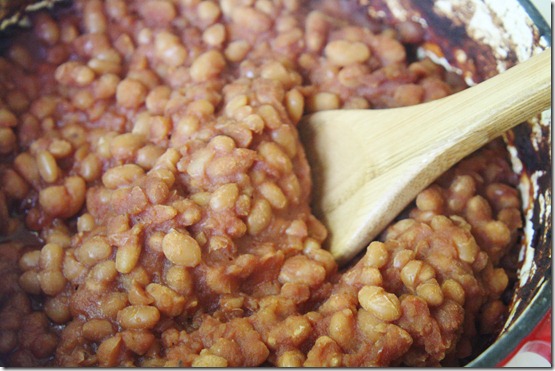
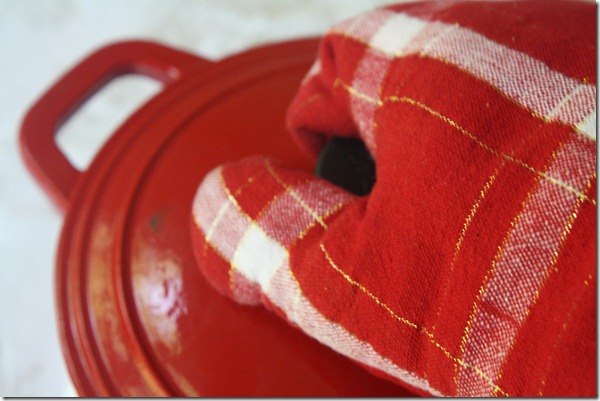
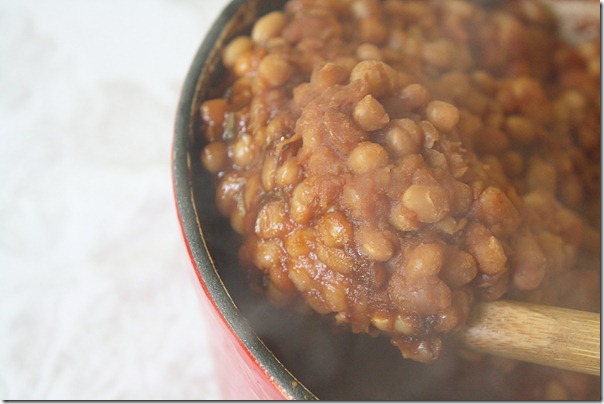
I really love making beans from scratch. It’s kind of like the vegetarian version of roasting a chicken: You take something from inedible to edible making the whole house smell great in the process. I probably hadn’t made this recipe for a good year, which is a shame because I liked it so much the first time. The flavor is incomparable to store-bought brands—truly unique. It’s sweet with a spicy kick that lingers.

There’s also a homemade Worcestershire sauce recipe at the bottom since looking for a bottled vegetarian/gluten-free sauce is sort of like looking for the Holy Grail.

Spicy Maple Baked Beans

Ingredients:

  • 1lb dry white beans
  • 1 yellow onion, peeled and halved
  • 2 bayleaves
  • 1 6oz can of tomato paste
  • 2/3 cup maple syrup
  • 1/3 cup Worcestershire sauce
  • 1/2 cup white vinegar
  • 1 teaspoon salt
  • 3/4 teaspoon ground mustard seed
  • 1/2 tablespoon onion powder
  • 1/2 teaspoon cayenne
  • 3/4 teaspoon paprika

Spicy-Maple-Baked-Beans-Pot

Method:

  1. Soak the beans in water for 8 hours or overnight. Drain the water and put the beans in a large pot with new water, the bayleaves, and the onion.
  2. Boil the beans for 70-80 minutes, scooping off the foam that forms on top of the water. Once done boiling, remove the pot from the stove and drain the beans from the water, also removing the bayleaves.
  3. Combine the beans with the rest of the ingredients in an oven-safe pot or a Crockpot. Bake at 350 degrees for 3 hours or simmer on high for the same period of time until the beans have darkened and most of the moisture has evaporated. If the beans dry out too much, add 1/2 cup of water and continue cooking.
  4. Remove from the oven and serve hot when ready.

Spicy-Maple-Baked-Beans-Stir

Homemade Worcestershire Sauce

Ingredients(Makes about 1/3-1/2 cup):

    • 1/2 cup apple cider vinegar
    • 1/4 cup soy sauce or wheat-free tamari
    • 1 tablespoon cane sugar
    • 1/2 teaspoon ginger
    • 1/2 teaspoon dry mustard
    • 1/2 teaspoon onion powder
    • 1/2 teaspoon garlic powder
    • 1/4 teaspoon cinnamon
    • 1/4 teaspoon pepper

Method:

  1. Combine all of the ingredients in a small pot over the stove.
  2. Keep between a boil and a simmer for 8-10 minutes until reduced to half its original volume.
  3. Use immediately or store in the refrigerator for up to a week.

Grilled Zucchini Boats

Grilled-Zucchini-Boats-Grilling

As excited as I am to move back to Providence in a month, there are a few things I’m going to miss. Things like Trader Joe’s and grilling. Did you know you can get zucchini any size at Trader Joe’s for just 79 cents? Between those, 3.99 watermelon and 19 cent bananas, the crew members must think I’m feeding a small colony of chimpanzees. It’s a good thing I buy the 2.99 Vahlrona chocolate to throw them off.

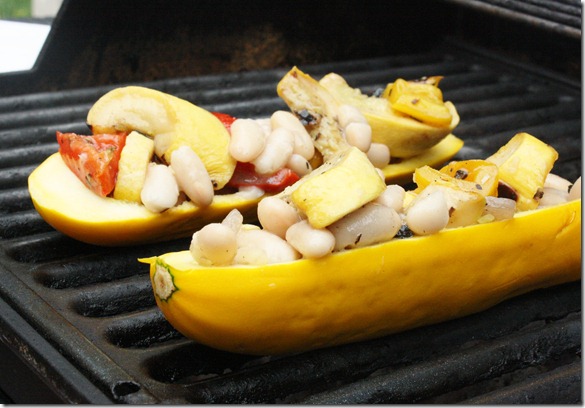
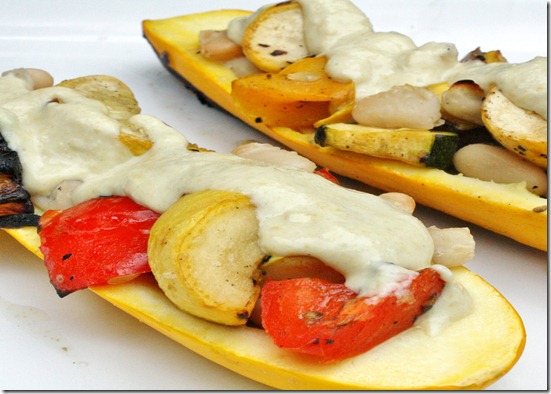
Because I went a little crazy on the zucchini and had the grill at my disposal I decided to make grilled zucchini boats. I’ve never made stuffed zucchini before so I didn’t know what to stuff them with; since we had beans and leftover vegetables on hand I went with that. I also topped mine with a cashew “cheese” sauce that was pretty much just cashews, water, and nutritional yeast. It’d be good with shredded cheese or even a pesto sauce, anything thick and hearty.

Vegetarian Grilled Zucchini Boats

Ingredients:

  • 1 zucchini
  • 1/3 cup grilled or cooked vegetables
  • 1/3 cup beans
  • 1/2 Tablespoon olive oil
  • Salt and pepper to taste
  • Shredded cheese or cheese sauce for topping(optional)

Grilled-Zucchini-Boats-Zucchini

Method:

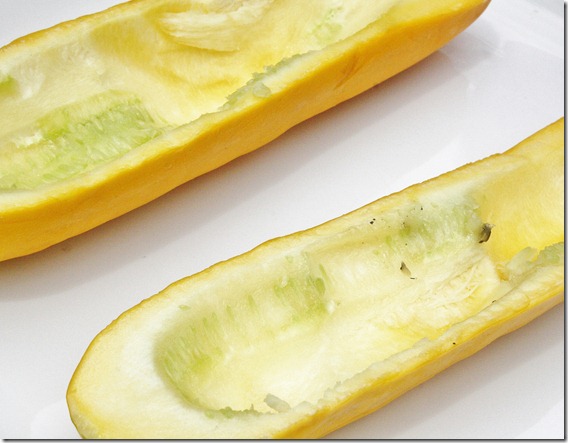
  1. Cut the zucchini lengthwise and scoop out the center.
  2. In a bowl, mix together the vegetables, beans, oil, salt, and pepper. Scoop the mixture into the center of the zucchini.
  3. Grill over high heat for 5 minutes until the bottom has begun to char and the filling is heated.
  4. If using shredded cheese, sprinkle on the top of the filling during the last minute of grilling and close the grill lid to melt it. Serve hot.

Grilled-Zucchini-Boats

Raw Lasagna

July 17th 086

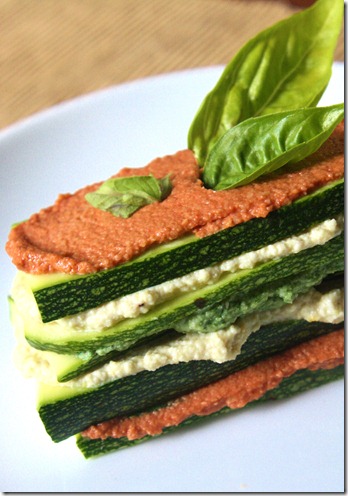
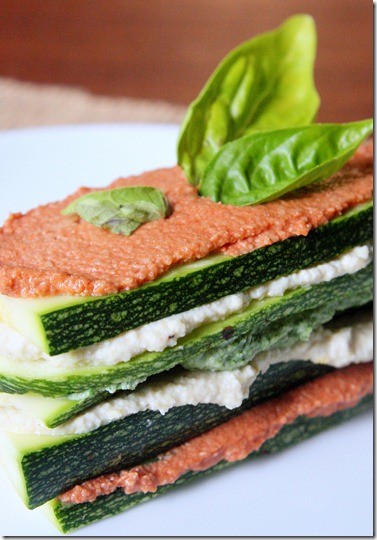
The 2 times I’ve been to Wildflour this Summer, I’ve gotten the same menu item: The raw lasagna. The first time I ate it, I more or less devoured it without paying much attention. The second time I stopped to look how they made it; I was surprised it was just layers of zucchini and different pastes, presumably cashew-based, that all came together to make a rich and complex flavor.

Even once I decided to try and make this at home, I still put it off for a good week; it just seemed like something that would be hard to do. When I actually tried it couldn’t have been easier. It took just 30 minutes to make a big batch of lasagnas. I love Wildflour, but not having to pay $8 for a taste of their lasagna is music to my ears.

Raw Lasagna

Ingredients(Makes 4 servings):

  • 2 cups cashews, soaked for 3-4 hours and drained
  • ~1/3 cup water
  • 1 1/2 Tablespoons nutritional yeast
  • 3 Tablespoons tomato paste
  • 1 Tablespoon extra virgin olive oil, divided
  • Handful of basil leaves
  • Handful of spinach leaves
  • Salt + pepper to taste
  • 2 zucchini

July 17th 125

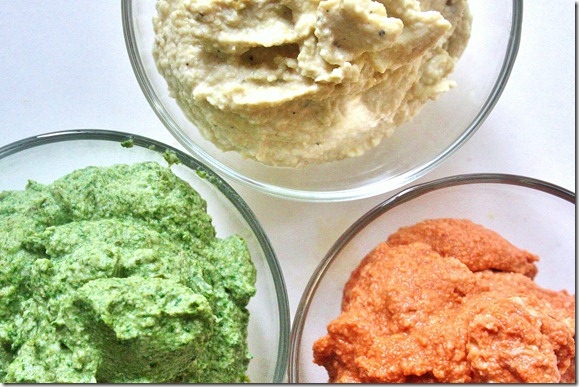
In a food processor, blend the water and the cashews into a soft, smooth paste. Divide the cashew spread into three portions, two 3/4 cup portions and one 1/2 cup portion.

Mix the 1/2 cup portion with the tomato paste, 1/2 a tablespoon of olive oil, and salt to taste.

Mix one of the 3/4 cup portions with the nutritional yeast and salt and pepper to taste.

In the food processor, blend the last portion of cashew spread with the remaining 1/2 tablespoon of oil, basil, spinach, and more salt to taste until the leaves are completely chopped up and the spread is an even green color.

July 17th 092

Cut each zucchini once in half across and then into thin slices lengthwise.

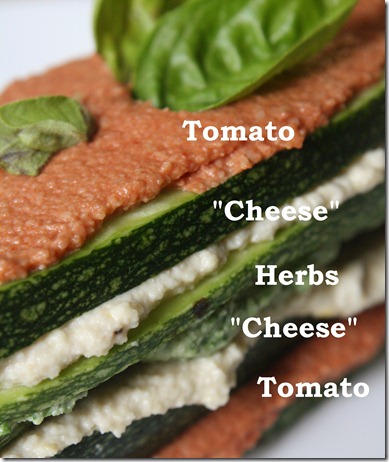
You can layer it however you want; I’m partial to alternating the 3 spreads with each slice. The best bites are the one with a taste of each flavor in them.

July 17th 088

In some ways, this is the least Italian entrée you could make: It involves no cooking; the ingredients aren’t at all what you’d normally use; and it looks entirely different. But as soon as you cut in and take a bite the flavors are spot on, from the rich “cheese” to sweet tomato. Serve it at a dinner party and it’ll definitely catch a few eyes.

Raspberry Tofu Pudding

July 17th 040

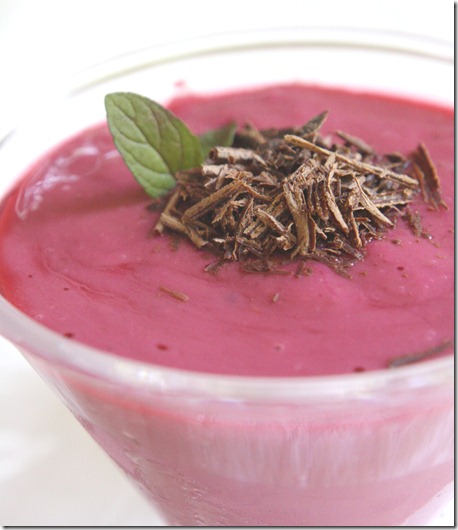
Normally I like fudgy desserts, or just a piece of thick chocolate. But this Summer I haven’t been able to get enough mousse desserts, like this one or this one or this one. So naturally I had to try this recipe when I saw it on the Whole Foods website.

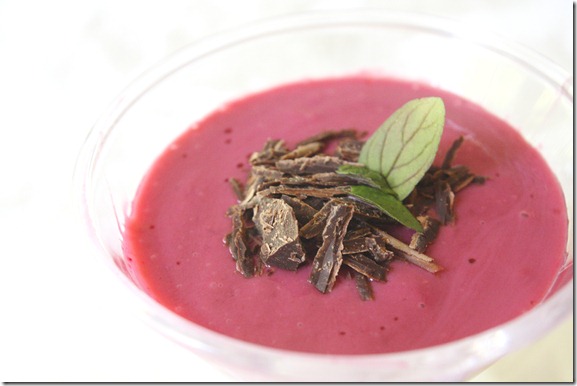
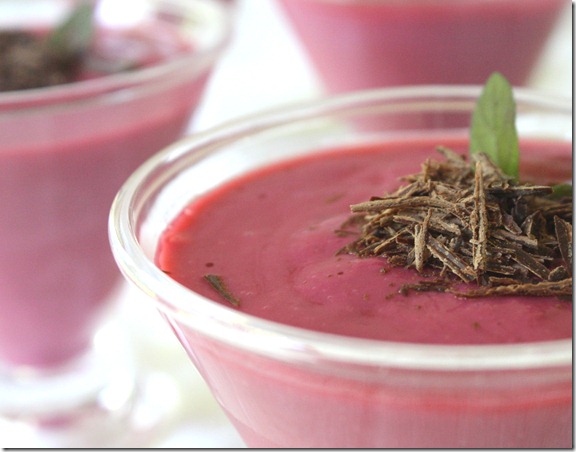
I’ve made chocolate and peanut butter tofu mousse before but never a fruit flavor. This came out really well in flavor, although the texture reminded me more of pudding rather than mousse. It’s thick and slightly dense with a sweet, bright flavor to it, perfect for hot Summer nights when chocolate is too rich(I’ve never experienced this myself but I hear some people do—weird).

Raspberry Tofu Pudding(lightly adapted from this recipe)

Ingredients(Makes 6 servings):

  • 12oz fresh or frozen raspberries
  • 1 16oz block silken tofu
  • 3/4 cup sugar
  • 1/4 cup corn or tapioca starch
  • 1/4 teaspoon salt
  • Zest from half a lemon
  • Chocolate and mint to garnish

Combine the tofu, raspberries, starch, sugar, salt, and zest in a food processor and blend until smooth and homogenous.

July 17th 035

Pour into individual dishes and refrigerate until serving. Garnish with shaved chocolate and/or mint.

July 17th 005

It does not get much better than this.

July 17th 030

If you add in 3/4 cup of cocoa powder, the flavor gets even better. Although—I warn you—the color isn’t as appetizing.