Tag Archive: Gluten-Free

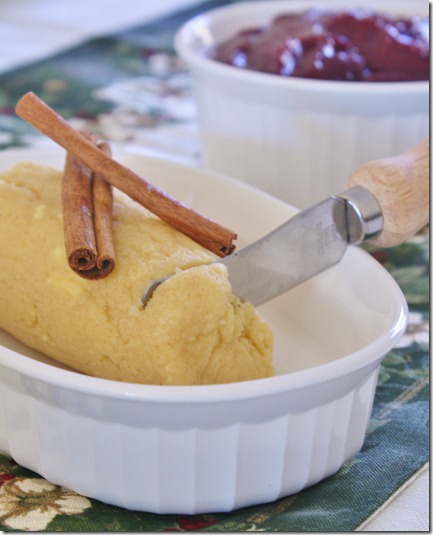
Cinnamon Honey Butter

cinnamon-honey-butter

This week is all about Thanksgiving recipes. In some respects that was poor planning on my part, since Thanksgiving won’t come around again for another 51 weeks; but I hope some of these recipes you’ll be able to work in and enjoy for Christmas or other times during the year, like this one.

This was so simple to make it almost didn’t feel like a recipe at all. And yet despite how easy it is, the flavor is rich and complex. You could easily make this to keep around for breakfast on toast or dinner on squash. It’s kind of addicting; before you know it you’ll be slathering this on anything.

This recipe calls for unsalted butter; I think it’s always best to keep that in stock since you can always add salt later on. If all you have is salted butter, just omit the added salt in the recipe and it will still taste great.

Cinnamon Honey Butter

Prep time: 5 minutes

Cook time: 0 minutes

Ingredients:

  • 1/2 cup unsalted butter, room temperature
  • 6 Tablespoons honey
  • 1/4 + 1/8 teaspoon cinnamon
  • 1/2 teaspoon salt

cinnamon-honey-butter-log

Method:

  1. In a small bowl, work all of the ingredients together until completely mixed together.
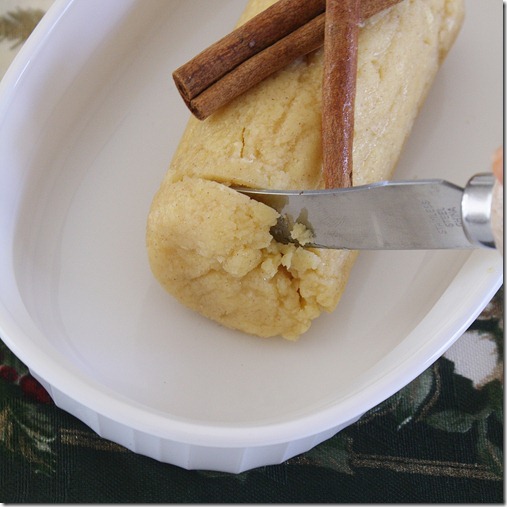
  2. Scoop the butter onto a piece of Saran wrap. Roll the butter into a log and place it in the refrigerator to solidify.
  3. Unwrap the butter and put it on a butter dish to serve.

cinnamon-honey-butter-serving

When I made this, I licked the bowl I mixed it in. It was simultaneously the grossest and best part of my day. The end.

Sweet Freedom, Round 2

August 22nd 151

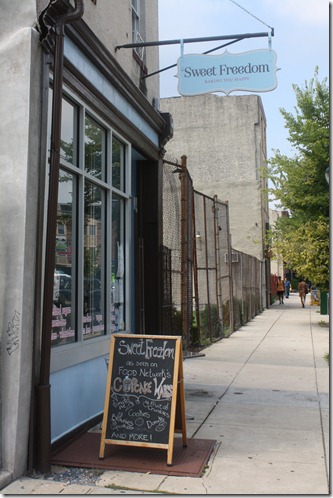
While I was in Philadelphia, I couldn’t help but take a trip to Sweet Freedom Bakery. I came here the last time I was in Philly and fell in love. It’s the only bakery I’ve ever been to where I could order absolutely everything there and not have to ask about the ingredients(which they proudly display), and their baked goods taste just as good as any others.

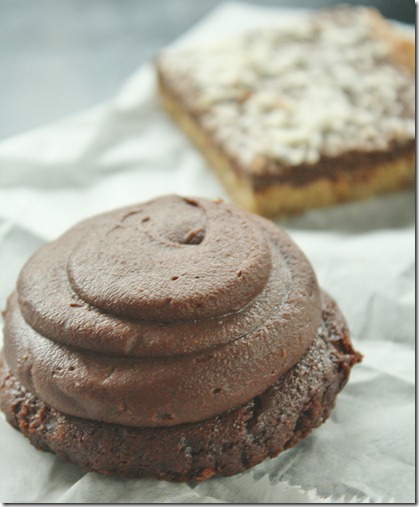
I intended to a couple of their cinnamon buns(which are incredible) but sadly they had none this time around. There menu had changed a lot since the last time I was there and a lot of the pastries were seasonal. The “cupcake tops” caught my eye.

Nov. 21st 023

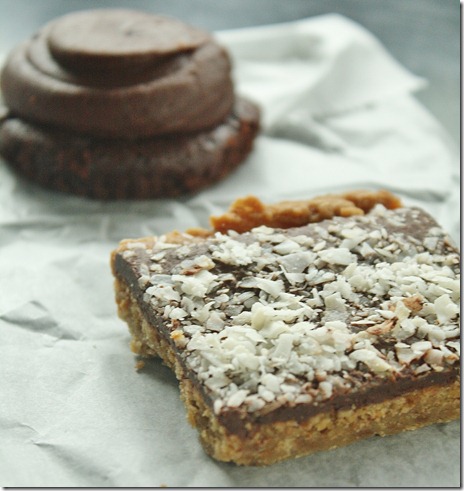
I’m a huge frosting fan. In fact, I’m pretty sure I’ve had layer cakes where I just ate the frosting and filling and left the cake part. Cake just isn’t as delicious. Naturally, anything with a frosting to cake ratio of 2:1 is right up my alley. I tried the chocolate flavor; while the frosting was great, the cake was a little disappointing, which made me glad I didn’t get the whole cupcake. It tasted a little starchy from the gluten-free flours used; I’m guessing the recipe has a bit too much potato or tapioca starch and it overpowers the cocoa.

Nov. 21st 055

The other dessert I tried was their “magic bars”. It looked small and unassuming, but ended up being my favorite of the two. The bottom tasted like a homemade graham cracker-peanut butter crust. On top was a chocolate ganache and flaked coconut. I don’t think I could get tired of chocolate and peanut butter desserts, and this just attested to that. It’s something that also looks easy to make at home so I’ll be trying to replicate their recipe soon.

Obviously I’m a fan of Sweet Freedom Bakery, but I could have told you that before I went. I’d definitely recommend visiting if you’re in the neighborhood.

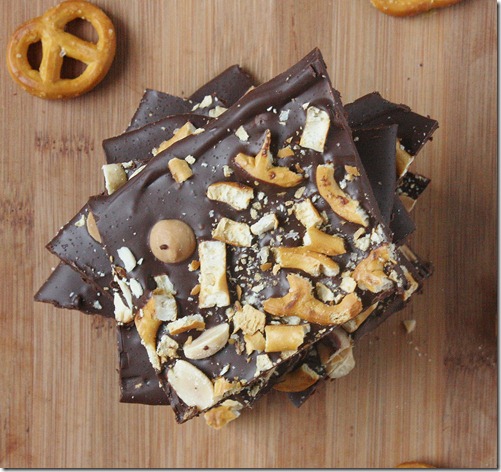
Peanuts And Pretzels Dark Chocolate Bark

Peanuts-And-Pretzels-Dark-Chocolate-Bark

Over this weekend I went to Philadelphia and ran a marathon. How did I do? I don’t actually know yet; I’m writing this 2 days before the actual marathon. You can probably check my Twitter. I hope to have an actual recap up by tomorrow.

But whether I hit my goal or not isn’t important(OK, it’s kind of important); what matters more is that I had fun with some awesome people. Madeline and her boyfriend were kind enough to let me crash at their place the night before the marathon so it only seemed fair that I shower them in chocolate. 

Peanuts-And-Pretzels-Dark-Chocolate-Bark-broken

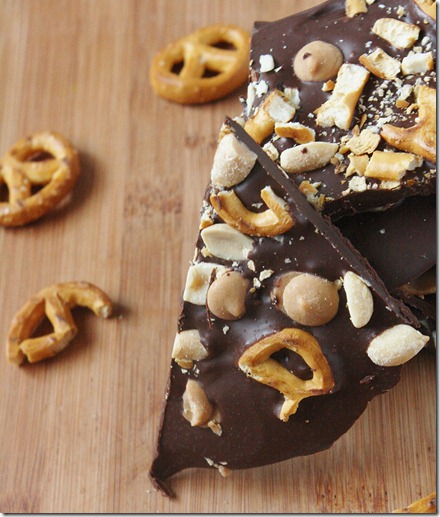
Madeline and Boots love gluten-free pretzels and gluten-free chocolate covered pretzels even though neither are gluten-free, which I find hysterical as someone who’s gluten-free and never even bought pretzels before I decided to make these. I don’t know that they like peanut butter, but I’m just going to assume that that’s the case, too. Because—I mean—who doesn’t like peanut butter?

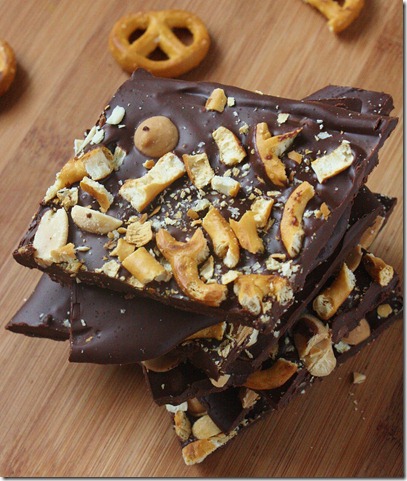
I sneaked a piece before I gave the rest away(because you can’t give something as a present and not taste it first to make sure it’s good, right?) and they were good. I would have added a touch more salt; when I tried the gluten-free pretzels on their own I realized they weren’t as salty as I expected them to be and I think the sweetness is a little overpowering. Otherwise I hope these will be a hit. And if you enjoy things that are sweet and salty I’d highly recommend them, too.

Peanuts And Pretzels Dark Chocolate Bark

Prep time: 10 minutes

Cook time: 0 minutes(allow 20 minutes for cooling)

Ingredients:

  • 12 ounces semi-sweet chocolate OR 1 3/4 cups semi-sweet chocolate chips
  • 1/3 cup crushed pretzels
  • 1/4 cup salted peanuts
  • 1/4 cup peanut butter chips

Peanuts-And-Pretzels-Dark-Chocolate-Bark-layered

Method:

  1. In the microwave or over a double boiler, melt the chocolate until it’s smooth and liquid.

  2. Spread the chocolate out on a piece of parchment paper in a 1/2-inch thick layer.
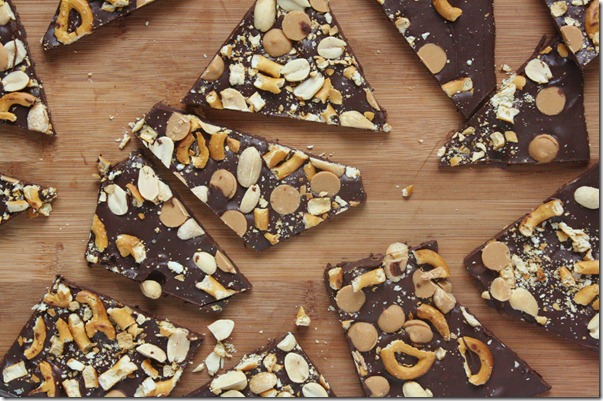
  3. Evenly distribute the peanuts, pretzels, and peanut butter chips over the chocolate. Press the ingredients lightly into the chocolate to make sure that they stick.
  4. Refrigerate the chocolate for 20 minutes until it has hardened.
  5. Break the bark into individual-sized pieces. Store at room temperature for up to 2 weeks.

Peanuts-And-Pretzels-Dark-Chocolate-Bark-square

I hope to have a full marathon/weekend recap up tomorrow morning, but if it’s a little late it’s because I’m going from Philadelphia to Boston to Providence and then back to Massachusetts to cook and photograph and eat Thanksgiving dinner. Basically it’s going to be a bust week and I can’t wait for all of it.

Curry Roasted Chickpeas

curry-roasted-chickpeas

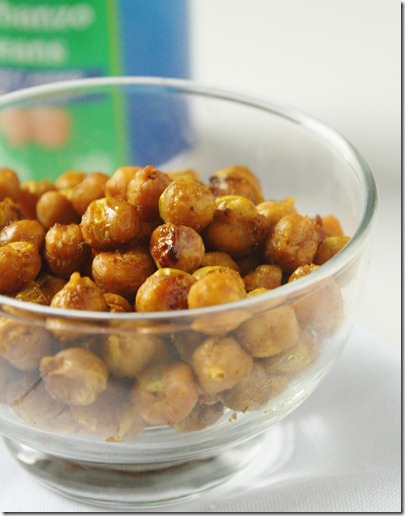
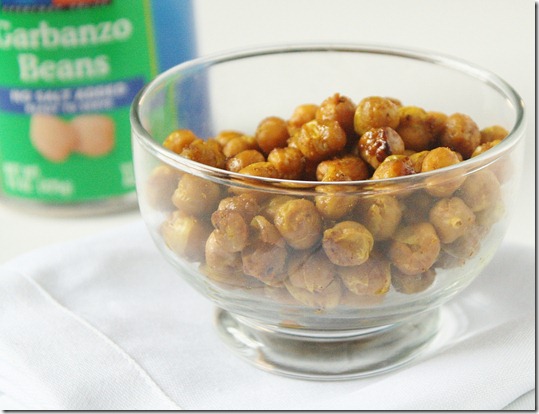
This is undoubtedly one of my favorite recipes of recent. After all it has maple syrup and cinnamon—what’s not to love? And I loved the way the chickpeas tasted after they had been roasted, which made me want to try more variations.

curry-roasted-chickpeas-bowl

Rather than go the sweet route(since I could eat sweets all day), I wanted a savory recipe that would be just as delicious but slightly less addicting. I love the combination of maple syrup and curry in this squash recipe so it seemed like a great way to start. The maple syrup doesn’t actually make these all that sweet; rather, it intensifies the spiciness of the curry and balances its saltiness for an intense flavor combination.

Different curry spice blends have different ingredients. If you’re opposed to spiciness, look for a mild-flavored blend. Additionally, if yours is salt-free, add 1/2 teaspoon salt to the recipe.
Curry Roasted Chickpeas

Prep time: 5 minutes

Cook time: 50 minutes

Ingredients:

  • 1 15-ounce can chickpeas, drained
  • 1 Tablespoon maple syrup
  • 2 teaspoons olive oil
  • 3/4 teaspoon Indian curry spice blend

curry-roasted-chickpeas-result

Method:

  1. Preheat your oven to 375 degrees.
  2. Toss all of the ingredients together in a large bowl.
  3. Lay out the chickpeas in a single layer on a baking tray and roast for 50 minutes or until nutty and crispy, shaking the pan halfway through.
  4. Serve hot or at room temperature. Keep leftovers in the refrigerator.

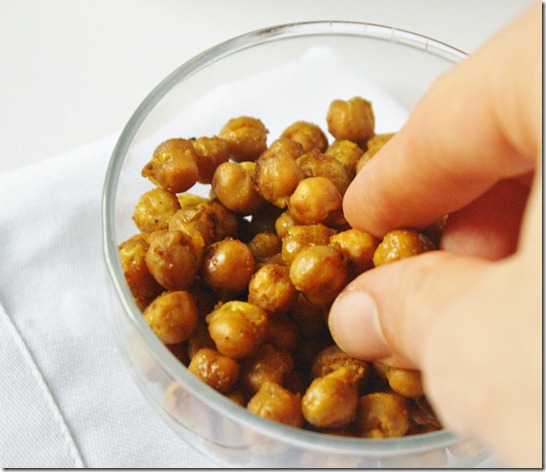
curry-roasted-chickpeas-snack

You can eat these on a salad or as a side dish or just on their own as a savory snack. Roasting the chickpeas makes them crispy, crunchy, and addicting.

Graham Cracker Peanut Butter Bars With Dark Chocolate Ganache

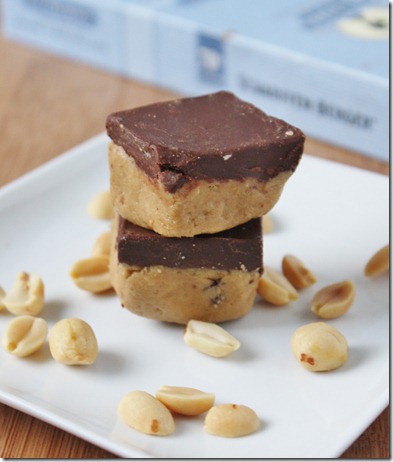
Graham-Cracker-Peanut-Butter-Bars-With-Dark-Chocolate-Ganache

I’m sorry that the name for this recipe is such a mouthful that you’ll probably finish half the batch before you say it. More accurately I’d call these “White Chocolate Peanut Butter Graham Cracker Bars With Dark Chocolate Ganache” but with a name like that you’d have to come up for air at some point.

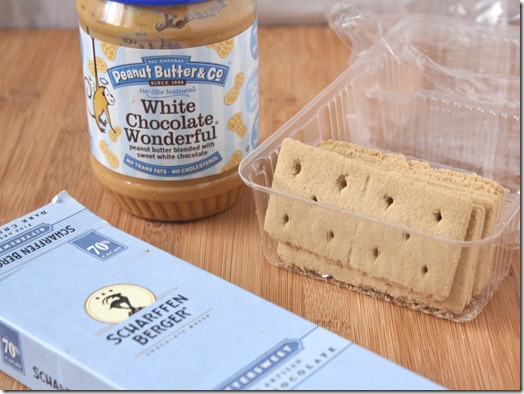
Graham-Cracker-Peanut-Butter-Bars-With-Dark-Chocolate-Ganache-ingredients

This recipe is made with a few of my favorite things. PB&Co.’s White Chocolate Wonderful is one of the best vegan “white chocolate” anything I’ve ever had. It actually tastes like white chocolate without any dairy. For the ganache, I used Scharffen Berger’s 70% baking chocolate, which is delicious and smooth to eat both on its own and in recipes. You can taste the quality in it and—I warn you—it’s addicting stuff.

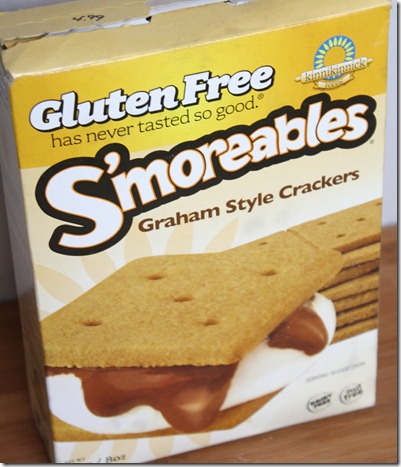
Normally, when I make peanut butter bars I use this recipe which is naturally gluten-free. However I’ve seen a lot of peanut butter bar recipes that use graham crackers as a binding(most recently this one) and I figured if so many people are doing it there must be something to it, right? So I broke out the ol’ gluten-free graham crackers and got cooking. I didn’t expect to like these as much as I do. The earthy spices in the graham crackers pair really well with the sweet and nutty peanut butter and add a pleasantly crunchy texture.

Graham Cracker Peanut Butter Bars With Dark Chocolate Ganache

Prep time: 15 minutes

Cook time: 0 minutes

Ingredients(Makes 18 1-inch squares):

*You can use any peanut butter so long as it’s the no-stir kind. If you want the white chocolate flavor but don’t have White Chocolate Wonderful, use 1/2 cup of natural peanut butter mixed with 3 Tablespoons melted white chocolate.
**This is easy to make at home. Simply pulse 9 sheets of graham crackers in a food processor until it makes a smooth flour.

Graham-Cracker-Peanut-Butter-Bars-With-Dark-Chocolate-Ganache-graham-crackers

Method:

  1. Gently melt the butter and 1/2 cup peanut butter either in the microwave or over the stove until it’s smooth and liquid.
  2. Once the ingredients are melted, sift in the powdered sugar and pour in the graham cracker crumbs and mix it together until emulsified.
  3. Grease a 3×8 loaf pan and press the peanut butter mixture into the pan in an even layer.
  4. In the microwave or over the stove, melt together the remaining 2 Tablespoons of peanut butter and chocolate. Once they’re melted, mix them together.
  5. Pour the ganache over the peanut butter layer and refrigerate until hardened(at least 30 minutes).
  6. 10 minutes before serving, remove these from the refrigerator to soften. Once soft, gently cut into 1-inch squares with a sharp knife and serve. Leftovers can be stored in the refrigerator for up to a week.

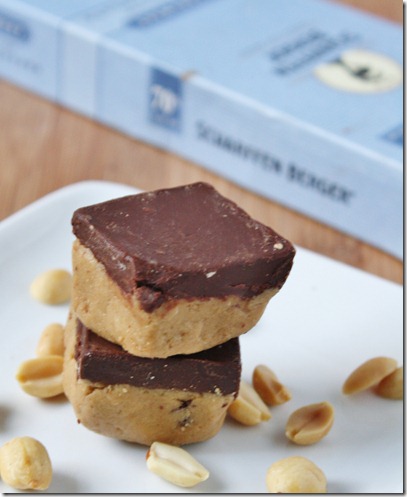
Graham-Cracker-Peanut-Butter-Bars-With-Dark-Chocolate-Ganache-beauty-shot

One of my favorite things about recipes like these is that they’re so easily adaptable for different allergens. I made mine gluten-free simply by using gluten-free graham crackers. To make them vegan you can use a dairy-free margarine in place of the butter and make sure to use vegan graham crackers.

Oven Fries

Oct 14th 131

Even after almost 2 years of eating gluten-free, I’m still learning about places it can be that trip me up. Recently on Ashley’s blog I read that most restaurant fries aren’t gluten-free. Puzzled, I looked it up online and sure enough found a host of explanations why most restaurant french fries aren’t gluten-free, basically summed up by this:

  • Some restaurants preserve the fries in between cutting and cooking by adding a coating including flour to soak up moisture and keep them from sticking together.
  • If fries are fried in the same oil as battered foods like chicken nuggets, the oil can contaminate the fries with gluten.

Luckily in the few instances I can think of that I’ve eaten french fries I don’t remember feeling sick afterwards. But I don’t need to be told twice to avoid something potentially harmful, especially when they’re so easy to make at home.

Oct 14th 115

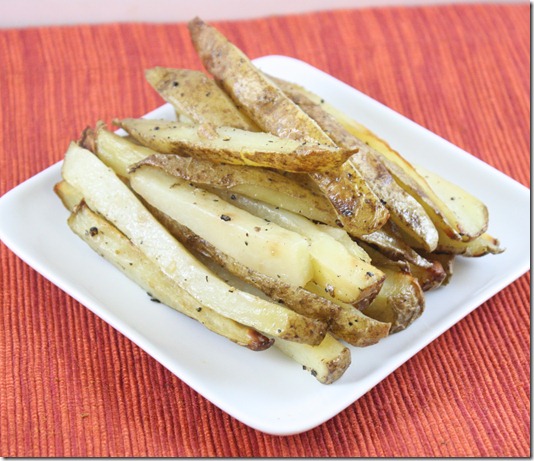
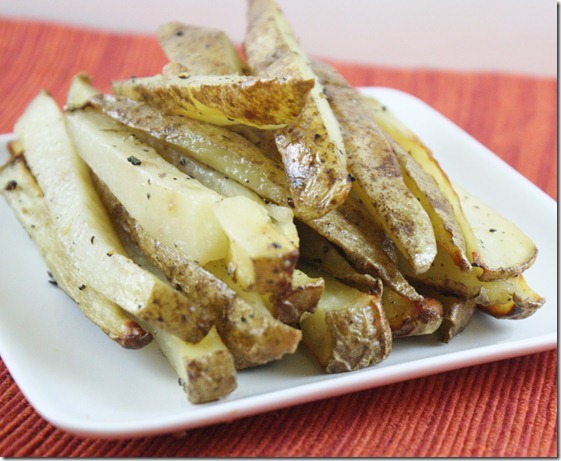
This recipe is very simple, with just what I would call the bare-bone ingredients. You can make more flavorful fries by switching up the seasoning. The vinegar in the recipe helps to give the fries a more authentic flavor without overpowering the seasoning. Definitely don’t leave it out, and don’t worry about the fries having a strong salt and vinegar taste because they most certainly don’t.

Oven Fries

Prep time: 10 minutes

Cook time: 50 minutes

Ingredients(Makes 2 servings):

  • 2 medium-sized russet potatoes
  • 2 Tablespoons oil
  • Splash(about 1/2 Tablespoon) vinegar
  • 1/2 teaspoon salt plus more for finishing
  • 1/4 teaspoon black pepper

Oct 14th 168

Method:

  1. Preheat your oven to 375 degrees.
  2. With a sharp knife, cut the potatoes horizontally and then lengthwise into long, thin fry shapes.
  3. Toss the fries with the oil, vinegar, salt, and pepper until completely coated.
  4. Line the fries out on a baking tray in a single layer. Bake for 50 minutes or until the ends are crisp, flipping occasionally to cook on all sides. Sprinkle with extra salt and serve immediately.

Oct 14th 102

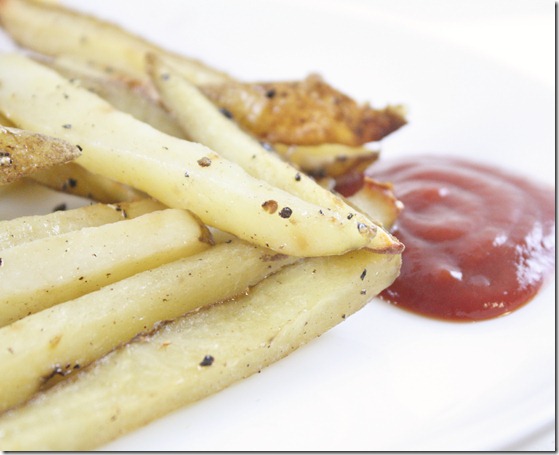
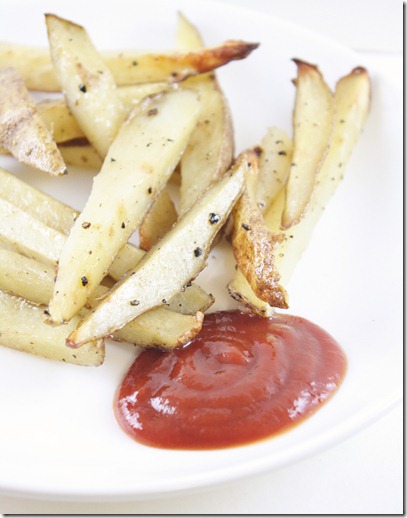
Serve with ketchup, obviously. I like Trader Joe’s ketchup because it’s more tart than most others but since I don’t live near one I use Whole Foods brand organic ketchup. Did you know organic ketchup has up to 8 times the lycopene of non-organic brands? Add that to the list of useless facts you’ll never need.

Peas And Carrots Quinoa

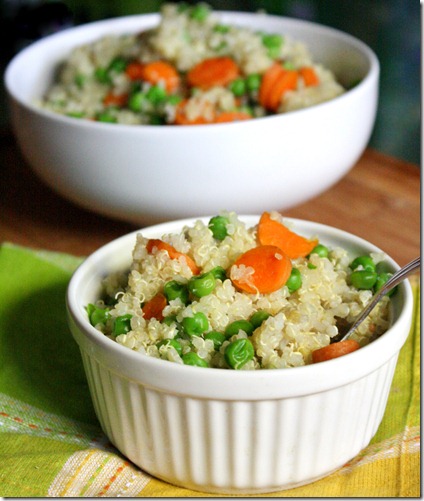
peas-and-carrots-quinoa

I’ve never understood why there are so many pea blogs out there, and then it hit me: I can’t remember ever trying peas before. I’ve had snap peas, but never peas out of their pod—at least not ever since I’ve been old enough to remember. I used to ice my legs with frozen peas I stole from a common room refrigerator, but that doesn’t count I don’t think. I even went to London where I was promised there would be mushy peas and I never saw any. What a disappointment. So when I went to Trader Joe’s and saw a bag of frozen peas for fairly cheap I thought I’d try them out.

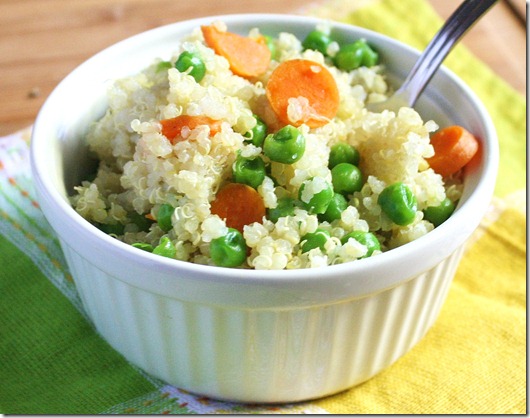
peas-and-carrots-quinoa-serving

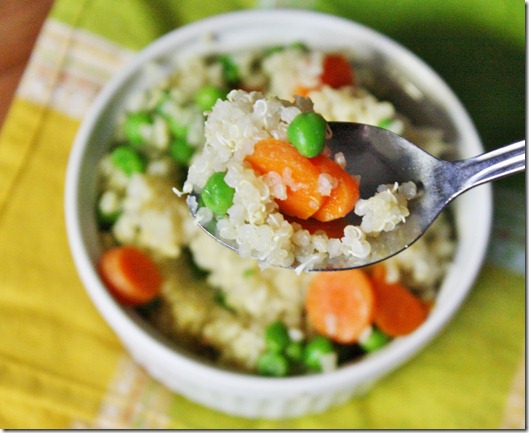
Peas and carrots seem to be the quintessential baby food. I’m not sure why; they’re two vegetables that just about anyone can enjoy. Dressed up with quinoa, they’re perfectly good for adults, too. And these were good. Now I see why all the fuss over peas. I can’t believe I’ve gone so long without trying them! Never again. I find their sweet, earthy pop of flavor addicting. I absolutely couldn’t get enough of this when I made it, and you won’t be able to either.

Peas And Carrots Quinoa

    Prep time: 5 minutes

    Cook time: 15 minutes

    Ingredients(Makes 4 servings):

    • 1 cup uncooked quinoa, washed and drained
    • 1/2 cup cooked peas
    • 1 carrots, sliced thinly
    • 1/2 teaspoon salt
    • 1 Tablespoon honey(optional)

peas-and-carrots-quinoa-over-head

    Method:

  1. Bring the quinoa and 2 cups of water to a boil over the stove.
  2. Add in the carrots and cook until the quinoa has soaked up all of the water.
  3. Add in the peas, salt, and honey. Mix and fluff the quinoa. Move to a serving bowl and serve hot.

peas-and-carrots-quinoa-spoonfull

More peas, please.

Almond Flour Pumpkin Bread

almond-flour-pumpkin-bread

Christopher Columbus discovered America.

I discovered that you can make a moist and delicious pumpkin bread that’s gluten and grain-free. Not to belittle Mr. Columbus’ achievement, but I think that’s pretty damn good.

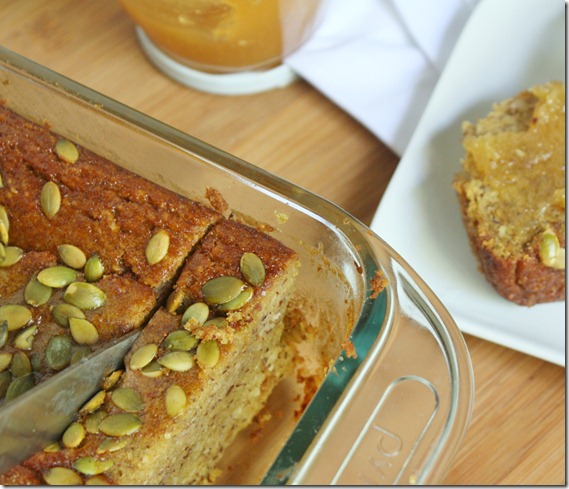
almond-flour-pumpkin-bread-cutting

Maybe I’m just a little too excited because I wasn’t sure this could be done. A few hours before I pulled this loaf out of the oven, it was literally just a bunch of almonds and a whole pumpkin. Not pumpkin puree. Not almond meal. Just the raw ingredients.

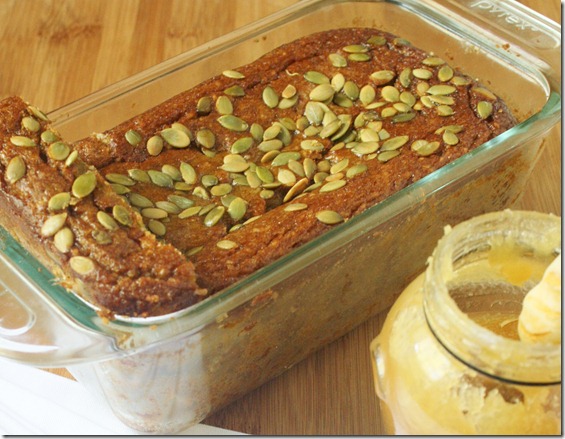
After roasting + pureeing the pumpkin and grinding the almonds, I threw these ingredients together and hoped for the best. Luckily, the best is what I got. This pumpkin bread is sweet, soft, moist(I hate that word but it really is) and spicy. It’s one of the best pumpkin breads I’ve had ever; it just happens to be gluten-free.

Almond Flour Pumpkin Bread

Prep time: 10 minutes

Cook time: 75 minutes

Ingredients(Makes 1 loaf):

  • 2 cups almond flour
  • 3/4 cup brown sugar
  • 3/4 cup pumpkin puree
  • 4 eggs
  • 6 Tablespoons oil
  • 1/4 cup tapioca starch(or corn starch)
  • 1/4 cup water
  • 1/2 teaspoon baking powder
  • 1/2 teaspoon cinnamon
  • 1/4 teaspoon nutmeg
  • 1/4 teaspoon cloves
  • 1/4 teaspoon ginger
  • pepitas to garnish(optional)

almond-flour-pumpkin-bread-smeared

Method:

  1. Preheat your oven to 350 degrees.
  2. Add all of the ingredients except for the pepitas into a large bowl and mix until fully combined. Stir extra well to ensure there aren’t any clumps.
  3. Grease a medium-sized loaf pan and pour the batter in.
  4. Bake for 75 minutes or until the center is cooked through.
  5. Remove and let cool for an hour before removing from the pan.

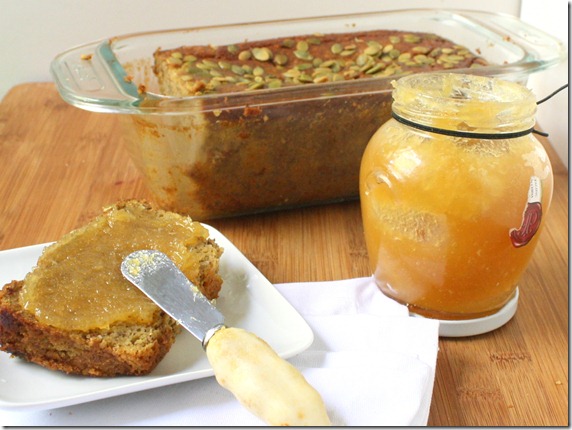
almond-flour-pumpkin-bread-loaf

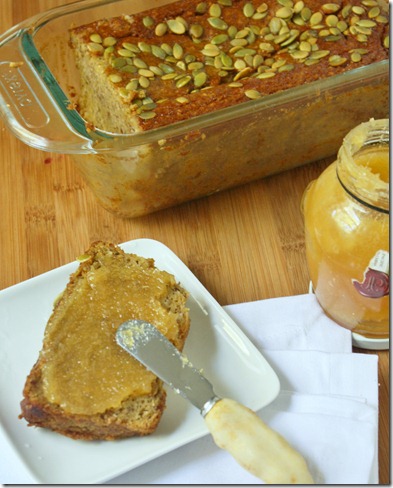
On top I spread a little(or a lottle) ginger jam. Have you seen this stuff? It’s made by Ginger People; it’s basically crystallized ginger made into a jam, and it’s heaven. A little goes a long way, though, which is why that jar has lasted me almost 2 years. This would also be good with pumpkin butter, cream cheese, peanut butter, or plenty of other spreads.

Gluten-Free Banana Pancakes

gluten-free-banana-pancakes

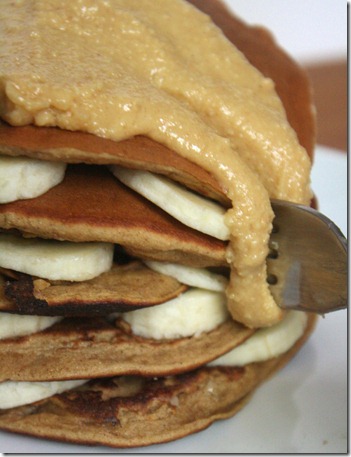
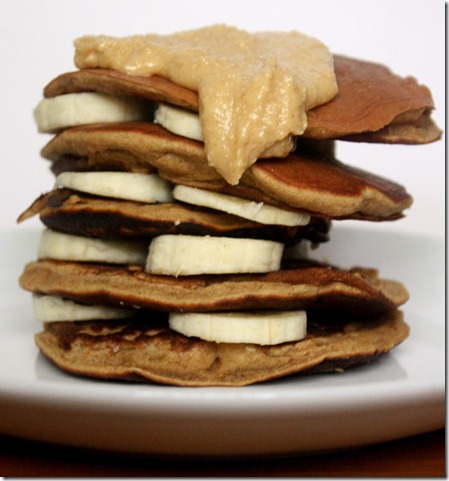
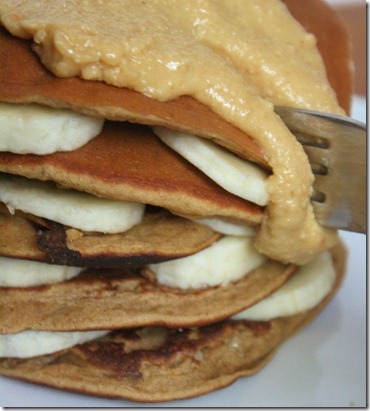
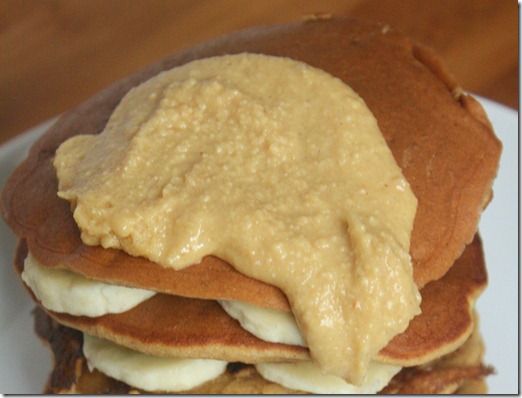
I’ve been waiting all week to share these. They aren’t some of the best gluten-free pancakes I’ve ever had, or vegan or banana. They’re just some of the best pancakes I’ve ever had—period. The banana sweetens these perfectly without added sugar, and the cinnamon adds a nice warm touch. They go especially good with a dollop of melting butter toffee peanut butter.

gluten-free-banana-pancakes-stack

Like my other pancake recipe, these use chickpea flour, which is a great gluten-free alternative to wheat flour. It has high protein and fiber contents making it a healthy breakfast that will fill you up and not have you crashing by 10am. I’m able to find it cheapest in my regular grocery store(Hannafords) in the natural/organic section for less than $4 a bag.

Gluten-Free Banana Pancakes

Prep Time: 5 minutes

Cook Time: 10 minutes

Ingredients(makes 1 serving):

  • 1/3 cup mashed banana(about 3/4 a medium-sized banana)
  • 1/2 cup chickpea flour
  • 1/4 teaspoon cinnamon
  • 1/4 teaspoon baking soda
  • 1/4-1/3 cup water

gluten-free-banana-pancakes-slice

Method:

  1. In a mixing bowl combine the mashed banana, chickpea flour, cinnamon, baking soda and 1/4 cup water and mix.
  2. Add more water if necessary to get the consistency somewhere between thick-runny and runny.
  3. Preheat a non-stick pan over medium heat.
  4. Scoop about 1/4 cup batter into the pan for each pancake. Only cook 1 or 2 at a time to avoid overcrowding.
  5. Cook on one side until the top is bubbly, then flip and cook for about another minute. Repeat until all the batter is used.

gluten-free-banana-pancakes-with-peanut-butter

Serve with maple syrup, peanut butter, bananas, blueberries—whatever, it will all be good.

Tempeh And Broccoli

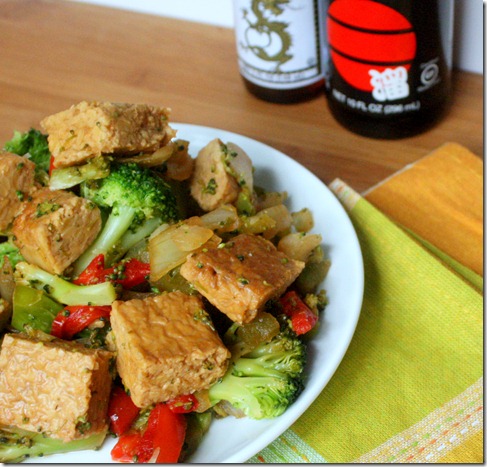
tempeh-and-broccoli

I’ve been getting a lot of questions on tempeh recently. I want to put all my thoughts into a post about it but until then you’ll only get recipes, which is pretty good considering half the time I eat tempeh it’s raw, cold from the fridge. I would not suggest eating it that way if it’s you’re first time; it would be a horrible, bland introduction to something that can be so tasty.

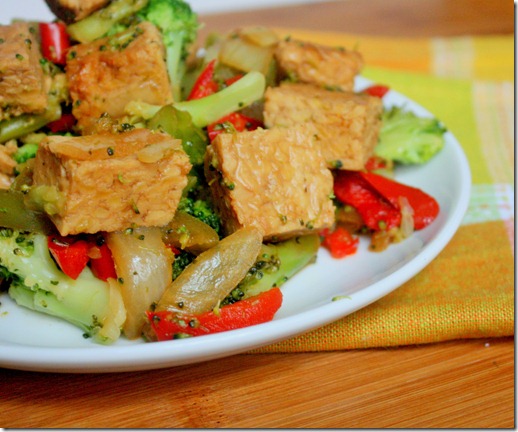
If tofu is soy chicken, tempeh is soy beef. It’s much firmer, earthier and has a chew to it. Naturally it’s a great vegetarian substitute for beef in Asian dishes, like beef and broccoli. Since broccoli was one of the three vegetables I liked growing up(the other being carrots and olives), beef and broccoli was what I always chose on Chinese take-out night. This recipe keeps all those same flavors and textures, but with whole food ingredients anyone can enjoy.

tempeh-and-broccoli-plated

You can substitute rice vinegar in place of apple cider vinegar for a more traditional ingredient list. I like apple cider vinegar here because it replicates the sweet, fruity flavor of plum sauce common in Asian cooking.

Tempeh And Broccoli(inspired by Caitlin)

Prep Time: 5 minutes

Cook Time: 10 minutes

Ingredients(makes 2 servings):

  • 1 block of tempeh, diced
  • 6 Tablespoons apple cider vinegar
  • 1/4 cup plus 1 Tablespoon soy sauce(or wheat-free tamari)
  • 2 Tablespoons agave nectar
  • 1 Tablespoon sesame oil, preferably toasted
  • 1/4 teaspoon chili powder
  • 2 cups broccoli, steamed
  • 1/2 onion, julienned
  • 1 bell pepper, julienned(optional)
  • 1/4 teaspoon garlic powder
  • 1/4 teaspoon salt

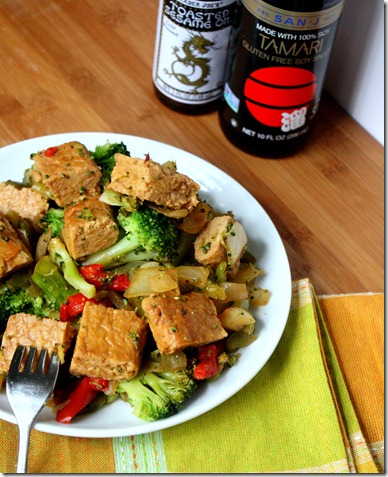
tempeh-and-broccoli-tablescape

  1. Combine the tempeh, apple cider vinegar, soy sauce, sesame oil, agave, and chili powder in a large pan and heat it on a burner set to medium-high.
  2. Cook for about 5 minutes flipping once until the liquid thickens up like a sauce.
  3. Add in the broccoli, onion, pepper, and garlic powder. Continue cooking over medium heat until the moisture has boiled off of the pan and the onions turn soft(about 5 minutes).
  4. Remove from the heat and season with salt. Plate and serve hot.

tempeh-and-broccoli-fork

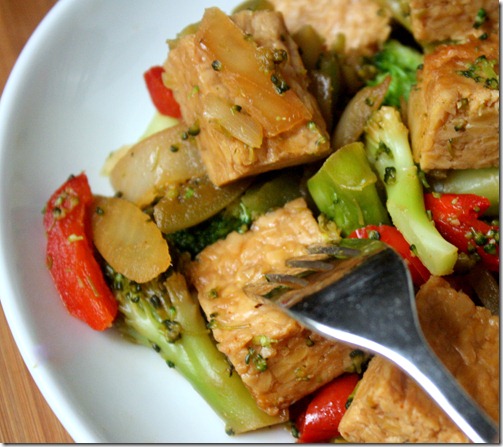
When this is cooked the tempeh should be fork-tender with a sweet, nutty flavor and fall apart in your mouth. It’s a great introduction to a food that could become your best friend.