Tag Archive: Food

Fava Bean Salad

fava-bean-salad

Fava beans are one of my favorite beans; they’re also probably the most underrated. It doesn’t help their reputation that they’re best known from Hannibal Lecter’s line in Silence of the Lambs where he boasts eating them alongside human liver and chianti. I promise this recipe has no liver or chianti. Well, you can add chianti if you’d like. But not liver. Not human at least.

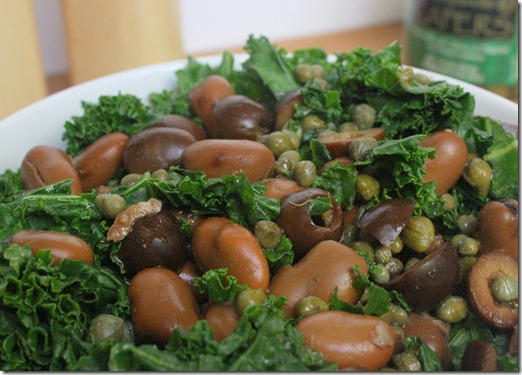
fava-bean-salad-close-up

Fava beans have a much meatier texture and flavor to them than most other beans. Because of this I think they’d be more appealing to meat eaters than a chickpea or cannellini bean. They’re also able to hold their own against the boldness of kale, olives, and capers in a way that most other beans wouldn’t. 

Fava Bean Salad

Prep time: 5 minutes

Cook time: 0 minutes

Ingredients(Makes 2 servings):

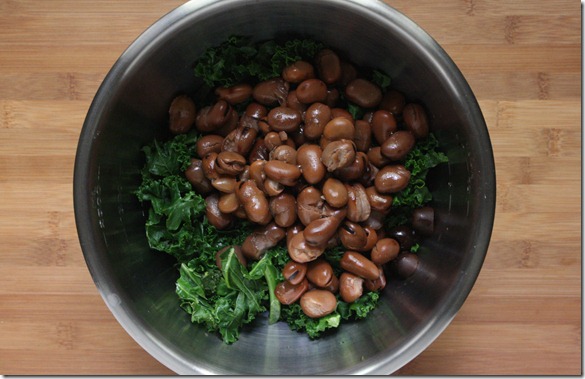
  • 1 can cooked fava beans, drained
  • 1/4 cup sliced black olives
  • 3 Tablespoons capers
  • 2 cups kale, wilted
  • 1 Tablespoon olive oil(optional)

fava-bean-salad-ingredients

Method:

  1. Combine all of the ingredients together in a large bowl.
  2. Toss all of the ingredients together. Salt to taste if necessary. Serve cold or at room temperature.

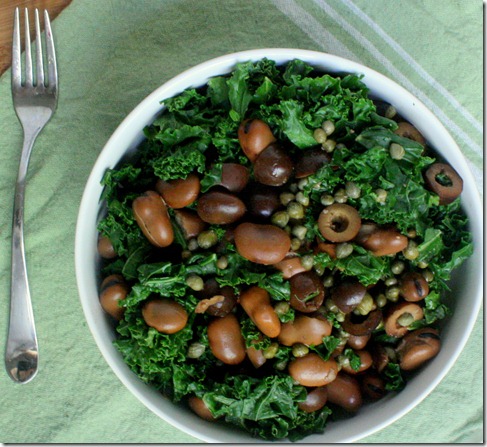
fava-bean-salad-bowl

Since olives and capers are traditionally brined, you don’t need to season the salad with salt or vinegar and still have a flavorful dish with just 4 or 5 ingredients.

How To Prepare Beets + A Beet Salad Recipe

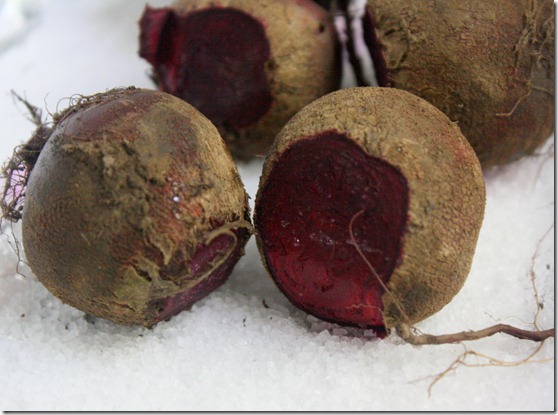
How-To-Prepare-Beets

When I worked in a restaurant over the Summer, I spent more time with beets than I’d ever thought I would. I would work on preparing them for service for hours. I thought I’d never touch them again until I saw them at the farmers’ market last week and decided to grab some to share my knowledge.

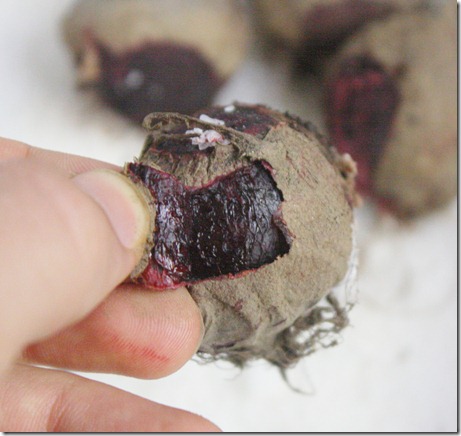
Beets aren’t exactly difficult to prepare, just a bit tedious. First we roasted them in a salt bath. The theory is that the beets absorb the salt, making their sweetness more potent. Whether that worked or not we constantly debated. Once they came out of the oven, we had to peel them, all done by hand while still piping hot. It was not the most fun job to have to do for an hour, and my fingers often looked like I had just committed a murder afterwards.
How-To-Prepare-Beets-Stem

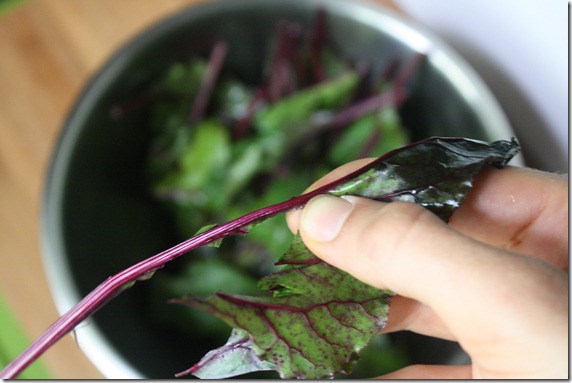
The other part of beet preparation was the greens. I didn’t know beet greens were even edible; I had always thrown mine away thinking they were poisonous like radish leaves. The proper way to peel a beet green is to pinch the leaves and remove the long, thick, purple spine in the middle. Doing this with one bunch of beets isn’t too troubling; doing it with 30 bunches of beets—well, that was anther story.

Roasted Beets

Prep time: 5 minutes

Cook time: 1 hour 10 minutes

Ingredients:

  • 1 bunch of beets, stems removed
  • 1/2 cup salt

How-To-Prepare-Beets-Raw

Method:

  1. Preheat your oven to 400 degrees.
  2. Pour the salt down on a baking tray.
  3. Lay the beets down on top of the salt. Roast for 60-70 minutes until a fork can pass through easily.
  4. Remove the tray from the oven and let cool slightly for 5 minutes or so.
  5. Gently peel the skin off of the beets using your hands. You might want to use a dish towel to protect your hands from the heat and dye of the beets.

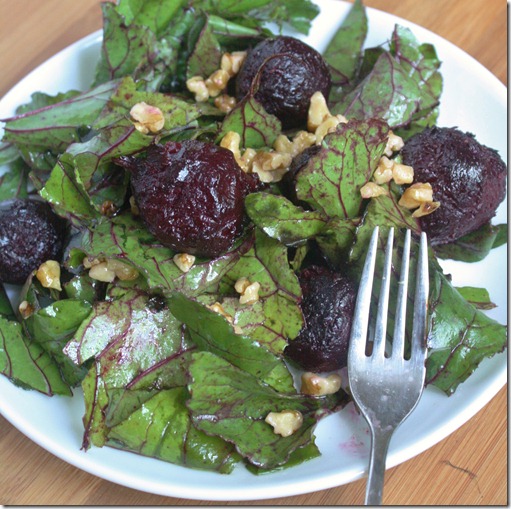
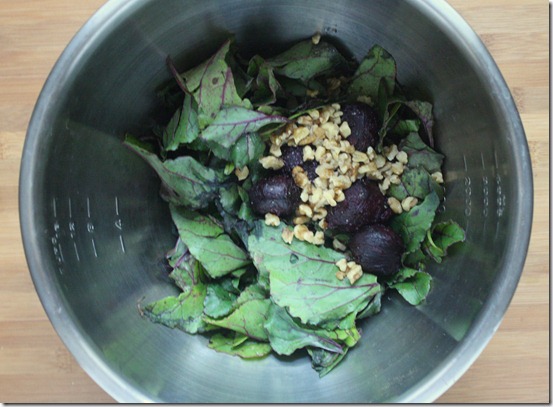
We served our beets in the restaurant in a salad. The salad prepared there had goat cheese and pistachios in it. Since I don’t eat cheese and didn’t have pistachios, I made a modified version with oil and walnuts. The recipe below could work for either variation.

Roasted Beet Salad

Prep time: 5 minutes

Cook time: 0 minutes

Ingredients(for 1 serving):

  • 6 medium-sized roasted beets, cooled to room temperature
  • Greens from one bunch of beets, washed and deveined
  • 1/4 cup crumbled goat cheese(optional)
  • 1/4 teaspoon salt(omit if using goat cheese)
  • 1 Tablespoon olive oil(omit if using goat cheese)
  • 2 Tablespoons crushed walnuts or pistachios
How-To-Prepare-Beets-Ingredients

Method:

  1. Combine all of the ingredients in a large bowl
  2. Toss the ingredients until thoroughly mixed together.
  3. Plate and serve at room temperature.

How-To-Prepare-Beets-Salad

If my restaurant experience taught me anything, it’s that I’m perfectly happy eating canned beets. They’re cheaper, more convenient, and just as nutritious. That being said, preparing your own beets from scratch makes for an impressive dish.

Stovetop Kale And Mushroom Frittata

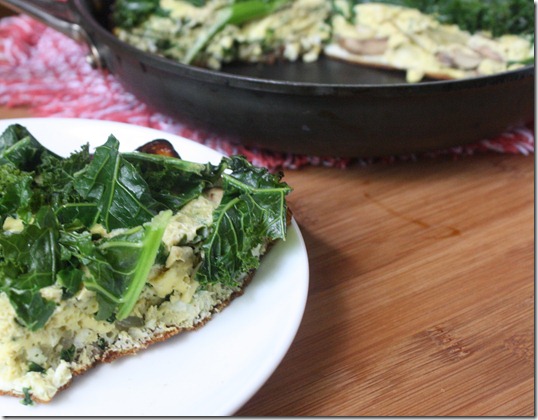
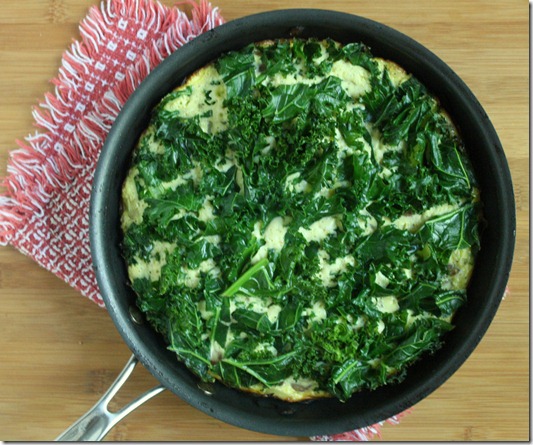
Stovetop-Kale-And-Mushroom-Frittata

This school year I’m doing something different. For the first time, I’m completely off of meal plan. That means I’m making every meal for myself, 3(who am I kidding? 5) times a day.

I did enjoy dropping into the cafeteria and piling up options from the salad bar from time to time, or bumping into friends to have dinner with. But this undoubtedly feels better for me. I feel comfortable grocery shopping and making meals for myself, even if half of those meals are made in a microwave and completely unphotogenic. And it’s still easy to eat meals with friends, just at different places.
Stovetop-Kale-And-Mushroom-Frittata-Overhead

There are times, however, when it’s inconvenient. Tuesday and Thursdays I have class all day. There’s simply no time to cook. Because of that, I usually make meals like this frittata the day before to heat up and serve when I’m in a rush—a much better option than fast food. While a traditional frittata is baked, this one is made entirely on the stovetop; it’s for no reason other than I hate moving things around, and this is easy enough that anyone can do it. . 

Stovetop Kale And Mushroom Frittata

Prep time: 5 minutes

Cook time: 20 minutes

Ingredients(Makes 3 or 4 servings):

  • 12 medium eggs
  • 3/4 cup mushrooms
  • 1/2 an onion, diced
  • 2 Tablespoons oil
  • 1 cup chopped kale
  • Salt to taste

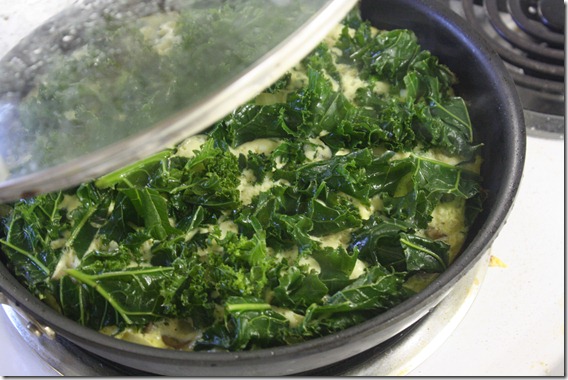
Stovetop-Kale-And-Mushroom-Frittata-Cooking

Method:

  1. In a large bowl, crack and beat the eggs. Set aside.
  2. Heat the oil in a 9 or 10-inch frying pan with a lid over medium heat. Sauté the onions and mushrooms until both are cooked. Remove these from the pan briefly.
  3. Put the pan back on the stove and pour in the beaten eggs. After 10 seconds or so, evenly distribute the mushrooms and onions throughout the batter.
  4. Gently press the kale on top into the raw egg and put the lid on the pan.
  5. Leave the frittata on the stove for 10 or 15 minutes undisturbed as it cooks. It will be ready when the egg in the center of the pan has set.
  6. When cooked, remove the pan from the stove and gently jiggle it to unstick the frittata from the bottom. Move to a plate to cut and serve.

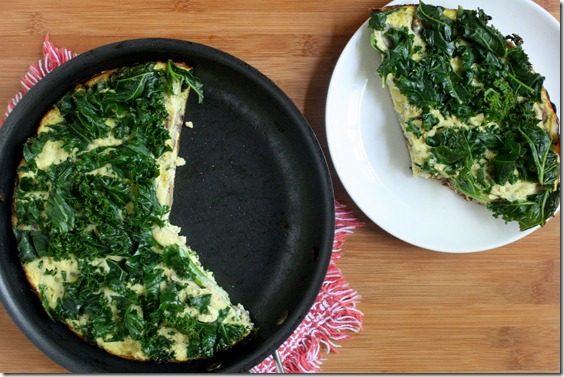
Stovetop-Kale-And-Mushroom-Frittata-Pan

I get about 3 meals out of one pan. Frittatas are great because they work for any meal of the day. I’d happily eat this for all 3.

Orange Tempeh

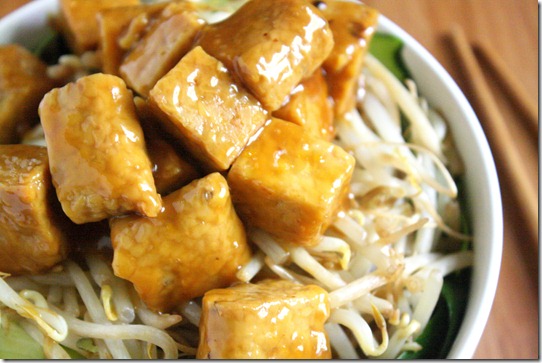
orange-tempeh

When I was in high school, we didn’t really have a traditional cafeteria; instead, we used a college campus’ union where they had tons of food options inside. Between my freshman and sophomore year, Burger King was moved out and in their place came a Panda Express. I wasn’t quite sure how to feel about that, since I loved the Burger King frozen chocolate pies so much. But one taste of Panda Express’ orange chicken and it was love at first bite.

I can’t count how many times I got that order over the next couple of years. Now I sometimes go back and get a little nostalgic just looking at the Panda Express sign. But since gluten and meat are out, Panda Express’ orange chicken is, too. So that inspired me to make my own; if I could make something half as good as their orange chicken without chicken or wheat, I’d be happy. Luckily I think I came upon with something half as good and more.

orange-tempeh-ingredient

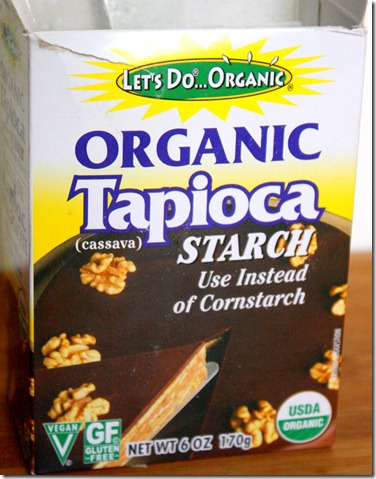
I used tapioca starch for a corn-free dish I was a little worried it wouldn’t be a good replacement, but it worked exactly the same. It’s something I now keep on hand at all times for gluten-free/grain-free baking and cooking.

Orange Tempeh

Prep time: 5 minutes

Cook time: 10 minutes

Ingredients(for 2 servings):

  • 1 block of tempeh, cubed
  • Juice of 1/2 an orange(about 2 Tablespoons)
  • 2 Tablespoons agave, or any sweetener
  • 1 Tablespoon soy sauce(or wheat-free tamari)
  • 1/2 Tablespoon sesame oil
  • 2 teaspoons rice vinegar
  • 1/4 teaspoon salt
  • 1 teaspoon siracha sauce(optional)
  • 1/2 Tablespoon tapioca or corn starch mixed with 2 Tablespoon water

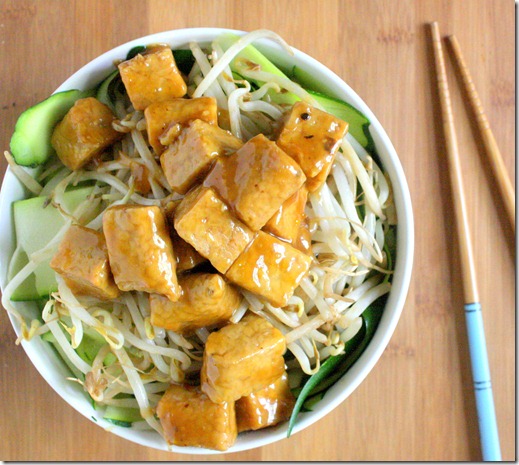
orange-tempeh-bowl

Method

  1. In a small dish, mix together the orange juice, agave, soy sauce, vinegar, salt, sesame oil and siracha if using.
  2. Pour the mixture into a frying pan and heat over a burner set to medium.
  3. When the liquid is hot, add in the tempeh. Brown the tempeh on all sides in the sauce until half the liquid has boiled off, about 5 minutes.
  4. Pour the dissolved starch into the pan and mix it around with the tempeh and sauce to thicken up. If the sauce becomes too thick, add a couple tablespoons of hot water into the pan and mix it in until more of the starch has dissolved and adjust it until it forms a coating over the tempeh.
  5. Remove from the heat. Serve over vegetables or rice.

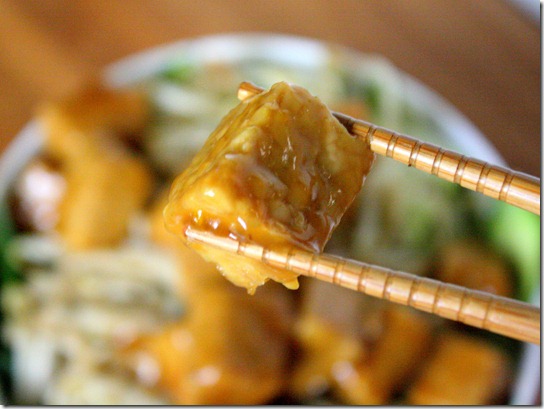
orange-tempeh-cube

This sauce is slightly less sweet and more orange-flavored than Panda Express’, which I like in terms of complexity but not quite fitting for a Chinese take-out craving. You can play with the sweetness and saltiness by adding more sugar or soy sauce and adjust to taste.

Autumn Almond Butter

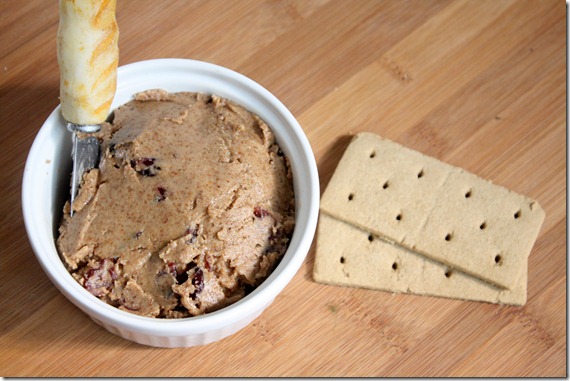
Autumn-almond-butter

I don’t care what the calendar say–Autumn definitely came early this year. The temperature is cold and the leaves are all falling; store shelves are lined with cans of pumpkin pie mix and candy corn; the farmers’ market is back in swing with squashes no one has ever seen before; I’m back to hastily finishing homework and quizzes. Need I say more?

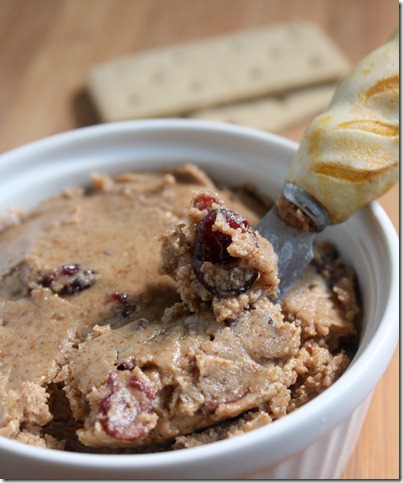
This weekend I was planning on making an almond version of Winnie’s amazing looking walnut butter, but I decided to save it for another time(when I actually have all the ingredients) and went with an Autumn themed one instead. I’m glad I made that decision because the spice from cinnamon and nutmeg paired with sweet cranberries have made cool mornings a little warmer.

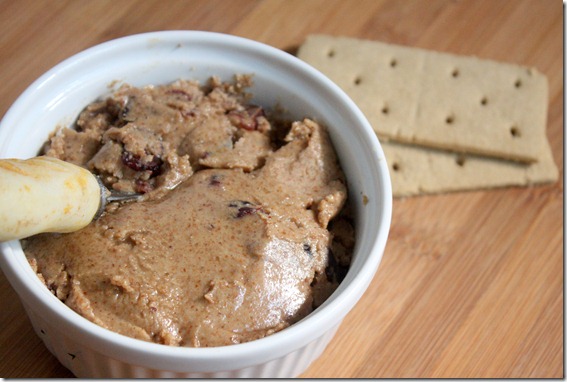
I like my almond and peanut butters on the thicker side, so I didn’t blend this for too long. Taking Ashley’s tip, I’d suggest to keep blending up to 12-15 minutes before adding in the second batch of ingredients for a drippier butter.

Autumn Almond Butter

Prep time: 15 minutes

Cook time: 0 minutes

Ingredients(makes about 20oz):

  • 1lb almonds, raw or roasted, blanched or unblanched
  • 1 1/2 Tablespoons neutral oil(I used coconut oil)
  • 1/4 cup cane sugar
  • 1 1/2 teaspoons pumpkin pie spice
  • 1/2 teaspoon salt
  • 1/2 teaspoon maple extract
  • 1/4 cup dried cranberries

Autumn-almond-butter-lateral

Method:

  1. Combine the almonds and oil in a food processor and blend until the almonds form a thick paste(about 5-10 minutes). Scrape down the sides as necessary to make sure all of the almonds get processed.
  2. Stop the processor and add the sugar, spice, salt, and extract. Continue pulsing until the ingredients have all been mixed evenly.
  3. Turn off your food processor. Add in the cranberries and fold them in throughout the almond butter. Move to an air-tight container for storing.

Autumn-almond-butter-side

If your Autumn involves chocolate(and that’s a pretty good Autumn), add 1/4 cup of white chocolate chips at the end and fold them in along with the cranberries.

How To Fry Plantains

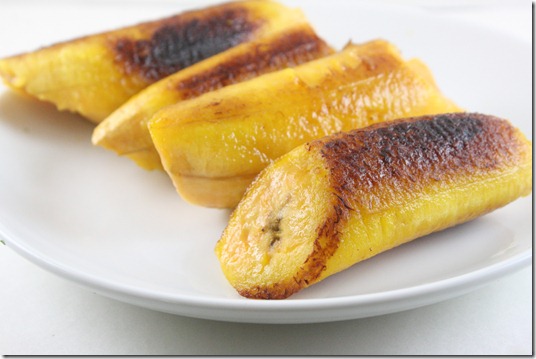
how-to-fry-plantains

I’d say I’m an adventurous eater and an adventurous cook. I’ll try anything once… except for deep frying, because we really don’t need to get the fire department involved.

For a long time I had never had a plantain. They just seemed… odd.

how-to-fry-plantains-ingredient

I mean, look at that—isn’t that kind of creepy? But also familiar looking. It took a freelance job to lure me outside of my comfort zone and try a plantain for the first time. And you know what? It wasn’t bad; in fact, it was good. The flavor was surprisingly sweet compared to what I expected. In fact it was cloyingly sweet, more like an apple than a banana. But the savory oil helped to balance out the flavors. Since then I’ve bought plantains and made them for myself a few times and I can’t figure out for the life of me why more cultures haven’t tapped into this delicious starch.

How To Fry Plantains

You’ll need(for 4 side servings)…

  • 2 plantains
  • 1 Tablespoon coconut oil*

*or other neutral oil.

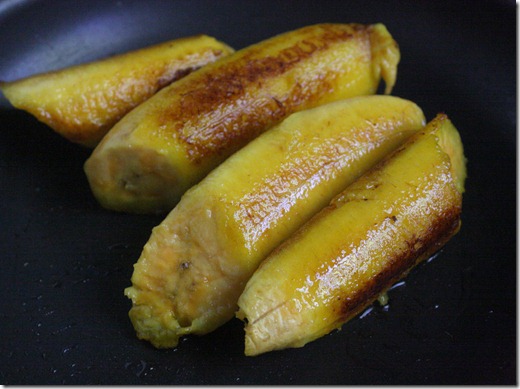
how-to-fry-plantains-pan

Method:

  1. Peel the plantains and slice them on a bias.
  2. Heat the oil in a large frying pan over medium heat.
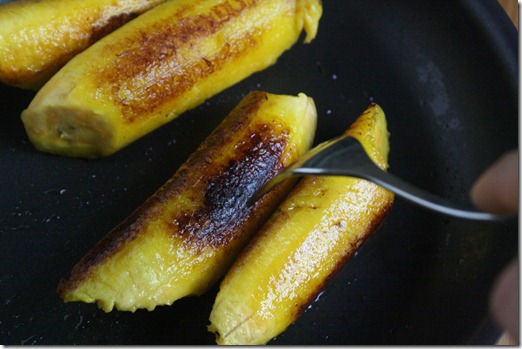
  3. Fry the plantains in the oil, turning every minute or so to brown each side.
  4. When browned all around, remove from the heat, drain from the oil, and serve hot.

how-to-fry-plantains-turning

I really like the subtle flavor of coconut with the plantains for a true tropical flavor. If you’re serving this as a dessert, sprinkle a couple tablespoons of brown sugar into the pan towards the end of cooking.

Have you ever tried a plantain? If not, would you try one now?

Nutty Roasted Broccoli

nutty-roasted-broccoli

A lot has changed since I started this blog 11 months ago. Personally, I think I’ve become a better blogger. I got my first DSLR camera for Christmas last year. At the time I didn’t know how to use it; hell, I’m still learning how to use it. I shot in auto-mode for so long that I’m just getting around to teaching myself to shoot in manual, which I’m enjoying more and more.

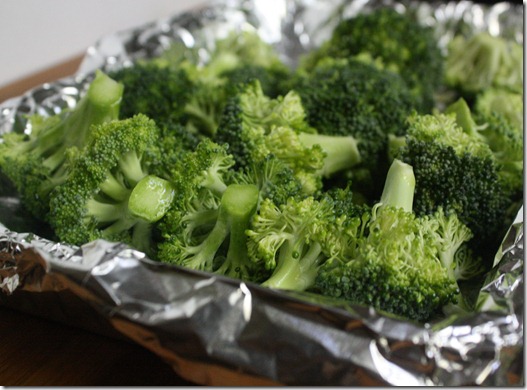
nutty-roasted-broccoli-raw

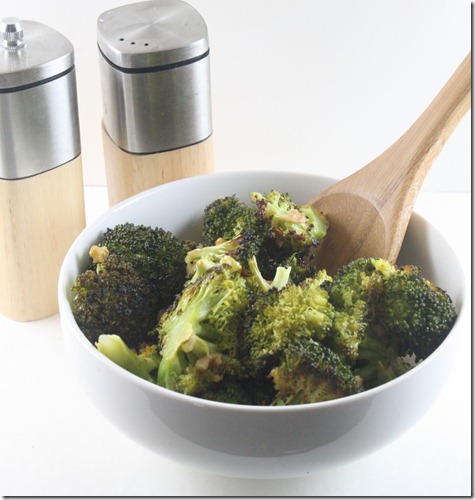
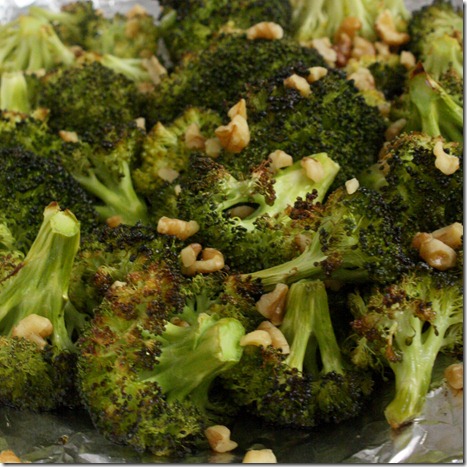
Even though my photos and writing may have changed, my recipes and the way I eat really hasn’t. Case in point: I made this broccoli last year and blogged about it, and I’m still making it today. I thought it deserved a new post, one that makes it look as great as it tastes. If you’ve never tried roasted broccoli before, you’re really missing out. It’s tender and earthy with a nutty flavor—like no other broccoli you’ve ever eaten. Toasted walnuts add a nice added crunch and compliments the flavor.

You can use frozen instead of fresh in this recipe, too, however the broccoli will have a soggy bite to it.

Nutty Roasted Broccoli

Prep time: 5 minutes

Cook time: 30 minutes

Ingredients(makes 4 servings):

  • 3 cups fresh broccoli florets
  • 3 Tablespoons olive oil
  • 3/4 teaspoon salt
  • 1/4 cup walnuts, crushed and toasted

nutty-roasted-broccoli-tray

Method:

  1. Preheat your oven to 375 degrees.
  2. Lay the broccoli florets out in a single layer on a baking tray.
  3. Pour the oil on top and sprinkle on the salt. Toss a few times with your hands.
  4. Roast in the oven for 30 minutes.
  5. When the broccoli’s done, take the tray out of the oven and add in the walnuts. Toss to distribute. Serve hot.

nutty-roasted-broccoli-bowl

Seriously, what was I thinking photographing in automatic all Summer when the lighting is best? I’m just learning more and more about aperture thanks to Anne’s guest post, and it’s like seeing through a whole new lens. It’s definitely worth the read to any photo enthusiasts.

Nutmeg Roasted Acorn Squash

nutmeg-roasted-acorn-squash

I’m already excited for Fall, not because of the weather or anything but because of the food. Roasted squash is comfort food to me. When they come into season there’s suddenly a treasure trove of new food to eat–acorn, pumpkin, butternut, spaghetti. All different and all delicious in their own way.

nutmeg-roasted-acorn-squash-pan

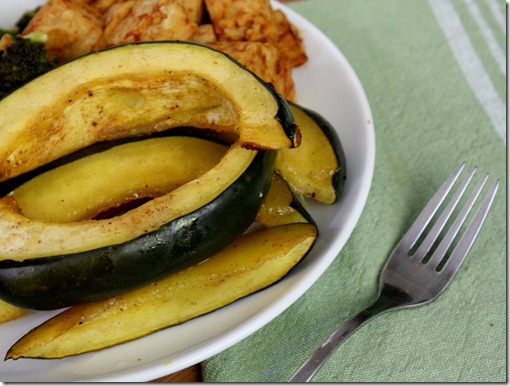
This recipe uses nutmeg, which is one of the more aggressive spices. It’s so aggressive it’s poisonous in large amounts, so you might want to have a light hand when seasoning this. The cinnamon helps to smooth out the flavor. By the end of cooking it smells like someone’s just baked a pie; that’s a smell that’s always welcomed in my house. 

Nutmeg Roasted Acorn Squash

Prep time: 5 minutes

Cook time: 45 minutes

Ingredients:

  • 1 acorn squash
  • 1/4 cup maple syrup
  • 1/2 teaspoon nutmeg
  • 1/4 teaspoon cinnamon
  • 1/2 teaspoon salt

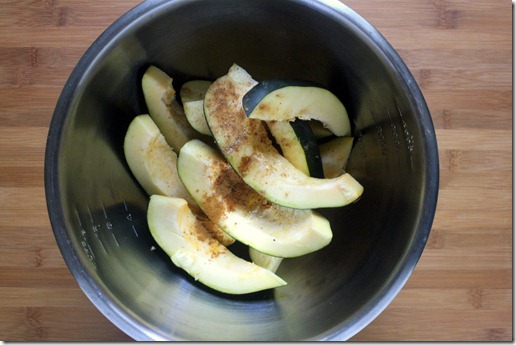
nutmeg-roasted-acorn-squash-bowl

Method:

  1. Preheat your oven to 375 degrees.
  2. Cut the squash in half and remove the stringy inner seeds.
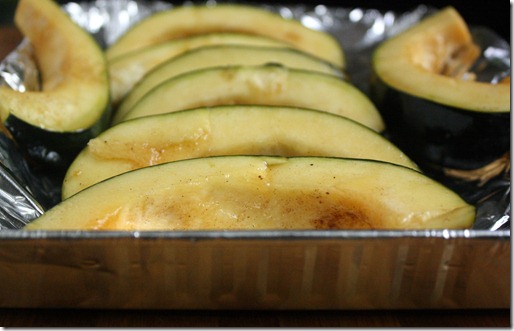
  3. Cut the squash along each ridge into long strips.
  4. In a mixing bowl, toss the squash, maple syrup, nutmeg, cinnamon, and salt until the squash is completely covered.
  5. Lay the squash out on a baking tray and roast for 45 minutes. Serve hot.

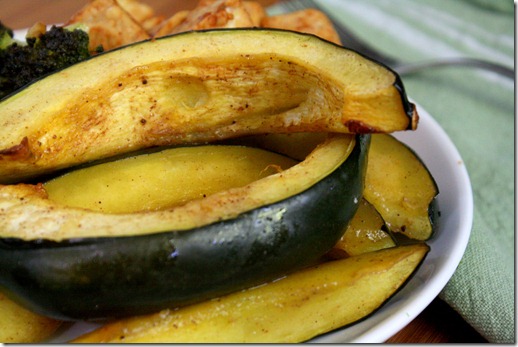
nutmeg-roasted-acorn-squash-close-up

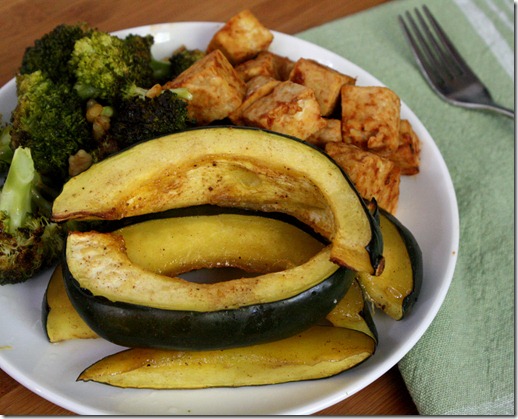
Despite the maple syrup, this recipe isn’t very sweet; it’s mostly spicy. There’ll be a lot of leftover spiced maple syrup in the mixing bowl. You can either pour it on top of the squash before roasting or reserve it as a finishing touch on the plate.

nutmeg-roasted-acorn-squash-plate

Chocolate Hazelnut Stuffed Figs

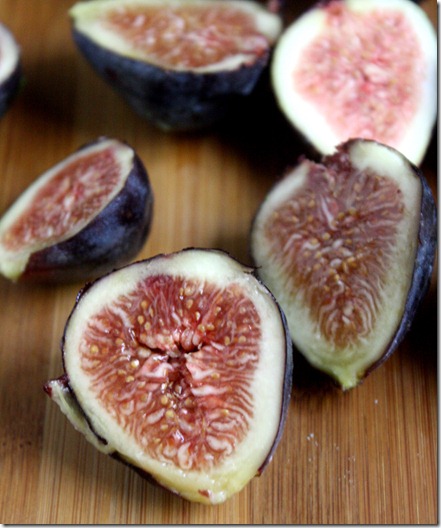
chocolate-hazelnut-stuffed-figs

In the time of the Ancient Greeks(my area of study), figs were considered a food of the Gods. Chocolate meanwhile was considered a food of the Gods by Mayans and Aztecs living thousands of miles away in South and Central America. Now, I’m not saying the Greeks were wrong, but I’d have to side with the Americans on this one.

chocolate-hazelnut-stuffed-figs-ingredient

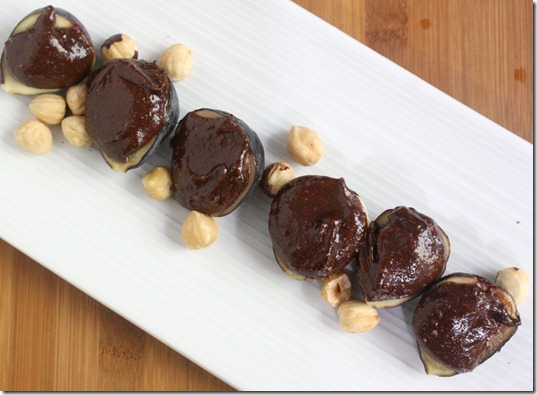
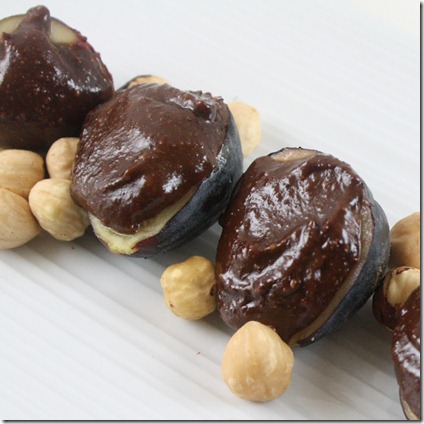
Even still, figs are pretty spectacular. For 2 weeks or so every year they’re at the peak of their season, and I always buy a few cartons when they go on sale. Figs remind me of France which leads me to France’s number 1 export(or at least in the heart of foodies): Nutella. The filling in this recipe is sort of like Nutella in that it uses cocoa powder and hazelnuts, but the raw ingredients produce a much more intense, dark flavor that pairs perfectly with sweet fruit.

Don’t have hazelnuts? This would taste great with almonds instead.

Chocolate Hazelnut Stuffed Figs

Prep time: 10 minutes

Cook time: 0 minutes

Ingredients(makes 16 amuse-bouches):

  • 8 Figs
  • 1/2 cup hazelnuts
  • 2 Tablespoons agave nectar
  • 2 Tablespoons cocoa powder
  • 2-3 Tablespoons water
  • Pinch of salt

chocolate-hazelnut-stuffed-figs-spread

Method:

  1. In a food processor, blend the hazelnuts until they start to form a paste.
  2. Add into the processor the agave, cocoa powder, and salt and continue blending until mixed.
  3. Slowly add the water until the filling is loose and spoonable like a thick mousse. Make sure not to add too much water and make this runny.
  4. Cut each fig lengthwise and lay them out cut side-up on a plate.
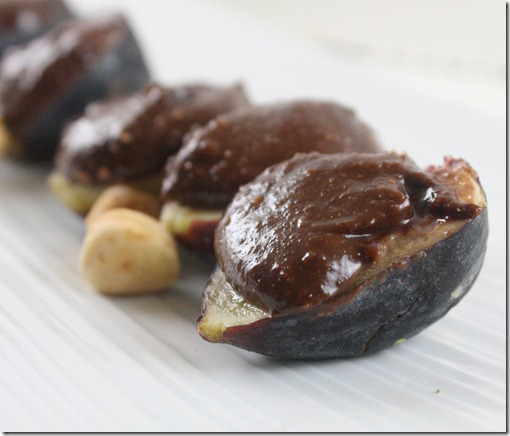
  5. Spoon 2 teaspoons of filling onto each fig. Serve at room temperature.

chocolate-hazelnut-stuffed-figs-garnish

I think the Greek Gods would be pleased.

Tempeh And Broccoli

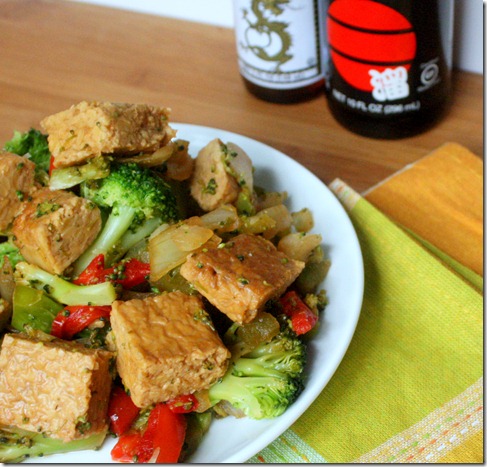
tempeh-and-broccoli

I’ve been getting a lot of questions on tempeh recently. I want to put all my thoughts into a post about it but until then you’ll only get recipes, which is pretty good considering half the time I eat tempeh it’s raw, cold from the fridge. I would not suggest eating it that way if it’s you’re first time; it would be a horrible, bland introduction to something that can be so tasty.

If tofu is soy chicken, tempeh is soy beef. It’s much firmer, earthier and has a chew to it. Naturally it’s a great vegetarian substitute for beef in Asian dishes, like beef and broccoli. Since broccoli was one of the three vegetables I liked growing up(the other being carrots and olives), beef and broccoli was what I always chose on Chinese take-out night. This recipe keeps all those same flavors and textures, but with whole food ingredients anyone can enjoy.

tempeh-and-broccoli-plated

You can substitute rice vinegar in place of apple cider vinegar for a more traditional ingredient list. I like apple cider vinegar here because it replicates the sweet, fruity flavor of plum sauce common in Asian cooking.

Tempeh And Broccoli(inspired by Caitlin)

Prep Time: 5 minutes

Cook Time: 10 minutes

Ingredients(makes 2 servings):

  • 1 block of tempeh, diced
  • 6 Tablespoons apple cider vinegar
  • 1/4 cup plus 1 Tablespoon soy sauce(or wheat-free tamari)
  • 2 Tablespoons agave nectar
  • 1 Tablespoon sesame oil, preferably toasted
  • 1/4 teaspoon chili powder
  • 2 cups broccoli, steamed
  • 1/2 onion, julienned
  • 1 bell pepper, julienned(optional)
  • 1/4 teaspoon garlic powder
  • 1/4 teaspoon salt

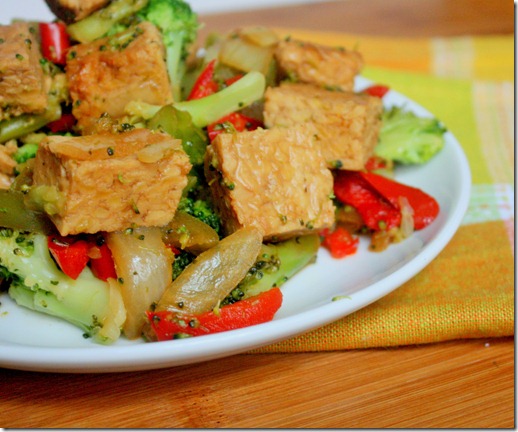
tempeh-and-broccoli-tablescape

  1. Combine the tempeh, apple cider vinegar, soy sauce, sesame oil, agave, and chili powder in a large pan and heat it on a burner set to medium-high.
  2. Cook for about 5 minutes flipping once until the liquid thickens up like a sauce.
  3. Add in the broccoli, onion, pepper, and garlic powder. Continue cooking over medium heat until the moisture has boiled off of the pan and the onions turn soft(about 5 minutes).
  4. Remove from the heat and season with salt. Plate and serve hot.

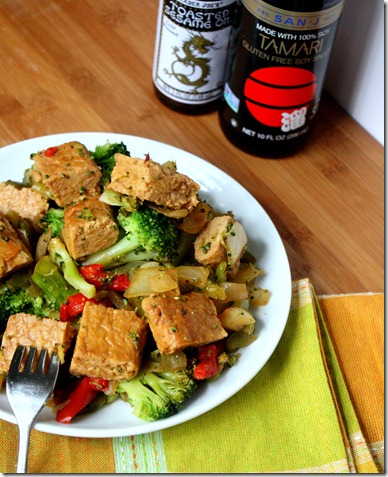
tempeh-and-broccoli-fork

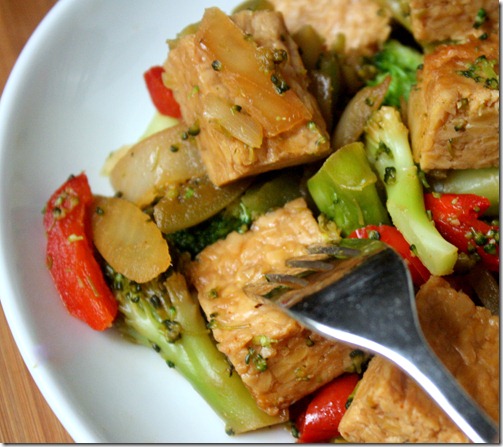
When this is cooked the tempeh should be fork-tender with a sweet, nutty flavor and fall apart in your mouth. It’s a great introduction to a food that could become your best friend.