Sweet Freedom, Round 2

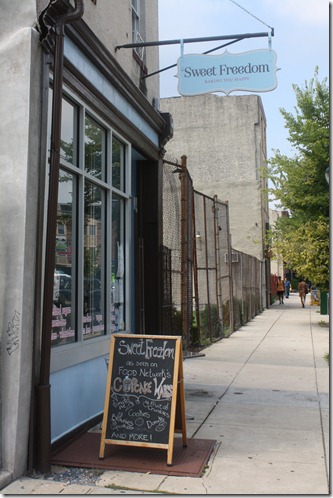
While I was in Philadelphia, I couldn’t help but take a trip to Sweet Freedom Bakery. I came here the last time I was in Philly and fell in love. It’s the only bakery I’ve ever been to where I could order absolutely everything there and not have to ask about the ingredients(which they proudly display), and their baked goods taste just as good as any others.
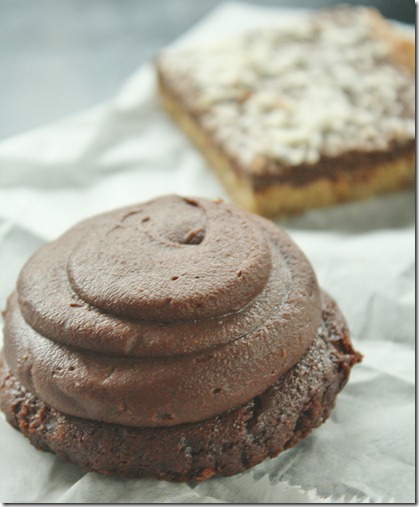
I intended to a couple of their cinnamon buns(which are incredible) but sadly they had none this time around. There menu had changed a lot since the last time I was there and a lot of the pastries were seasonal. The “cupcake tops” caught my eye.
I’m a huge frosting fan. In fact, I’m pretty sure I’ve had layer cakes where I just ate the frosting and filling and left the cake part. Cake just isn’t as delicious. Naturally, anything with a frosting to cake ratio of 2:1 is right up my alley. I tried the chocolate flavor; while the frosting was great, the cake was a little disappointing, which made me glad I didn’t get the whole cupcake. It tasted a little starchy from the gluten-free flours used; I’m guessing the recipe has a bit too much potato or tapioca starch and it overpowers the cocoa.
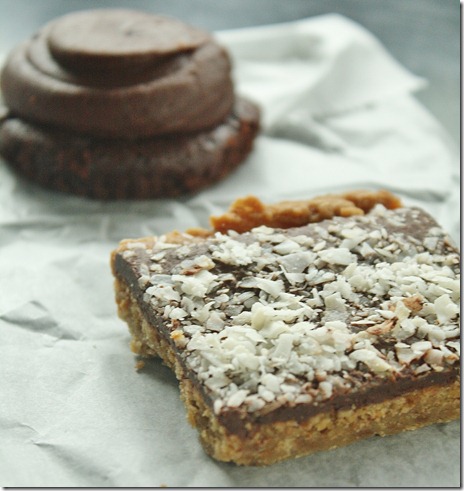
The other dessert I tried was their “magic bars”. It looked small and unassuming, but ended up being my favorite of the two. The bottom tasted like a homemade graham cracker-peanut butter crust. On top was a chocolate ganache and flaked coconut. I don’t think I could get tired of chocolate and peanut butter desserts, and this just attested to that. It’s something that also looks easy to make at home so I’ll be trying to replicate their recipe soon.
Obviously I’m a fan of Sweet Freedom Bakery, but I could have told you that before I went. I’d definitely recommend visiting if you’re in the neighborhood.

Philadelphia Marathon Recap

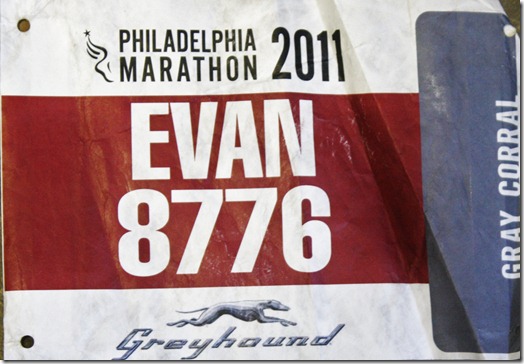
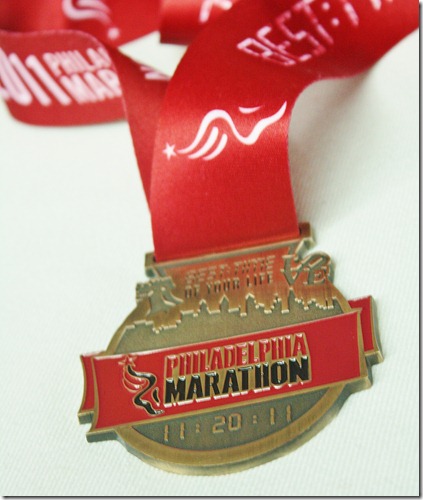
8 months ago I ran my first marathon. I swore I would never do it again… and then I signed up for the Philadelphia marathon 5 days later.
What made me change my mind so quickly? I got injured really early during training for my first marathon and was really lucky just to be able to finish. Originally I had hoped to run under 4 hours but learned to live with 4:19:37… or at least for 5 days.
The Philadelphia Marathon appealed to me because it was a big marathon in the North-East region which has no registration standards or lottery. It also helped that Fall in the North-East is perfect for distance running and Philadelphia is fairly flat. I came down in April and ran a 16-mile run here along Kelly Drive, which ended up being the same route as miles 13-17 and 21-26, so that worked out pretty perfectly.
As for training, I posted my plan here but the core of it was fitting in 3 20-mile runs. This didn’t really make me feel 100% prepared for the marathon; then again, knowing me, the only way I would have felt prepared is if I had run a practice marathon and in the time I was aiming for, which is usually considered excessive as far as training plans go. What the 3 20-milers taught me was that 2:50:00 was a reasonable 20-mile time for me and that if I did that I could drop my pace significantly over the last 6 miles and still make my goal, so that was more or less my marathon strategy.

Fueling during the race became my biggest obstacle to overcome(you can skip this paragraph if you don’t want to hear about bathroom talk, but I’d say it’s a pretty big deal when it comes to marathons). I have GI problems when I’m not traveling 5 hours and anxious about running a marathon; this weekend threw my body off way off. I ate oatmeal and some almond butter a few hours before the marathon, tried to go to the bathroom and no luck. I knew drinking water or Gatorade or a GU during the race would send me racing for a porta-potty and use up time I didn’t have, so my plan ended up being drinking as little as possible for the first 20 miles. This might sound crazy, but since I never ate or drank during my 20-mile runs, it wasn’t a huge shock to my system. And the cool weather helped since I wasn’t sweating much.
The first 6 miles or so were pretty crowded and it was hard to go ahead of many people. Normally this would be a bad thing but I think the crowd helped to pace me and prevent me from going out too fast at the start.
The next 7 miles people started breaking up. It made it a lot easier to find a comfortable running spot. It was pretty noticeable when the half-marathoners split off from the marathoners but there were a surprising number of full runners so the course didn’t feel empty at all after the break.
Miles 13 through 18 were surprisingly good. It felt like I had picked up my pace a bit and was passing a lot of people. It really helped that Kelly Drive was flat and that I had ran it before so I had an idea of what to expect.
18-20 had us go down through Manayunk and back. This is when I first started feeling exhausted. I tried to drink a cup of Gatorade and water and later an orange slice from a spectator which helped a little; still I knew I couldn’t overdo it on the liquids if I wanted to avoid using the bathroom. The crowds down at this part were great and kept everyone’s spirits up. When I checked my watch I realized I finished the first 20 miles in around 2:53, so just around goal.
The last 6 miles were by far the toughest. I think there are two halves of a marathon: The first 20 miles and the last 6.2. My legs were exhausted and I was definitely in need of more electrolytes. I tried to zone out into my playlist as best I could to not obsess over how much longer it was. I remember seeing that I had almost an hour to run 5 miles and figured I was in good position. Still, my pace dropped by about a minute each mile because I just didn’t want to go on anymore.
When I got to the last 5k I told myself it was only 30 more minutes of hell. I thought about taking walking breaks but questioned if I had time for them. I settled into a 10 minute/mile running pace for the last couple of miles telling myself it would only be 20 minutes of hell and that was do-able. As cliché as they are, the signs that said “Pain is only temporary” really helped me through this part and reminded me that if I couldn’t hold out for the toughest part than what was I training for all this time? There were also a ton of people cheering the last .75 mile so that helped to keep me going, and once I could see the finish I just took off and forgot my legs hurt at all.
I knew as soon as I finished that it was faster than 4 hours. After drinking a bottle of water and a cup of Gatorade, I checked online and saw that my official time was 3:52:17. That couldn’t have been a bigger relief.

Now that I have a sub 4:00 marathon under my belt, I’m not rushing to sign up for another any time soon(don’t quote me on that in 5 days). But really I don’t have any more running goals in mind at the moment, so if I did train for another race it’d be more for the fun of it. You call a marathon a lot of names when you’re running it; “fun” isn’t one of those.

Peanuts And Pretzels Dark Chocolate Bark

Over this weekend I went to Philadelphia and ran a marathon. How did I do? I don’t actually know yet; I’m writing this 2 days before the actual marathon. You can probably check my Twitter. I hope to have an actual recap up by tomorrow.
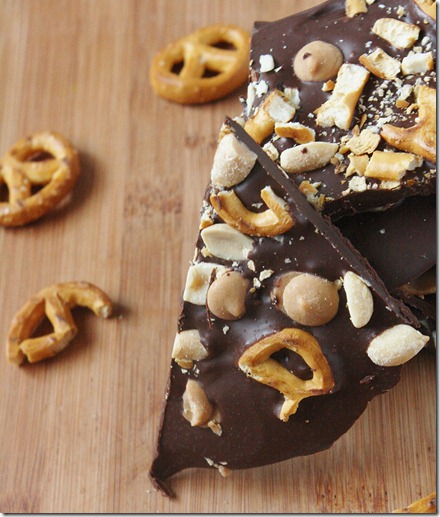
But whether I hit my goal or not isn’t important(OK, it’s kind of important); what matters more is that I had fun with some awesome people. Madeline and her boyfriend were kind enough to let me crash at their place the night before the marathon so it only seemed fair that I shower them in chocolate.
Madeline and Boots love gluten-free pretzels and gluten-free chocolate covered pretzels even though neither are gluten-free, which I find hysterical as someone who’s gluten-free and never even bought pretzels before I decided to make these. I don’t know that they like peanut butter, but I’m just going to assume that that’s the case, too. Because—I mean—who doesn’t like peanut butter?
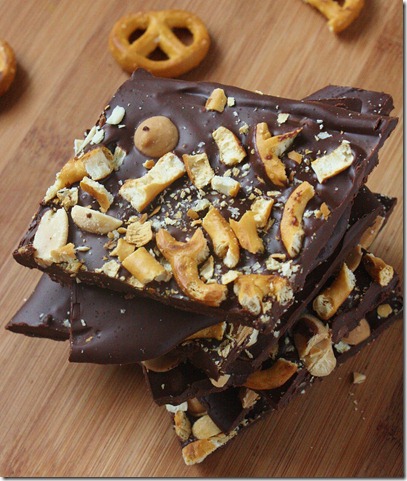
I sneaked a piece before I gave the rest away(because you can’t give something as a present and not taste it first to make sure it’s good, right?) and they were good. I would have added a touch more salt; when I tried the gluten-free pretzels on their own I realized they weren’t as salty as I expected them to be and I think the sweetness is a little overpowering. Otherwise I hope these will be a hit. And if you enjoy things that are sweet and salty I’d highly recommend them, too.
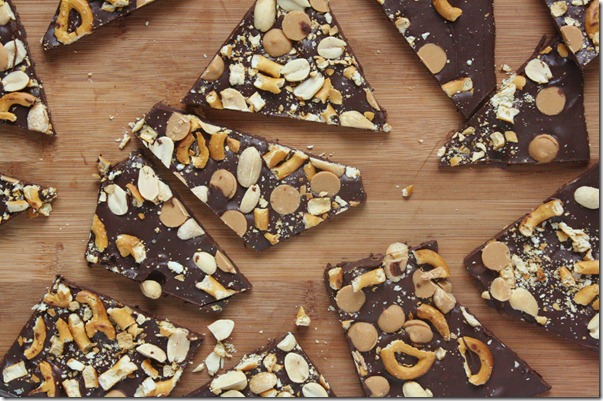
Peanuts And Pretzels Dark Chocolate Bark
Prep time: 10 minutes
Cook time: 0 minutes(allow 20 minutes for cooling)
Ingredients:
- 12 ounces semi-sweet chocolate OR 1 3/4 cups semi-sweet chocolate chips
- 1/3 cup crushed pretzels
- 1/4 cup salted peanuts
- 1/4 cup peanut butter chips
Method:
-
In the microwave or over a double boiler, melt the chocolate until it’s smooth and liquid.
- Spread the chocolate out on a piece of parchment paper in a 1/2-inch thick layer.
- Evenly distribute the peanuts, pretzels, and peanut butter chips over the chocolate. Press the ingredients lightly into the chocolate to make sure that they stick.
- Refrigerate the chocolate for 20 minutes until it has hardened.
- Break the bark into individual-sized pieces. Store at room temperature for up to 2 weeks.
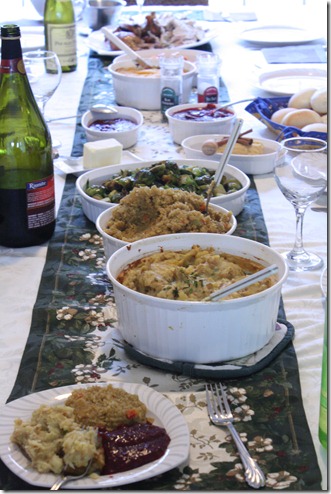
I hope to have a full marathon/weekend recap up tomorrow morning, but if it’s a little late it’s because I’m going from Philadelphia to Boston to Providence and then back to Massachusetts to cook and photograph and eat Thanksgiving dinner. Basically it’s going to be a bust week and I can’t wait for all of it.

Finding The Light

I hate Daylight Savings Time. Hate it. I don’t care about that extra hour of sleep I got; it’s not worth the trade-off of it becoming dark outside by 5pm. That is a nightmare for a food blogger.
Something I haven’t talked about much is how frustrated I’ve been with my photography over the past 2 months. A dorm room—as you can imagine—has very limited space and this makes setting up elaborate scenes difficult. After 8 weeks of trial and error(and error and error), I think I’m just now starting to pick up the tricks of how to work with limited light and limited space.
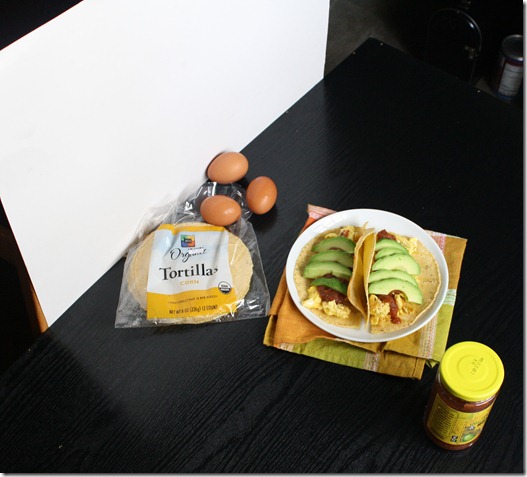
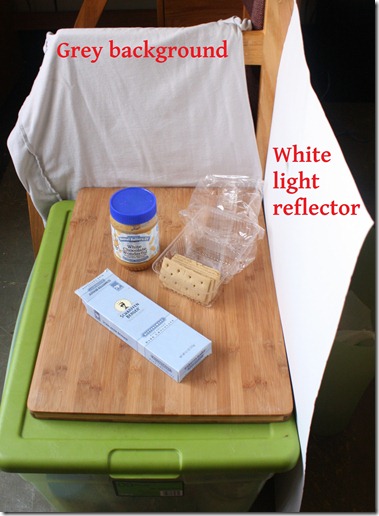
My usual set up is to put a flat, textured surface on top of a storage bin set up in front of the window with a neutral background behind propped up with a chair to reflect the light. Once I have that set up, I start adding plates of food and other props around it to make it look like a more permanent tablescape.
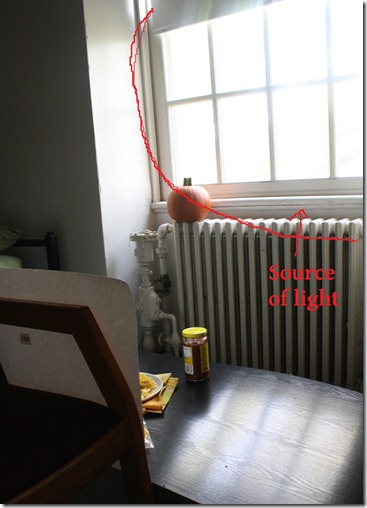
I think one of the most important things is knowing when the light is “good” in a room. This is just something you have to observe about the space over time. For me it seems like there are a few hours in the morning and a few in the early afternoon when the most light comes through the window, so I try to arrange taking photographs around those times.
When everything else has come together, all that’s left is to find the right angles and start shooting. I’m a big fan of the take-many-photos-and-hope-one-isn’t-blurry method. A tripod to hold the camera, lengthen the exposure, and allow for more detailed, lightened photographs would be a good investment; but it’s one that I haven’t made yet.
The latest thing I’ve done to improve is switch from a white to a light grey background. The problem with white is that it’s often too bright and makes the rest of the image look dull in comparison. Depending on how the camera’s white balance is set, it might throw off the colors of the objects in the photo, too.
White balance is something I admit that I understand very little of; but certainly it’s one of those things that you notice in a photo when it’s well done and notice when it’s not. I’m looking forward to trying more with grey backgrounds with a grey posterboard I just bought(much better than an inside-out shirt).
Another option I’ve used is my homemade light box, which is good because it allows me to take photos at any time no matter how light it is outside. However, I’m not a huge fan of using it because I think it ends up looking too artificial and overexposed and the only way to change that is by making another larger light box. That being said, this is the first photo I’ve had accepted onto Tastespotting and Foodgawker in months so I shouldn’t knock it too hard.
Why all this about photography? Fore one, it’s probably the part of food blogging that comes least naturally to me. I feel very confident cooking for any number of people under whatever conditions and being able to make something satisfying. But photography takes work. Another reason is that I just found out I’ll be taking a photography course at the Rhode Island School of Design next semester. While the thought of being graded on something so far removed from my studies makes me a little nervous, I know in the end I’ll gain a lot from the experience and hope that shows through on the blog.

Curry Roasted Chickpeas

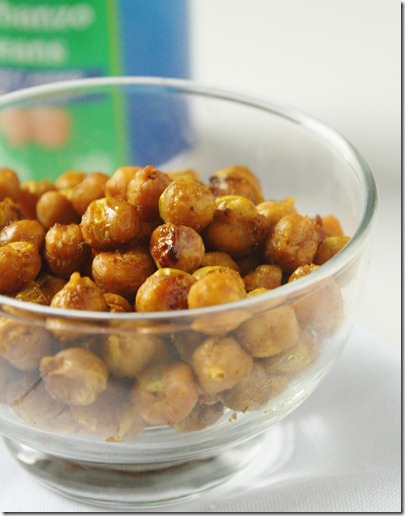
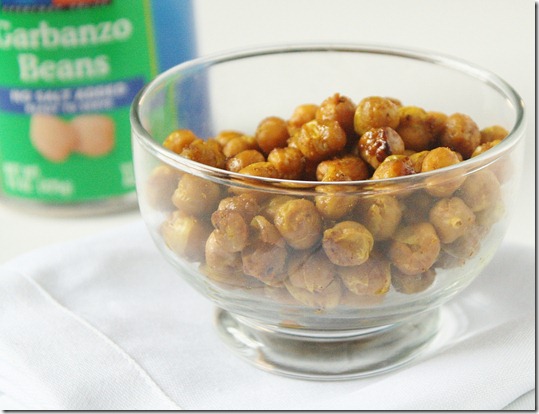
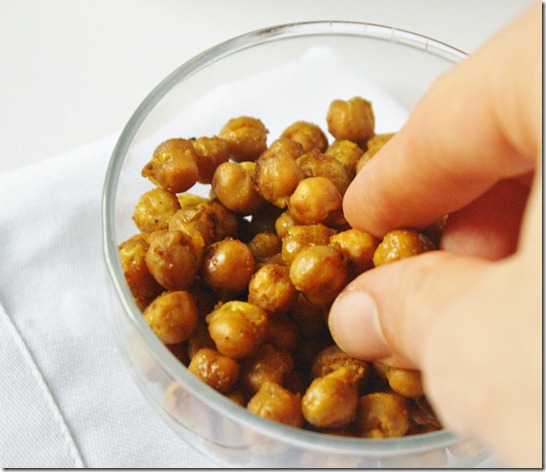
This is undoubtedly one of my favorite recipes of recent. After all it has maple syrup and cinnamon—what’s not to love? And I loved the way the chickpeas tasted after they had been roasted, which made me want to try more variations.
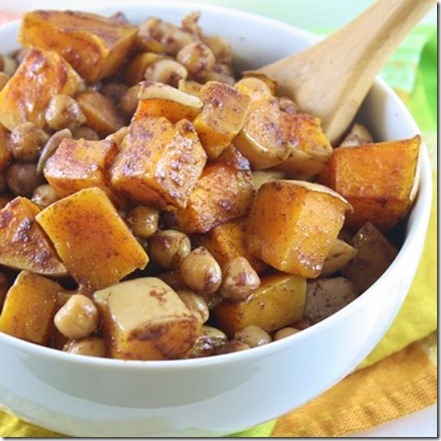
Rather than go the sweet route(since I could eat sweets all day), I wanted a savory recipe that would be just as delicious but slightly less addicting. I love the combination of maple syrup and curry in this squash recipe so it seemed like a great way to start. The maple syrup doesn’t actually make these all that sweet; rather, it intensifies the spiciness of the curry and balances its saltiness for an intense flavor combination.
Different curry spice blends have different ingredients. If you’re opposed to spiciness, look for a mild-flavored blend. Additionally, if yours is salt-free, add 1/2 teaspoon salt to the recipe.
Curry Roasted Chickpeas
Prep time: 5 minutes
Cook time: 50 minutes
Ingredients:
- 1 15-ounce can chickpeas, drained
- 1 Tablespoon maple syrup
- 2 teaspoons olive oil
- 3/4 teaspoon Indian curry spice blend
Method:
- Preheat your oven to 375 degrees.
- Toss all of the ingredients together in a large bowl.
- Lay out the chickpeas in a single layer on a baking tray and roast for 50 minutes or until nutty and crispy, shaking the pan halfway through.
- Serve hot or at room temperature. Keep leftovers in the refrigerator.
You can eat these on a salad or as a side dish or just on their own as a savory snack. Roasting the chickpeas makes them crispy, crunchy, and addicting.

My Favorite Comfort Food

I think you can tell a lot about people based on what they love to eat: If they go to bed dreaming of bagels slathered in cream cheese, or wait each year until grilling season for authentic BBQ, or haunt the same local restaurant week after week for all-you-can-eat sushi.
A few years ago if you asked what my favorite comfort food meal was—the dinner I couldn’t get enough of—I’d say buffalo wings and pizza. It was the same thing we got every Tuesday night from a downtown restaurant where the pizza was particularly doughy and greasy and the wings drenched in batter and hot sauce. It wasn’t a particularly gourmet(or even good) meal but just the sight of it was familiar and inviting.
A lot’s changed since then. Having to stop eating gluten and becoming a vegetarian have opened my eyes up to a whole new set of foods. Most of all it’s shown me that there are healthier options than greasy pizza and fried chicken that can be just as familiar and comforting at the end of a long day.
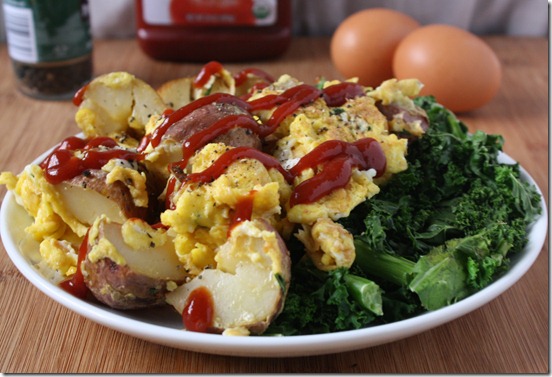
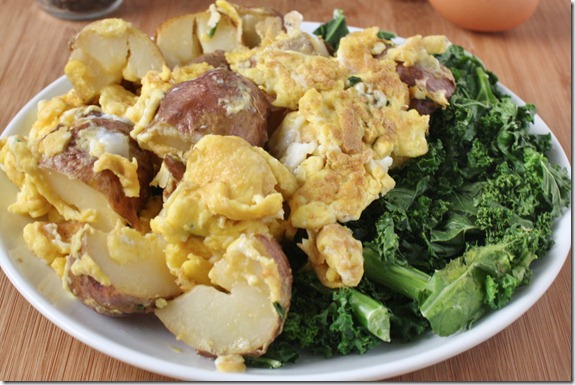
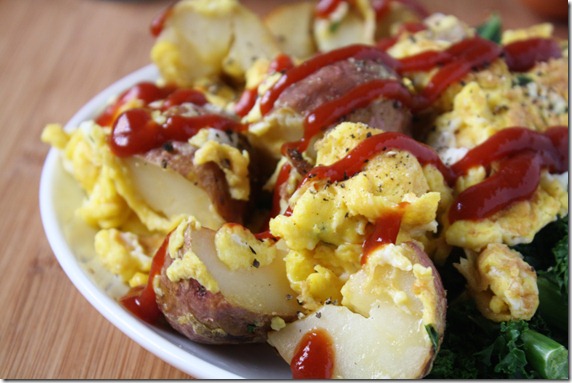
When I was little I spent most of my Summer at my grandparent’s apartment since both my parents worked and they lived 1.5 miles away. My grandmother knew how to cook a few things, one of them being scrambled eggs that she cooked with a large wooden spoon and served with buttered toast. Now whenever I need that taste of home I go straight for the scrambled eggs—occasionally made with a wooden spoon—and served next to buttered home fries and a bed of steamed kale for color.
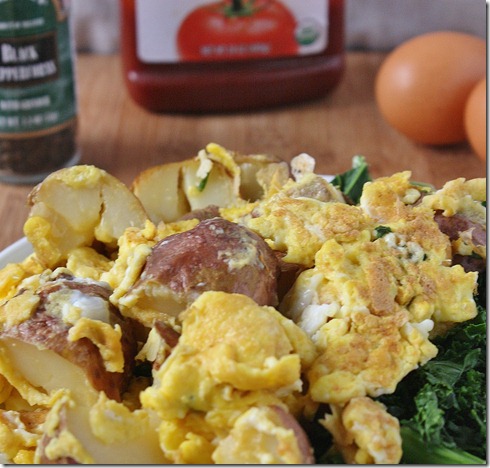
A lot of people will tell you the secret to good scrambled eggs is adding milk to the batter. I don’t think that’s it. The key to making good eggs is to take them off the heat before they’re finished cooking—when they’re mostly cooked but still have a glossy, wet shine on top. Eggs, like any protein, continue to cook even when they’re cooling; if you cook them fully on the stove, they’ll dry out as soon as you take them out of the pan.
And the secret to good potatoes? Time. Time in the oven, and then time on a hot pan on each side to get a brown crust. Oil, butter, and sliced onions never hurt either.
And of course there’s nothing more comforting than the whole plate covered in tangy, salty-sweet ketchup, coarse sea salt and fresh black pepper.
What’s the one meal that feels like home to you?

Roasted Hazelnut And Candied Ginger Bark

I love this time of year(except for the cold which I will complain about endlessly). The mall smells terrific; there’s Christmas music playing every time I walk into CVS; it’s socially acceptable again to spend your Saturday nights watching Christmas movies on Netflix(as opposed to when I do this in July); and food blogs post new and exciting dessert recipes every day.
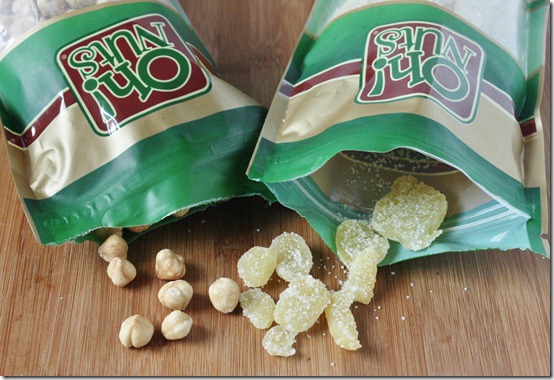
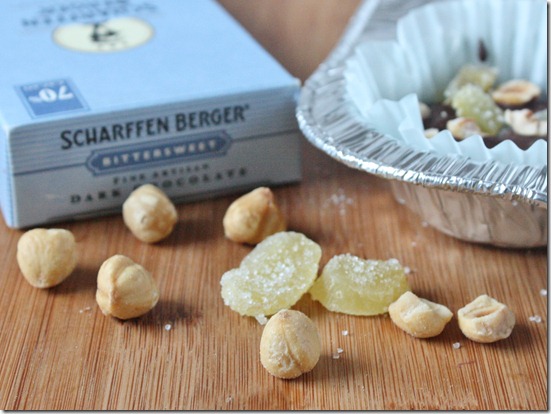
Sam from Oh Nuts! offered to send me two of their products to start my Holiday baking and be entered in a contest. Sounded good to me. I love making and sharing food with friends and family and the holidays are the perfect time to do that. I asked for roasted hazelnuts and candied ginger; both of those are delicious on their own but also pair well with Winter flavors.
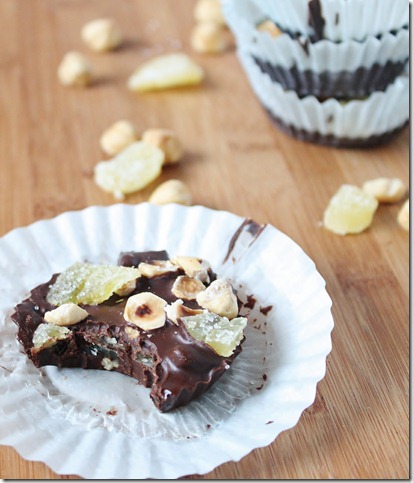
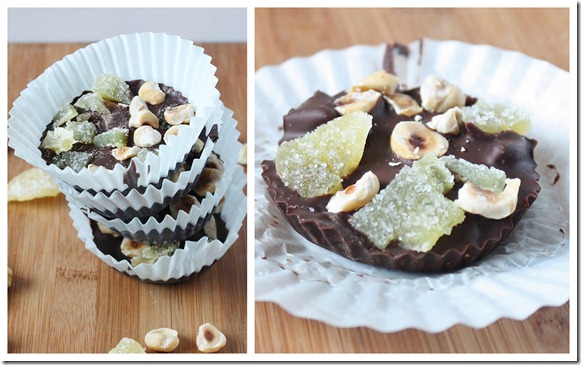
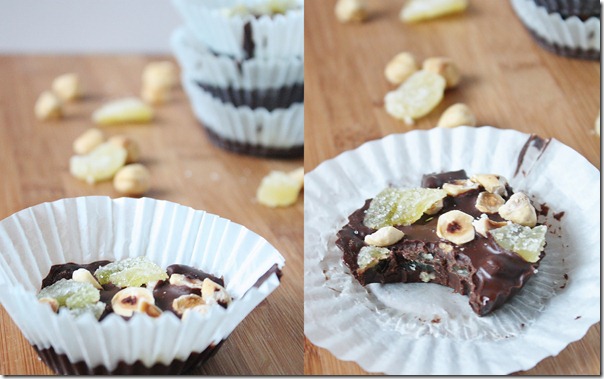
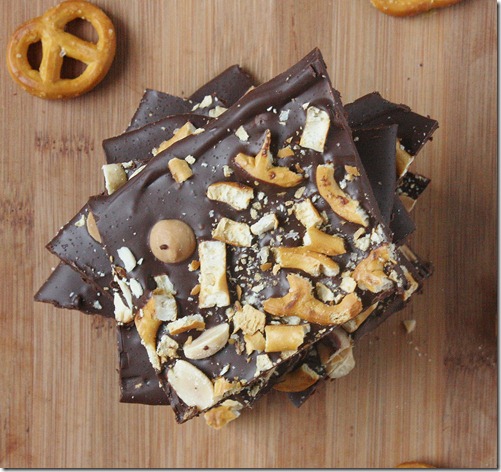
I didn’t want to do too much to the hazelnuts and ginger because their taste is so fresh. I decided to make bark since it’s an easy and elegant dessert that derives a lot of its flavor from the mix-ins added and the quality of chocolate used(I used Scharffen Berger). I didn’t have parchment or wax paper; twitter told me to avoid using aluminum foil, too, so I improvised with cupcake liners. I actually think these worked out really well since the chocolate didn’t stick at all and they come out already portioned. You can use these or make traditional bark by laying it out on a flat piece of parchment paper and breaking it into pieces.
Roasted Hazelnut And Candied Ginger Bark
Prep time: 15 minutes
Cook time: 0 minutes(allow 30 minutes to harden)
Ingredients(Makes 12 servings):
- 12oz 70% good quality baking chocolate OR 1 1/2 cups bitter-sweet chocolate chips
- 3oz(3/4 cup) roasted hazelnuts(preferably salted), crushed
- 4.5oz(3/4 cup) candied ginger, diced
Method:
- Fill a dozen cupcake wells with paper liners.
- Melt the chocolate either in the microwave or over a double boiler until completely liquid.
- Fold 1/2 cups of the hazelnuts and ginger into the melted chocolate until completely mixed.
- Spoon the chocolate mixture evenly among the paper liners.
- Garnish with the remaining hazelnuts and ginger, pressing them into the melted chocolate lightly to make sure they hold.
- Refrigerate the chocolate cups for about 30 minutes until they’ve hardened. Serve and store at room temperature.
Brian from Twitter remarked that they sounded “fancy”. I’d agree and add that this looks and tastes like a gourmet treat from a dessert shop. And yet it’s so easy to make! That’s why I love bark. No one needs to know you didn’t candy the ginger yourself or roast your own hazelnuts.
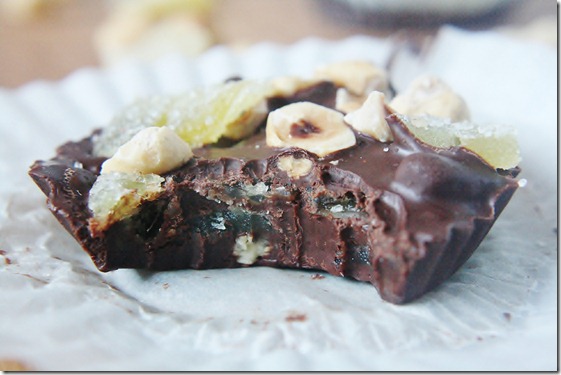
As for the dessert itself, I loved how the chewy ginger contrasted with the nutty hazelnuts. The chocolate after it melted and hardened wasn’t quite solid but wasn’t messy, either; it was very smooth soft, highlighting the taste and texture of the mix-ins.
Happy Holidays

Raw Dark Chocolate Peppermint Pudding

In a perfect world, I’d eat less sugar. But this isn’t a perfect world, and I’m far from perfect. Truthfully my sweet tooth is out of control. I tried to eat less sugar in October and failed(I blame the existence of candy corn). I tried to eat less sugar in November and I’m failing(hello, peanut butter bars). I’ll try to eat less sugar in December and I’ll fail then, too(at least I’m being realistic about it at this point). Maybe I’ll kick the habit in 2012; who knows?
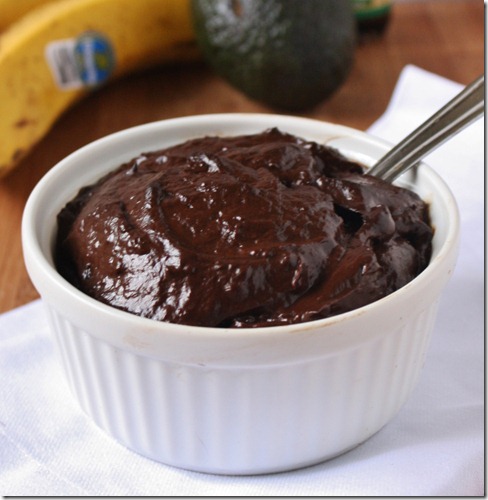
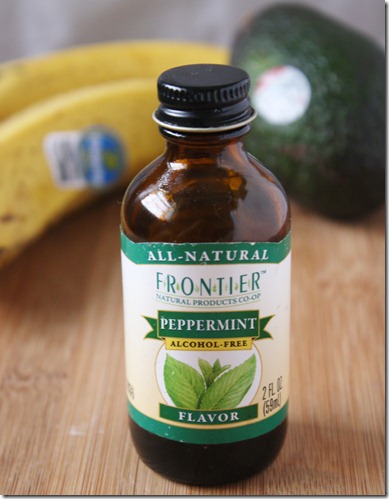
That’s not all to say I haven’t learned anything. One thing I’ve learned is that bananas make a great whole food sweetener. I used to make raw chocolate pudding all the time with avocado and agave, but at the end of the day agave is still another refined sugar like maple syrup and cane sugar. Bananas may have sugar, but also fiber and potassium. And in this dessert you really can’t taste the difference.
The trick is to use bananas that are well past yellow onto brown to get more sweetness and less banana-flavor.
Raw Dark Chocolate Peppermint Pudding
Prep time: 5 minutes
Cook time: 0 minutes
Ingredients(Makes 2 servings):
-
1 medium-sized ripe avocado
-
2 small overripe bananas(the browner the better)
-
1/4 cup undutched cocoa powder
-
Scant 1/4 teaspoon peppermint extract
Method:
-
Peel the avocado and bananas and throw them in a food processor.
-
Blend the fruits until they make a smooth puree.
-
Add in the cocoa powder and extract and continue blending until they’re entirely mixed.
-
Scrape into serving bowls and serve at room temperature. Keep leftovers in the refrigerator for up to 24 hours.
Maybe I could give up sugar if I had an endless supply of this in my refrigerator… right next to a bowl of candy corn and Reese’s.

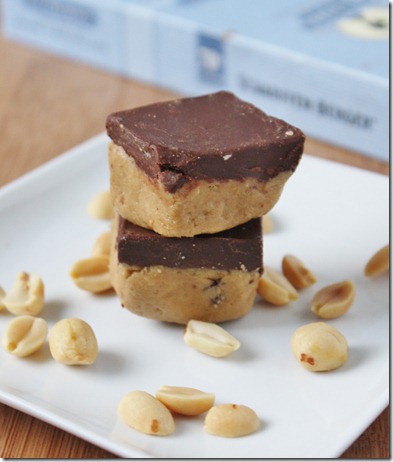
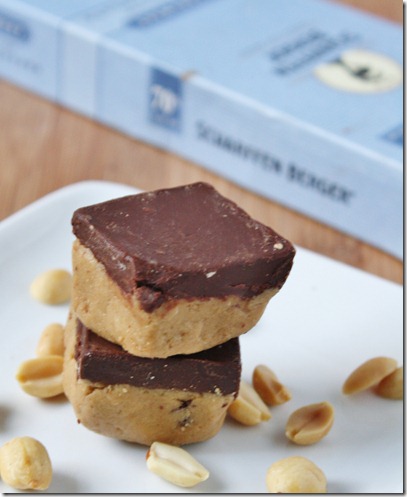
Graham Cracker Peanut Butter Bars With Dark Chocolate Ganache

I’m sorry that the name for this recipe is such a mouthful that you’ll probably finish half the batch before you say it. More accurately I’d call these “White Chocolate Peanut Butter Graham Cracker Bars With Dark Chocolate Ganache” but with a name like that you’d have to come up for air at some point.
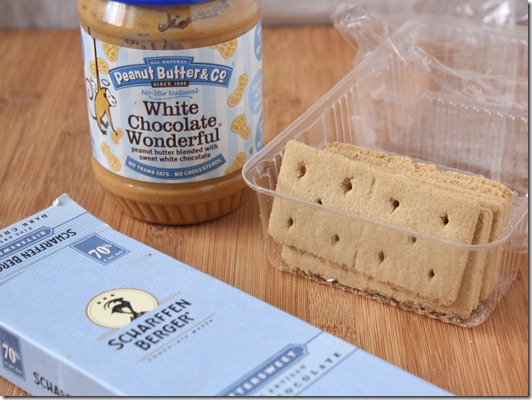
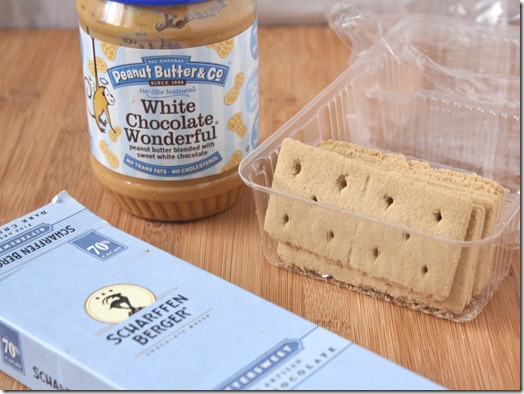
This recipe is made with a few of my favorite things. PB&Co.’s White Chocolate Wonderful is one of the best vegan “white chocolate” anything I’ve ever had. It actually tastes like white chocolate without any dairy. For the ganache, I used Scharffen Berger’s 70% baking chocolate, which is delicious and smooth to eat both on its own and in recipes. You can taste the quality in it and—I warn you—it’s addicting stuff.
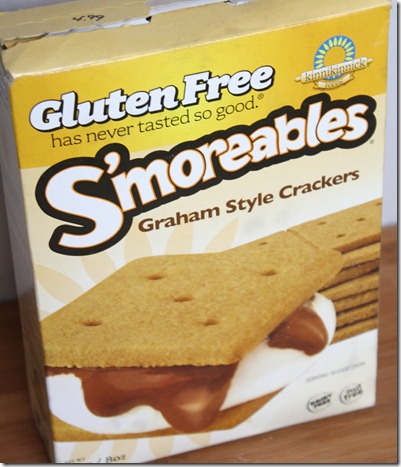
Normally, when I make peanut butter bars I use this recipe which is naturally gluten-free. However I’ve seen a lot of peanut butter bar recipes that use graham crackers as a binding(most recently this one) and I figured if so many people are doing it there must be something to it, right? So I broke out the ol’ gluten-free graham crackers and got cooking. I didn’t expect to like these as much as I do. The earthy spices in the graham crackers pair really well with the sweet and nutty peanut butter and add a pleasantly crunchy texture.
Graham Cracker Peanut Butter Bars With Dark Chocolate Ganache
Prep time: 15 minutes
Cook time: 0 minutes
Ingredients(Makes 18 1-inch squares):
-
1/4 cup butter
-
1/2 cup plus 2 Tablespoons White Chocolate Wonderful peanut butter*
-
1/2 cup powdered sugar
-
135g graham cracker crumbs**
-
120g 70% dark chocolate OR 1/2 cup bittersweet chocolate chips
*You can use any peanut butter so long as it’s the no-stir kind. If you want the white chocolate flavor but don’t have White Chocolate Wonderful, use 1/2 cup of natural peanut butter mixed with 3 Tablespoons melted white chocolate.
**This is easy to make at home. Simply pulse 9 sheets of graham crackers in a food processor until it makes a smooth flour.
Method:
- Gently melt the butter and 1/2 cup peanut butter either in the microwave or over the stove until it’s smooth and liquid.
- Once the ingredients are melted, sift in the powdered sugar and pour in the graham cracker crumbs and mix it together until emulsified.
- Grease a 3×8 loaf pan and press the peanut butter mixture into the pan in an even layer.
- In the microwave or over the stove, melt together the remaining 2 Tablespoons of peanut butter and chocolate. Once they’re melted, mix them together.
- Pour the ganache over the peanut butter layer and refrigerate until hardened(at least 30 minutes).
- 10 minutes before serving, remove these from the refrigerator to soften. Once soft, gently cut into 1-inch squares with a sharp knife and serve. Leftovers can be stored in the refrigerator for up to a week.
One of my favorite things about recipes like these is that they’re so easily adaptable for different allergens. I made mine gluten-free simply by using gluten-free graham crackers. To make them vegan you can use a dairy-free margarine in place of the butter and make sure to use vegan graham crackers.


