Category Archives: Side Dish

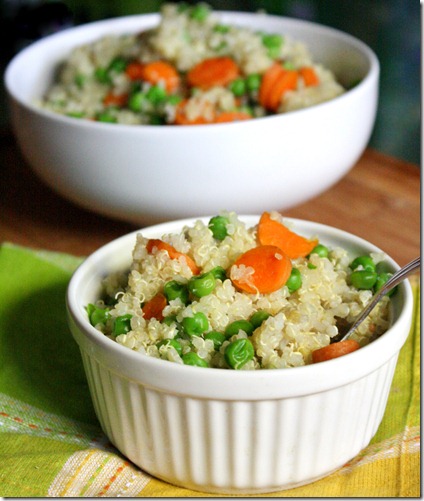
Peas And Carrots Quinoa

peas-and-carrots-quinoa

I’ve never understood why there are so many pea blogs out there, and then it hit me: I can’t remember ever trying peas before. I’ve had snap peas, but never peas out of their pod—at least not ever since I’ve been old enough to remember. I used to ice my legs with frozen peas I stole from a common room refrigerator, but that doesn’t count I don’t think. I even went to London where I was promised there would be mushy peas and I never saw any. What a disappointment. So when I went to Trader Joe’s and saw a bag of frozen peas for fairly cheap I thought I’d try them out.

peas-and-carrots-quinoa-serving

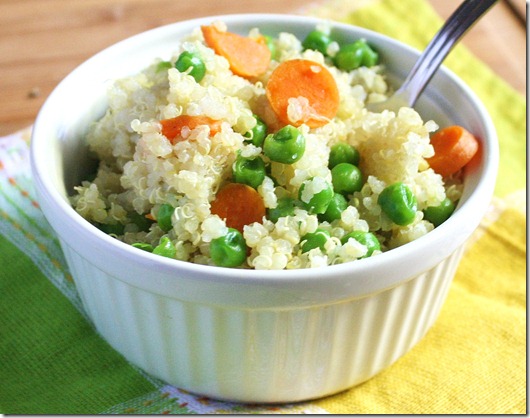
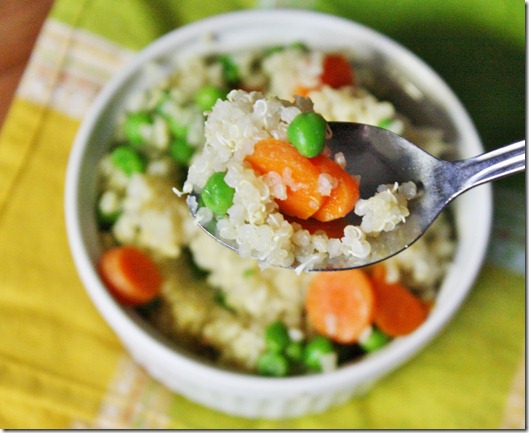
Peas and carrots seem to be the quintessential baby food. I’m not sure why; they’re two vegetables that just about anyone can enjoy. Dressed up with quinoa, they’re perfectly good for adults, too. And these were good. Now I see why all the fuss over peas. I can’t believe I’ve gone so long without trying them! Never again. I find their sweet, earthy pop of flavor addicting. I absolutely couldn’t get enough of this when I made it, and you won’t be able to either.

Peas And Carrots Quinoa

    Prep time: 5 minutes

    Cook time: 15 minutes

    Ingredients(Makes 4 servings):

    • 1 cup uncooked quinoa, washed and drained
    • 1/2 cup cooked peas
    • 1 carrots, sliced thinly
    • 1/2 teaspoon salt
    • 1 Tablespoon honey(optional)

peas-and-carrots-quinoa-over-head

    Method:

  1. Bring the quinoa and 2 cups of water to a boil over the stove.
  2. Add in the carrots and cook until the quinoa has soaked up all of the water.
  3. Add in the peas, salt, and honey. Mix and fluff the quinoa. Move to a serving bowl and serve hot.

peas-and-carrots-quinoa-spoonfull

More peas, please.
Orange And Herb Quinoa

orange-and-herb-quinoa

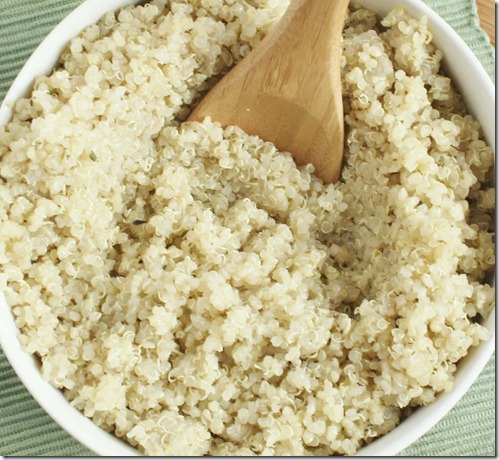
I’ve gotten into a practice—a good practice—where I make a big batch of quinoa over the weekend using this method to heat and serve throughout the week. It saves me a lot of time and dramatically increases my options for meals when I don’t really have the patience to cook or turn on the oven.

orange-and-herb-quinoa-scoop

I usually cook the quinoa in just water(as opposed to veg stock) because I’m never quite sure what I’m going to use it for. Sometimes I like it dressed up in Asian flavors like in this fried quinoa recipe and other times with more Western ingredients like this recipe, which I could just as easily see served with roasted chicken and mashed potatoes. It’s an easy way to dress up leftovers so that it doesn’t taste anything like it started as.

Orange and Herb Quinoa

Prep time: 5 minutes(longer if you aren’t using leftover quinoa)

Cook time: 0 minutes

Ingredients(Makes 4 servings):

  • 2 cups cooked quinoa(or 1 cup uncooked quinoa and 2 cups water)
  • Juice from 1/2 an orange(2-3 Tablespoons)
  • Zest from 1/2 an orange
  • 1 Tablespoon extra virgin olive oil
  • 3/4 teaspoon herbs de Provence(or any other seasoning blend)
  • 1/2 teaspoon salt
  • 2 Tablespoons sugar(optional)

orange-and-herb-quinoa-bowl

Method:

  1. If using uncooked quinoa, bring to a boil over the stove with the 2 cups of water and cover with a lid until the water’s been absorbed and the quinoa shows that it’s cooked like above.
  2. Mix the cooked quinoa with all of the other ingredients thoroughly. Adjust the taste by adding more salt or sugar.
  3. Serve cold or heat up briefly in the microwave or oven for a warm side dish.

orange-and-herb-quinoa-plated

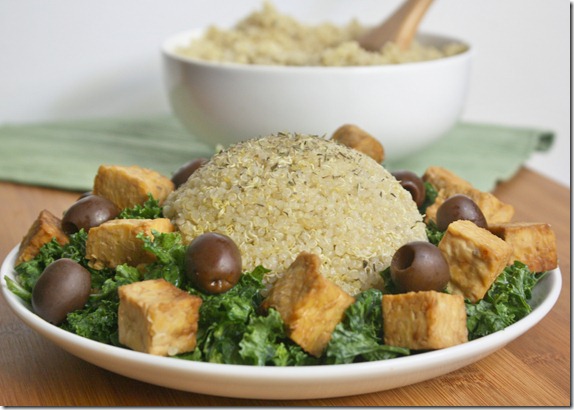
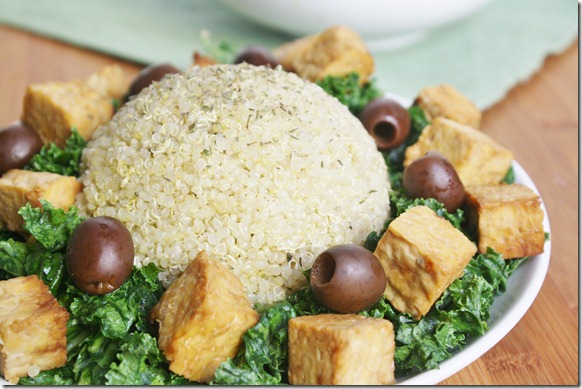
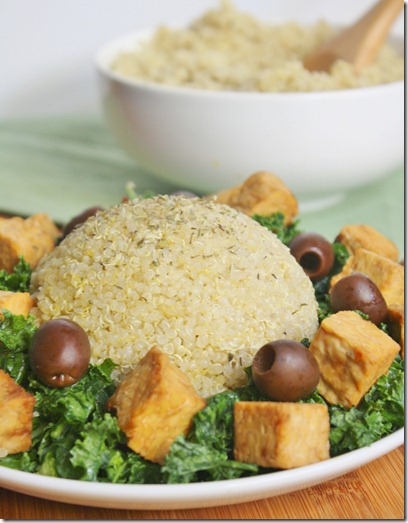
Shown with kale, tempeh cooked in soy sauce, and black olives.

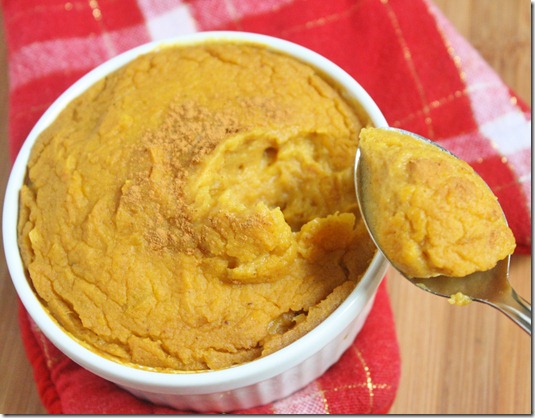
Baked Butternut Squash Mash

Baked-Butternut-Squash-Mash

Now is my favorite time of the year, for food at least. I love pumpkin, squash, mashed potatoes, sweet potatoes—basically anything starchy that looks like baby food. Naturally I was excited to see local squash at the farmers’ market last week and picked out the biggest, most obscene looking butternut squash I could find.

Baked-Butternut-Squash-Mash-spoonful

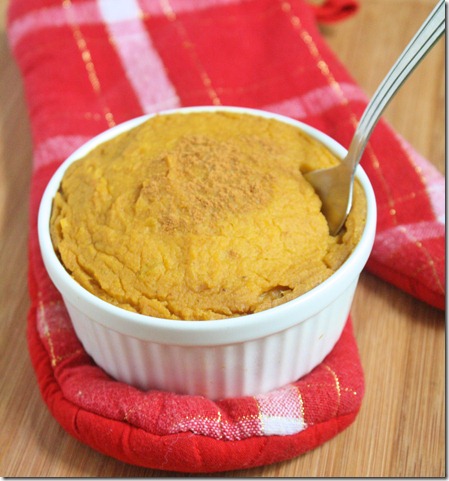
Like I said, this is basically glorified baby food: Smooth squash puree mixed with amber maple syrup, rich cream, and nutty spices. It’s reminiscent of a pie filling but without the overpowering sweetness so you can feel good about eating this with dinner. It’s definitely a new favorite that I’ll probably turn to time and time again the next few months; it’s good enough that I’d invite it to the Thanksgiving table!

Baked Butternut Squash Mash

Prep time: 5 minutes

Cook time: 30 minutes

Ingredients(Makes 4 servings):

  • 3 cups butternut squash puree*
  • 1/2 cup almond cream(recipe below) or regular cream or other non-dairy cream
  • 3 Tablespoons maple syrup
  • 1/2 teaspoon salt
  • 1/2 teaspoon cinnamon
  • 1/4 teaspoon nutmeg

*This is easy to make yourself. Roast a medium-sized butternut squash until the inside is soft. Scoop the flesh out from the skin and puree it in a food processor until smooth.

For the almond cream:

  • 3 Tablespoons smooth almond butter
  • 5 Tablespoons water

Method:

  1. In a small bowl, whisk together the almond butter and water until it forms a rich and smooth liquid.

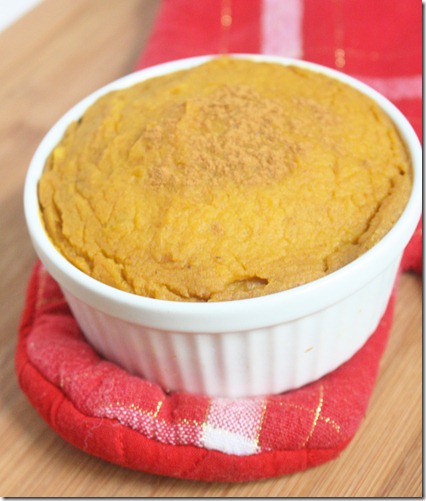
Baked-Butternut-Squash-Mash-out-of-oven

Method:

  1. Preheat your oven to 375 degrees
  2. Stir together the butternut squash puree, cream, maple syrup, salt, cinnamon, and nutmeg until completely combined.
  3. Scoop the squash into a large casserole dish or individual ramekins. Bake for 20-30 minutes until the squash is heated through and the top has goldened slightly and begun to crack.
  4. Garnish with cinnamon and serve hot.

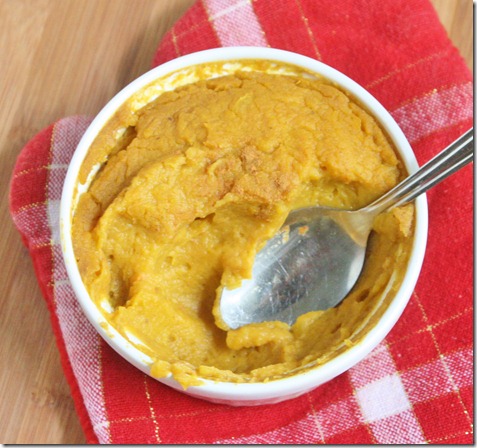
Baked-Butternut-Squash-Mash-bowl

There were no leftovers, but I figured a picture of a half-eaten bowl was better than an empty bowl.

Now what other squash can I find?

How To Cook Quinoa In A Rice Cooker

how-to-cook-quinoa-in-a-rice-cooker

Last year around this time I bought a rice cooker. Since then I’ve made rice approximately 2 times, both being for other people. I just don’t care for rice. Why’d I buy it then? To cook other things like quinoa.

Quinoa is traditionally made in a pot on the stove. That method works well if you have a full kitchen, but there are definitely benefits to using a rice cooker, too.

    • You don’t have to watch a rice cooker as much as a burner.
    • Rice cookers with “keep warm” settings make it easy to serve warm food even during a busy party.
    • You can use a rice cooker almost anywhere there’s an electrical outlet—even in a dorm room.

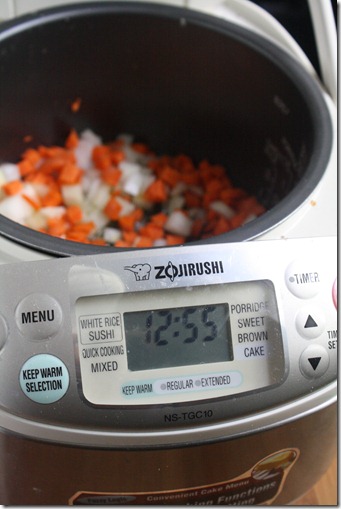
how-to-cook-quinoa-in-a-rice-cooker-brand

I use a Zojirushi rice cooker. They’re one of the more expensive brands but totally worth the extra cost. This will last for years and years, is easy to clean, and has plenty of cooking features. I’ve made a number of different things in it, from quinoa to date paste. It’s worth the investment if you’re in the market for a rice cooker.

How To Cook Quinoa In A Rice Cooker

Prep time: 5 minutes

Cook time: 30 minutes

Ingredients(Makes 4 servings):

  • 1/2 an onion, small diced
  • 1 large carrot, small diced
  • 2 Tablespoons olive oil
  • 1 cup quinoa, rinsed and drained
  • 2 1/2 cups water or stock
  • 3/4 teaspoon salt(omit if using salt)

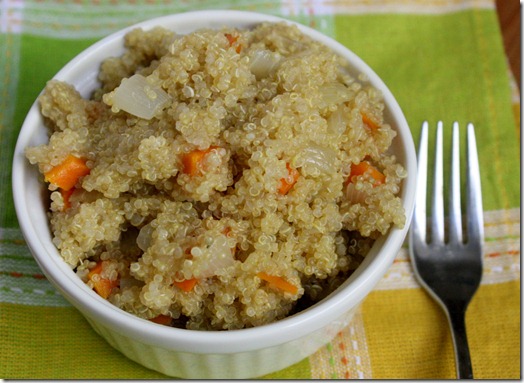
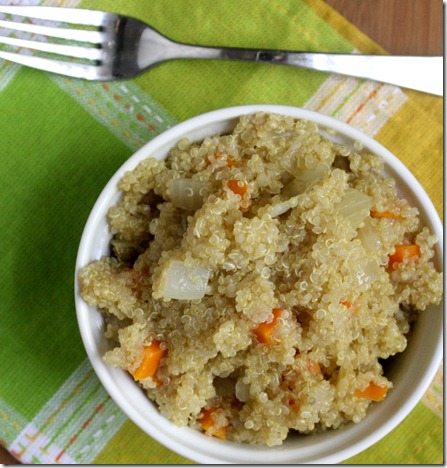
how-to-cook-quinoa-in-a-rice-cooker-finished

Method:

  1. “Sauté” the carrots and onion in the bottom of the rice cooker by cooking them in the oil on a high-heat setting until the onions are translucent.
  2. Add in the quinoa, liquid, and seasoning if using. Close the lid on the rice cooker and cook on high for 15-20 minutes until the liquid has boiled off. The quinoa will be ready when it has doubled in volume and a “tail” sprouts from the end.
  3. Fluff the quinoa with a serving spoon and serve hot or let cool and store in a sealed container in the refrigerator for 2-3 days.

how-to-cook-quinoa-in-a-rice-cooker-overhead

Once you get comfortable preparing basic quinoa, you can make more complex recipes, all while still using your rice cooker. Here are a few of my favorites that I have picked to make for Fall:

Vegged-Out Quinoa

The Best Quinoa Dressing

Savory Pumpkin Quinoa

How To Prepare Beets + A Beet Salad Recipe

How-To-Prepare-Beets

When I worked in a restaurant over the Summer, I spent more time with beets than I’d ever thought I would. I would work on preparing them for service for hours. I thought I’d never touch them again until I saw them at the farmers’ market last week and decided to grab some to share my knowledge.

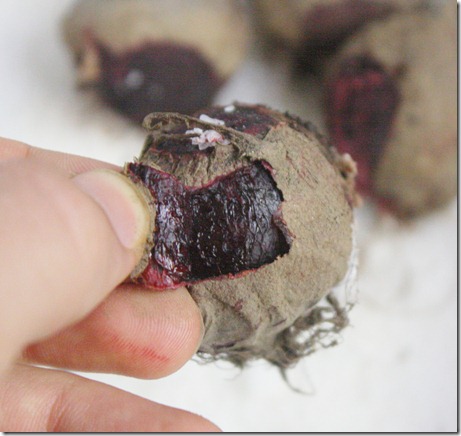
Beets aren’t exactly difficult to prepare, just a bit tedious. First we roasted them in a salt bath. The theory is that the beets absorb the salt, making their sweetness more potent. Whether that worked or not we constantly debated. Once they came out of the oven, we had to peel them, all done by hand while still piping hot. It was not the most fun job to have to do for an hour, and my fingers often looked like I had just committed a murder afterwards.

How-To-Prepare-Beets-Stem

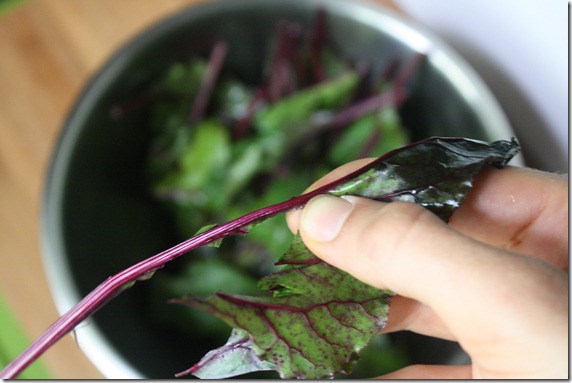
The other part of beet preparation was the greens. I didn’t know beet greens were even edible; I had always thrown mine away thinking they were poisonous like radish leaves. The proper way to peel a beet green is to pinch the leaves and remove the long, thick, purple spine in the middle. Doing this with one bunch of beets isn’t too troubling; doing it with 30 bunches of beets—well, that was anther story.

Roasted Beets

Prep time: 5 minutes

Cook time: 1 hour 10 minutes

Ingredients:

  • 1 bunch of beets, stems removed
  • 1/2 cup salt

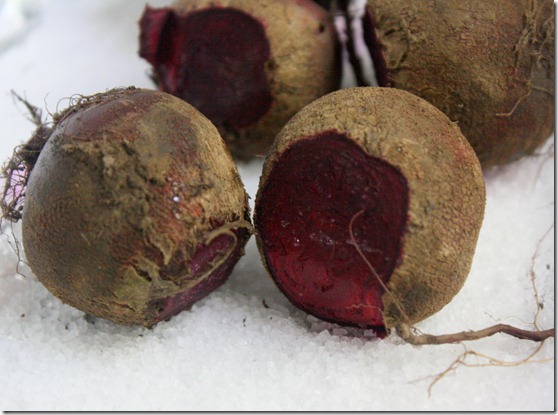
How-To-Prepare-Beets-Raw

Method:

  1. Preheat your oven to 400 degrees.
  2. Pour the salt down on a baking tray.
  3. Lay the beets down on top of the salt. Roast for 60-70 minutes until a fork can pass through easily.
  4. Remove the tray from the oven and let cool slightly for 5 minutes or so.
  5. Gently peel the skin off of the beets using your hands. You might want to use a dish towel to protect your hands from the heat and dye of the beets.

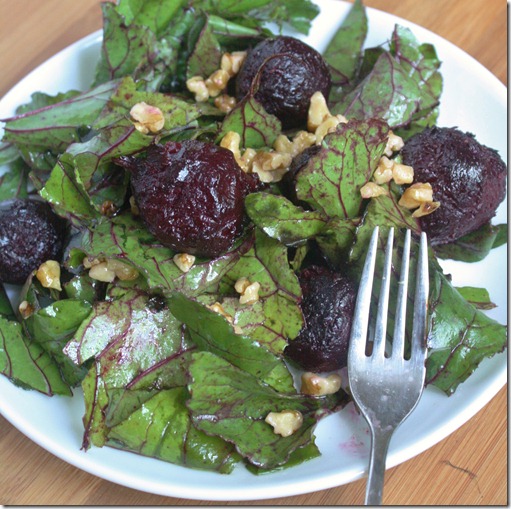
We served our beets in the restaurant in a salad. The salad prepared there had goat cheese and pistachios in it. Since I don’t eat cheese and didn’t have pistachios, I made a modified version with oil and walnuts. The recipe below could work for either variation.

Roasted Beet Salad

Prep time: 5 minutes

Cook time: 0 minutes

Ingredients(for 1 serving):

  • 6 medium-sized roasted beets, cooled to room temperature
  • Greens from one bunch of beets, washed and deveined
  • 1/4 cup crumbled goat cheese(optional)
  • 1/4 teaspoon salt(omit if using goat cheese)
  • 1 Tablespoon olive oil(omit if using goat cheese)
  • 2 Tablespoons crushed walnuts or pistachios

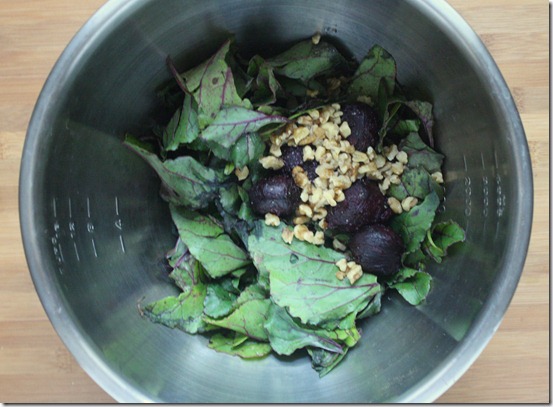
How-To-Prepare-Beets-Ingredients

Method:

  1. Combine all of the ingredients in a large bowl
  2. Toss the ingredients until thoroughly mixed together.
  3. Plate and serve at room temperature.

How-To-Prepare-Beets-Salad

If my restaurant experience taught me anything, it’s that I’m perfectly happy eating canned beets. They’re cheaper, more convenient, and just as nutritious. That being said, preparing your own beets from scratch makes for an impressive dish.

How To Fry Plantains

how-to-fry-plantains

I’d say I’m an adventurous eater and an adventurous cook. I’ll try anything once… except for deep frying, because we really don’t need to get the fire department involved.

For a long time I had never had a plantain. They just seemed… odd.

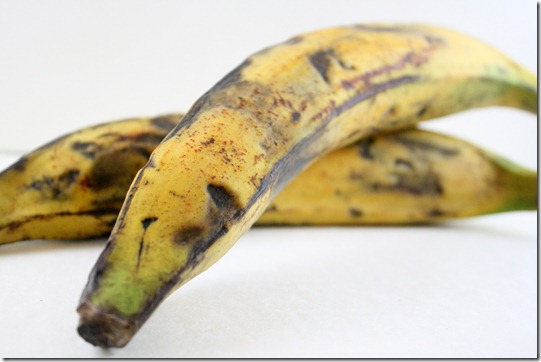
how-to-fry-plantains-ingredient

I mean, look at that—isn’t that kind of creepy? But also familiar looking. It took a freelance job to lure me outside of my comfort zone and try a plantain for the first time. And you know what? It wasn’t bad; in fact, it was good. The flavor was surprisingly sweet compared to what I expected. In fact it was cloyingly sweet, more like an apple than a banana. But the savory oil helped to balance out the flavors. Since then I’ve bought plantains and made them for myself a few times and I can’t figure out for the life of me why more cultures haven’t tapped into this delicious starch.

How To Fry Plantains

You’ll need(for 4 side servings)…

  • 2 plantains
  • 1 Tablespoon coconut oil*

*or other neutral oil.

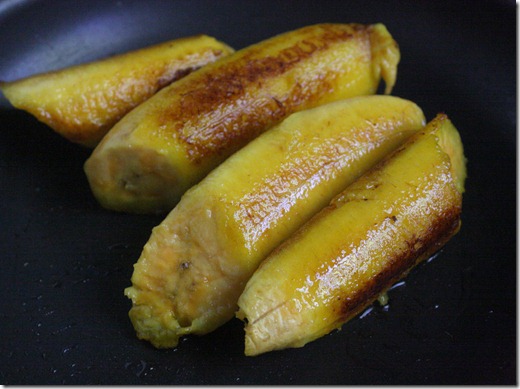
how-to-fry-plantains-pan

Method:

  1. Peel the plantains and slice them on a bias.
  2. Heat the oil in a large frying pan over medium heat.
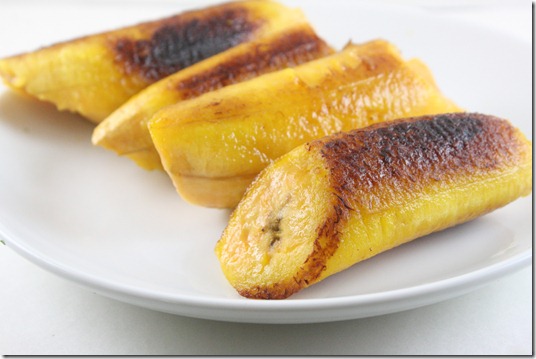
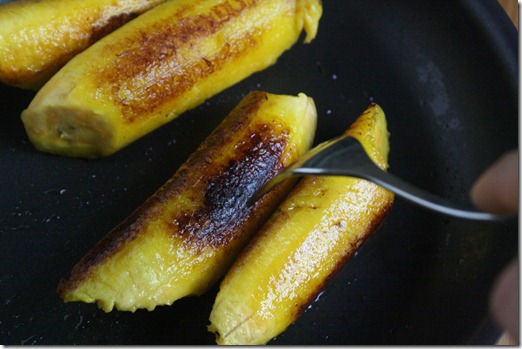
  3. Fry the plantains in the oil, turning every minute or so to brown each side.
  4. When browned all around, remove from the heat, drain from the oil, and serve hot.

how-to-fry-plantains-turning

I really like the subtle flavor of coconut with the plantains for a true tropical flavor. If you’re serving this as a dessert, sprinkle a couple tablespoons of brown sugar into the pan towards the end of cooking.

Have you ever tried a plantain? If not, would you try one now?

Nutty Roasted Broccoli

nutty-roasted-broccoli

A lot has changed since I started this blog 11 months ago. Personally, I think I’ve become a better blogger. I got my first DSLR camera for Christmas last year. At the time I didn’t know how to use it; hell, I’m still learning how to use it. I shot in auto-mode for so long that I’m just getting around to teaching myself to shoot in manual, which I’m enjoying more and more.

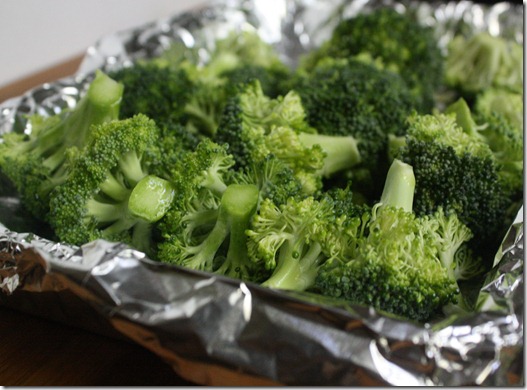
nutty-roasted-broccoli-raw

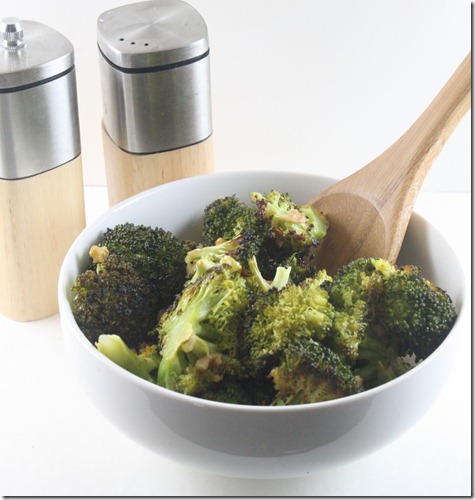
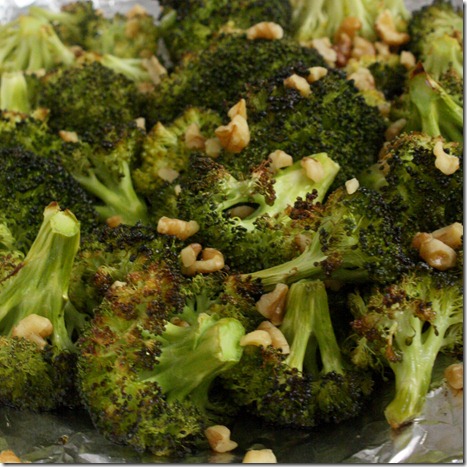
Even though my photos and writing may have changed, my recipes and the way I eat really hasn’t. Case in point: I made this broccoli last year and blogged about it, and I’m still making it today. I thought it deserved a new post, one that makes it look as great as it tastes. If you’ve never tried roasted broccoli before, you’re really missing out. It’s tender and earthy with a nutty flavor—like no other broccoli you’ve ever eaten. Toasted walnuts add a nice added crunch and compliments the flavor.

You can use frozen instead of fresh in this recipe, too, however the broccoli will have a soggy bite to it.

Nutty Roasted Broccoli

Prep time: 5 minutes

Cook time: 30 minutes

Ingredients(makes 4 servings):

  • 3 cups fresh broccoli florets
  • 3 Tablespoons olive oil
  • 3/4 teaspoon salt
  • 1/4 cup walnuts, crushed and toasted

nutty-roasted-broccoli-tray

Method:

  1. Preheat your oven to 375 degrees.
  2. Lay the broccoli florets out in a single layer on a baking tray.
  3. Pour the oil on top and sprinkle on the salt. Toss a few times with your hands.
  4. Roast in the oven for 30 minutes.
  5. When the broccoli’s done, take the tray out of the oven and add in the walnuts. Toss to distribute. Serve hot.

nutty-roasted-broccoli-bowl

Seriously, what was I thinking photographing in automatic all Summer when the lighting is best? I’m just learning more and more about aperture thanks to Anne’s guest post, and it’s like seeing through a whole new lens. It’s definitely worth the read to any photo enthusiasts.

Nutmeg Roasted Acorn Squash

nutmeg-roasted-acorn-squash

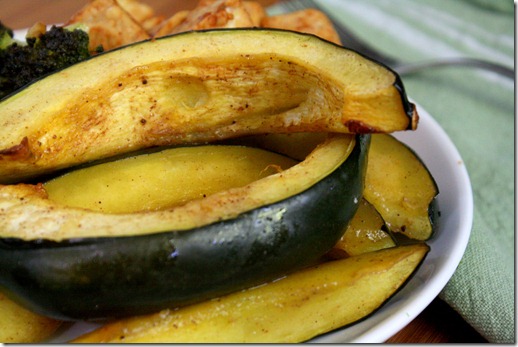
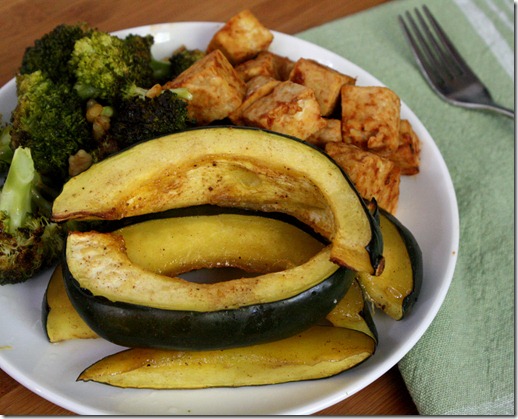
I’m already excited for Fall, not because of the weather or anything but because of the food. Roasted squash is comfort food to me. When they come into season there’s suddenly a treasure trove of new food to eat–acorn, pumpkin, butternut, spaghetti. All different and all delicious in their own way.

nutmeg-roasted-acorn-squash-pan

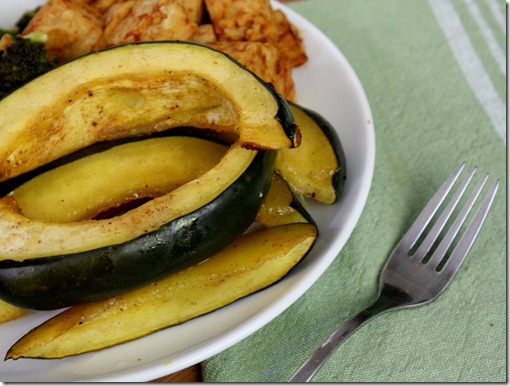
This recipe uses nutmeg, which is one of the more aggressive spices. It’s so aggressive it’s poisonous in large amounts, so you might want to have a light hand when seasoning this. The cinnamon helps to smooth out the flavor. By the end of cooking it smells like someone’s just baked a pie; that’s a smell that’s always welcomed in my house. 
Nutmeg Roasted Acorn Squash

Prep time: 5 minutes

Cook time: 45 minutes

Ingredients:

  • 1 acorn squash
  • 1/4 cup maple syrup
  • 1/2 teaspoon nutmeg
  • 1/4 teaspoon cinnamon
  • 1/2 teaspoon salt

nutmeg-roasted-acorn-squash-bowl

Method:

  1. Preheat your oven to 375 degrees.
  2. Cut the squash in half and remove the stringy inner seeds.
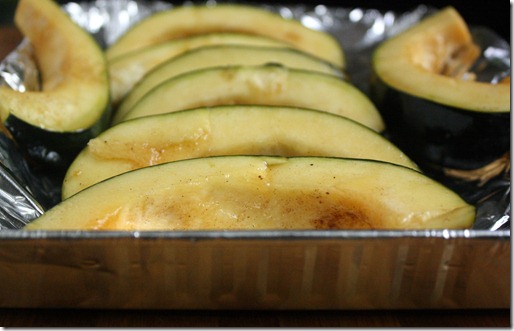
  3. Cut the squash along each ridge into long strips.
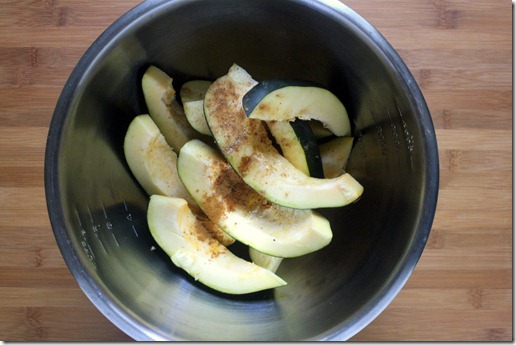
  4. In a mixing bowl, toss the squash, maple syrup, nutmeg, cinnamon, and salt until the squash is completely covered.
  5. Lay the squash out on a baking tray and roast for 45 minutes. Serve hot.

nutmeg-roasted-acorn-squash-close-up

Despite the maple syrup, this recipe isn’t very sweet; it’s mostly spicy. There’ll be a lot of leftover spiced maple syrup in the mixing bowl. You can either pour it on top of the squash before roasting or reserve it as a finishing touch on the plate.
nutmeg-roasted-acorn-squash-plate

Sesame Mushroom And Kale

sesame-mushroom-and-kale

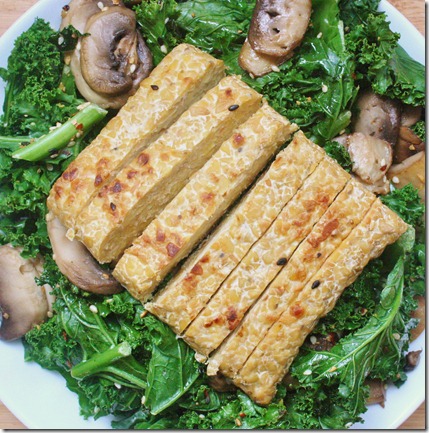
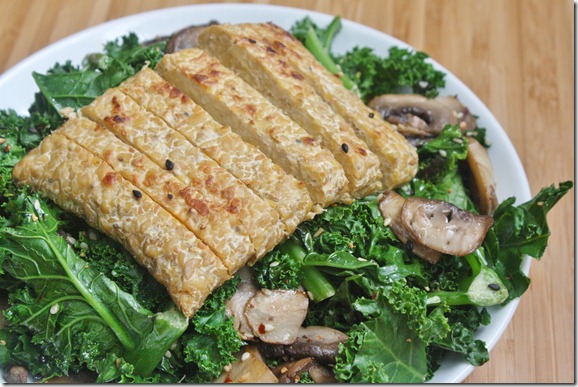
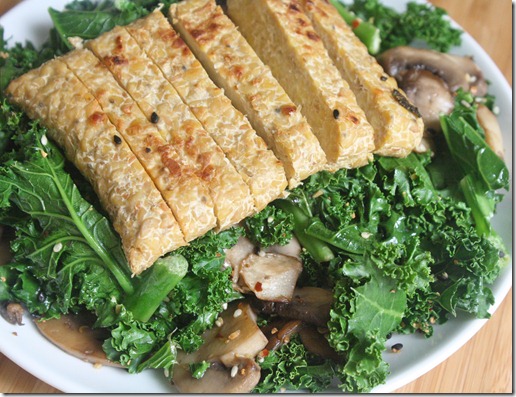
Last week a reader asked me to post about how I cook kale and specifically a mushroom/kale side dish I photographed. You don’t have to ask me twice to cook this dish; kale and mushrooms are two of my favorite foods when prepared properly.
This recipe cooks kale by steaming it, which gets it to that soft and tender point without removing many nutrients. Properly steamed kale should be bright green, stiff, and still have a crunch in its stalk.

As for the mushrooms, I’m a big believer in that you don’t need to buy the expensive mushrooms to bring out an expensive flavor. Mushrooms do a great job of soaking up whatever you give them, so I use oil and seasonings to make the cheapest mushrooms taste like a 5 star dish. 

sesame-mushroom-and-kale-ingredient

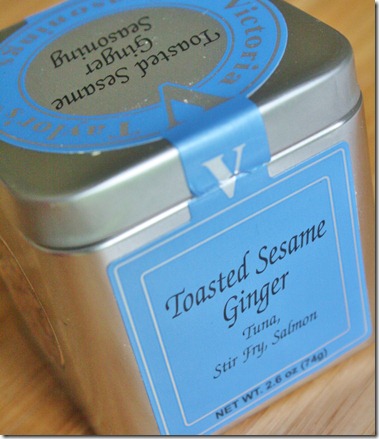
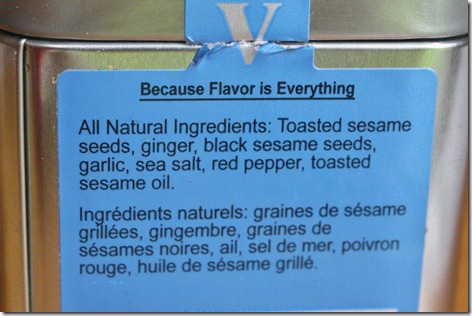
I’m crazy for this sesame seasoning I got in a swag bag from a conference last month.

sesame-mushroom-and-kale-sesame-blend

They do not hold back on the ginger, which I love. You can either use a seasoning like this or make the recipe with just sesame seeds and salt for a milder flavor.

Sesame Mushroom And Kale

Prep time: 0 minutes

Cook time: 10 minutes

Ingredients(makes 2 servings):

  • 2 Tablespoons sesame oil
  • 2/3 cup sliced mushrooms
  • 2 cups kale
  • 1/2 teaspoon salt
  • 1 Tablespoon sesame seeds

sesame-mushroom-and-kale-overhead

Method:

  1. Heat the oil in a pan that has a lid over medium heat.
  2. Sauté the mushrooms until they’ve browned on both sides.
  3. Add the kale and cover the pan. Let it stand still for about a minute while the kale steams.
  4. When all of the kale has turned a vibrant green color, remove the pan from the heat. Add the salt and sesame seeds and toss all of the ingredients together.
  5. Serve hot.

sesame-mushroom-and-kale-with-tempeh

I like to eat mine with seared tempeh, another favorite. Just toss the tempeh in the pan and cook it until it’s browned on both side. It’s delicious and one of the healthiest soy products for you. If you know anyone who refuses to eat healthy because they think healthy eating is bland, this is the dish that will change their mind.

Healthy Chinese Broccoli

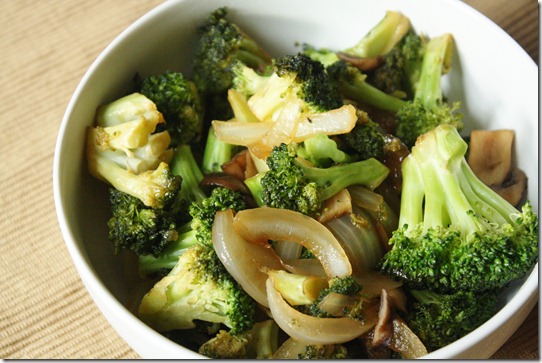
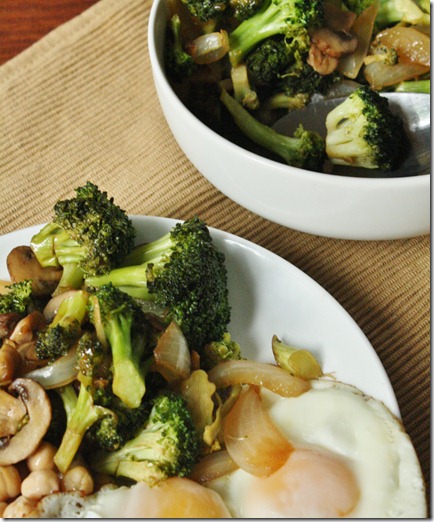
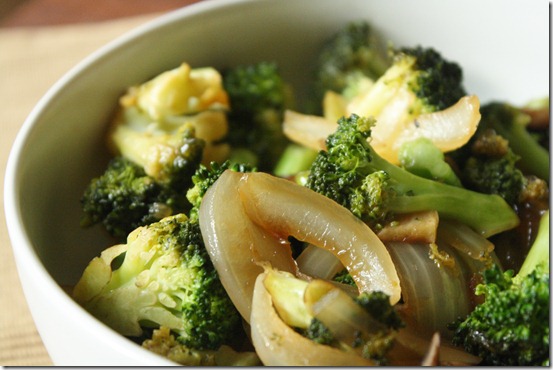
Healthy-Chinese-Broccoli

My favorite Chinese take-out to order has always been broccoli: Beef and broccoli, mushroom and broccoli, bean curd and broccoli. They just know how to do something to broccoli that makes it taste good. No doubt it’s full of sodium and sugar, which is part of why I wanted to make this myself. The other reason is, well, who doesn’t want to have delicious take-out food at half the cost whenever they feel like it?

Whether or not this is “healthy” you can debate. It has added sugar and a modest amount of sodium. Corn starch isn’t too “clean” an ingredient either. But I think making it for yourself, using ingredients you can see and touch, and being aware of what’s in your food is a pretty darn healthy way to live.

Healthy Chinese Broccoli

Ingredients(Makes 4 servings):

  • 4 cups raw broccoli
  • 2 Tablespoons sesame oil
  • 4 garlic cloves, minced
  • 1 yellow onion, julienned
  • 3 Tablespoons sugar
  • 2 Tablespoons rice vinegar
  • 2 Tablespoons soy sauce
  • 2 Tablespoon water
  • 1 Tablespoon corn starch or tapioca starch

Healthy-Chinese-Broccoli-Dish

Method:

  1. In a large pan, heat the sesame oil over a burner set to medium heat.
  2. Sauté the garlic in the sesame oil until lightly browned.
  3. In a small cup, mix the sugar, rice vinegar, and soy sauce until the sugar has mostly dissolved.
  4. Add the broccoli, onion, and sugar mixture into the pan and cover with a lid until the broccoli has steam cooked and turned bright green.
  5. While continuing to cook, remove the lid and mix together the contents of the pan until everything is covered in sauce.
  6. Dissolve the starch into 2 tablespoons of water and pour it into the pan to mix with the sauce.
  7. Cook until all the excess water has evaporated and the broccoli is covered in sauce. Plate and serve hot. 

Healthy-Chinese-Broccoli-Bowl