Category Archives: Entree

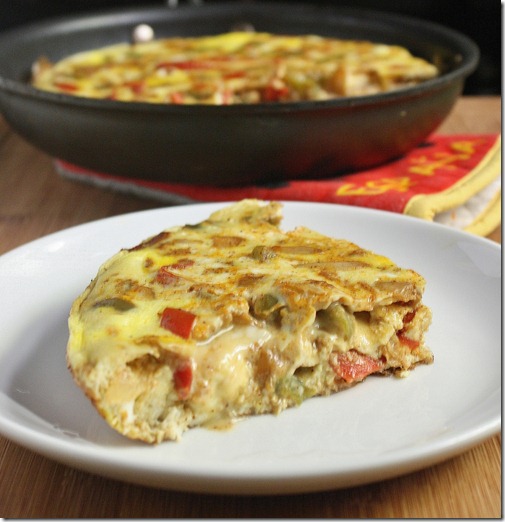
Southwestern Stovetop Frittata

Oct 6th 142

My weekly schedule is a little funny. Tuesday and Thursday are always go-go-go and I hardly have time to sit down and eat let alone cook. But on Wednesday I have all the time in the world if I work enough over the weekend to take my time and lounge around. This Wednesday I realized I didn’t have very much food to get me through the next couple of days, so what did I do? Cook. A lot.

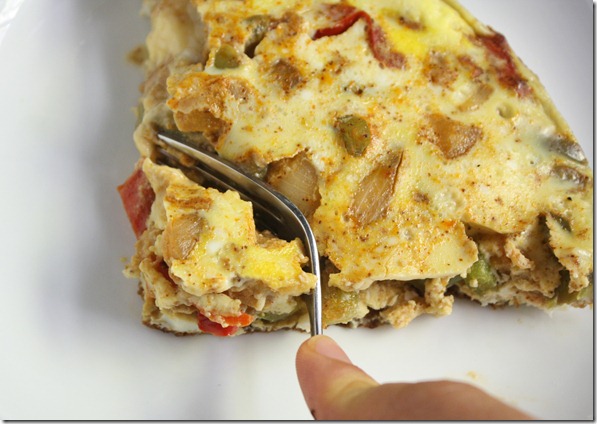
On top of lunch and dinner, I roasted a spaghetti squash, acorn squash, and used up a dozen eggs in this frittata. My 3-foot fridge might have been bursting open with squash that night, but it’s made my next couple days a breeze. I ate 3 servings of this frittata yesterday and still wanted more after dinner. I can tell I’ll be making another again soon. 

Oct 6th 122

If you don’t feel like cutting the peppers and onion yourself, check in the frozen section of your grocery store for something called a “southwestern vegetable blend” and substitute the vegetables here for 1 cup of the vegetable blend.

Southwestern Stovetop Frittata

Prep time: 15 minutes

Cook time: 10 minutes

Ingredients(Makes 4 servings):

  • 12 medium eggs
  • 1 red bell pepper, julienned
  • 1 green bell pepper, julienned
  • 1 yellow onion, diced
  • 1 Tablespoon oil
  • 1/4 teaspoon chili powder
  • 1/4 teaspoon cayenne pepper
  • 1/4 teaspoon cumin
  • 1/4 teaspoon garlic powder
  • 1/2 teaspoon salt
  • 1/2 cup shredded Mexican blend or cheddar cheese(optional)

Oct 6th 148

Method:

  1. Heat the oil in an 8’ non-stick pan with a fitting lid over medium heat.
  2. Add in the peppers, onion, spices and salt and sauté until the onion is translucent. Make sure to mix the ingredients to evenly distribute the spices.
  3. In a large bowl, crack and beat all of the eggs.
  4. Remove the onion and peppers from the pan and pour in the beaten eggs(if you’re using a pan that’s not non-stick, it’s a good idea to add a little oil to the bottom before doing this).
  5. Wait 10 seconds and then distribute the onion and peppers and cheese if using into the egg batter.
  6. Put a lid on the pan and leave untouched for 10 minutes until the egg has cooked through. You’ll be able to tell it’s done when the egg in the center has set.
  7. Remove from the pan and cut into quarters. Serve hot.

Oct 6th 171

Next time I try this I think I’ll add some cheddar-style Daiya, because if it’s that good without cheese it can only be better with.

Fried Quinoa

fried-quinoa

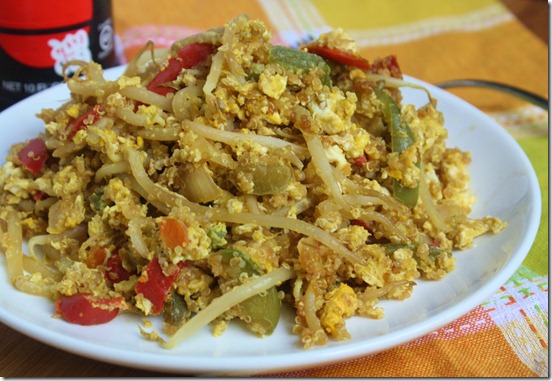
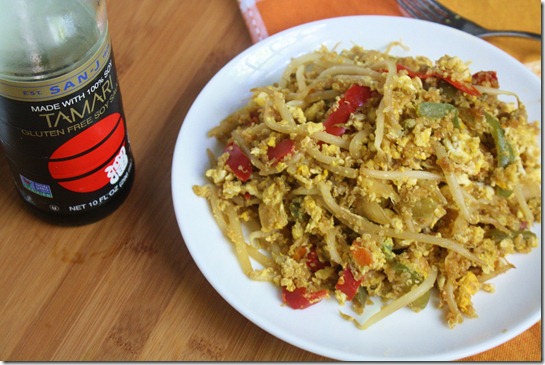
The downside(or benefit depending on how you look at it) of making things like quinoa in big batches is that you have the same old food meal after meal. Luckily, quinoa is one grain that’s easy to dress up. You can eat it in the morning in place of oatmeal, or later on in place of rice. Here I used it to make a tasty, higher protein version of fried rice.

fried-quinoa-plated

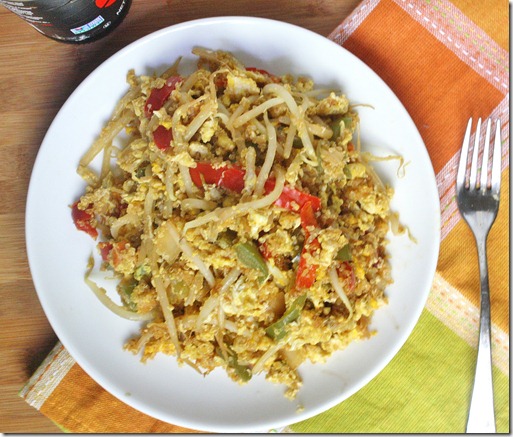
I’ve never really found rice interesting, even as fried rice from a halfway decent Chinese takeout restaurant. This, however, I could eat meal after meal. The vegetables and egg add a play of textures and the quinoa has a nice nutty flavor to it to compliment the sesame oil. Add some stir-fried tofu or chicken and you’re good to go.

Of course, if you have leftover rice you could make the same recipe subbing in rice for quinoa and have a more traditional dish.

Fried Quinoa

Prep time: 5 minutes

Cook time: 10 minutes

Ingredients(makes 2 servings)

  • 1 cup cooked quinoa
  • 2 Tablespoons toasted sesame oil
  • 3 Tablespoons soy sauce(use wheat-free tamari for a gluten-free meal)
  • 1/2 an onion, diced
  • 1 bell pepper, chopped into bite-sized chunks
  • 1/2 cup bean sprouts
  • 4 eggs

fried-quinoa-soy-sauce

Method:

  1. Heat the oil and soy sauce in a large frying pan over medium-high heat until the oil starts to bubble.
  2. Add in the onion and sauté until translucent.
  3. Add in the quinoa, pepper, and bean sprouts. Toss the pan to mix. Cook until all the liquid has been absorbed and the quinoa on the bottom of the pan begins to pop.
  4. Crack the eggs directly into the pan. Lightly mix them in with the other ingredients. Continue mixing until the all the whites and yolks have cooked through.
  5. Plate and serve hot. Can be kept in the refrigerator and reheated as leftovers for up to 3 days.

fried-quinoa-fork

I ate this as leftovers and it was most definitely better the next day, with a strong, nutty sesame flavor and crunchy bean sprouts.

Fava Bean Salad

fava-bean-salad

Fava beans are one of my favorite beans; they’re also probably the most underrated. It doesn’t help their reputation that they’re best known from Hannibal Lecter’s line in Silence of the Lambs where he boasts eating them alongside human liver and chianti. I promise this recipe has no liver or chianti. Well, you can add chianti if you’d like. But not liver. Not human at least.

fava-bean-salad-close-up

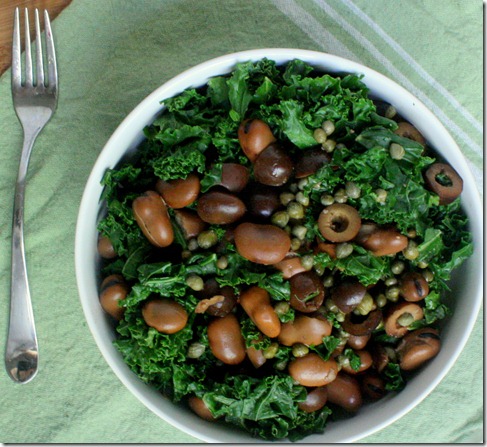
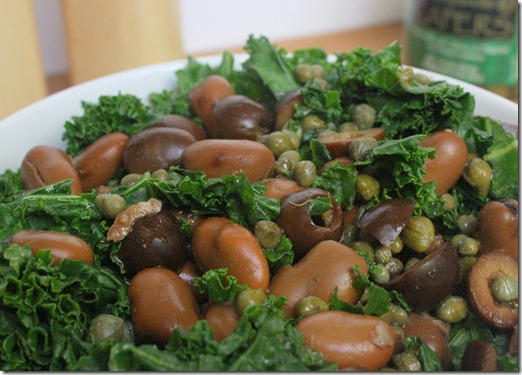
Fava beans have a much meatier texture and flavor to them than most other beans. Because of this I think they’d be more appealing to meat eaters than a chickpea or cannellini bean. They’re also able to hold their own against the boldness of kale, olives, and capers in a way that most other beans wouldn’t. 

Fava Bean Salad

Prep time: 5 minutes

Cook time: 0 minutes

Ingredients(Makes 2 servings):

  • 1 can cooked fava beans, drained
  • 1/4 cup sliced black olives
  • 3 Tablespoons capers
  • 2 cups kale, wilted
  • 1 Tablespoon olive oil(optional)

fava-bean-salad-ingredients

Method:

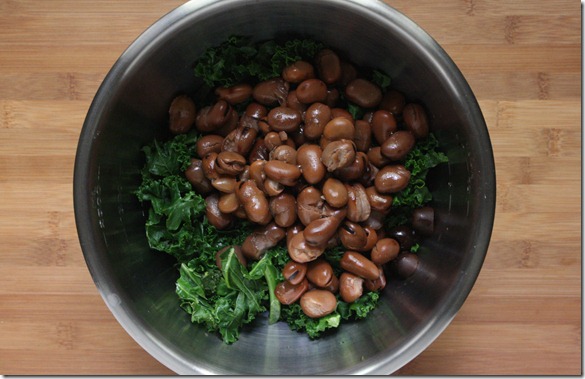
  1. Combine all of the ingredients together in a large bowl.
  2. Toss all of the ingredients together. Salt to taste if necessary. Serve cold or at room temperature.

fava-bean-salad-bowl

Since olives and capers are traditionally brined, you don’t need to season the salad with salt or vinegar and still have a flavorful dish with just 4 or 5 ingredients.

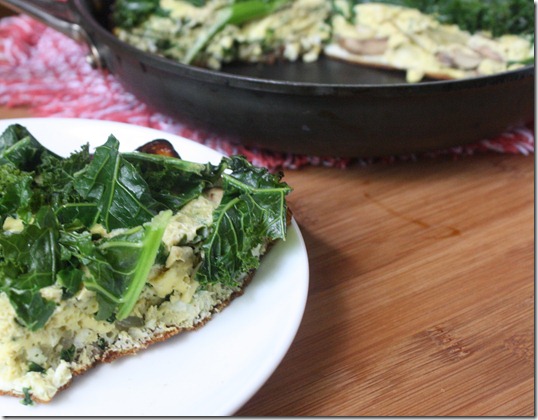
Stovetop Kale And Mushroom Frittata

Stovetop-Kale-And-Mushroom-Frittata

This school year I’m doing something different. For the first time, I’m completely off of meal plan. That means I’m making every meal for myself, 3(who am I kidding? 5) times a day.

I did enjoy dropping into the cafeteria and piling up options from the salad bar from time to time, or bumping into friends to have dinner with. But this undoubtedly feels better for me. I feel comfortable grocery shopping and making meals for myself, even if half of those meals are made in a microwave and completely unphotogenic. And it’s still easy to eat meals with friends, just at different places.
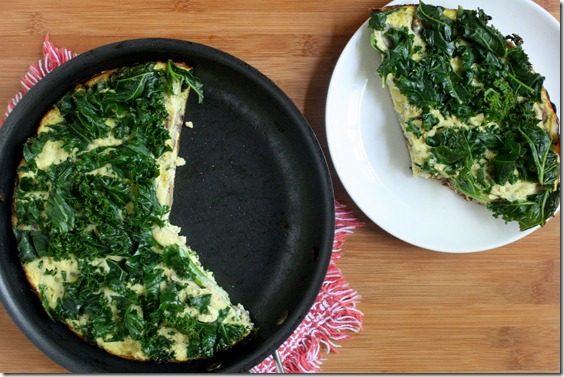
Stovetop-Kale-And-Mushroom-Frittata-Overhead

There are times, however, when it’s inconvenient. Tuesday and Thursdays I have class all day. There’s simply no time to cook. Because of that, I usually make meals like this frittata the day before to heat up and serve when I’m in a rush—a much better option than fast food. While a traditional frittata is baked, this one is made entirely on the stovetop; it’s for no reason other than I hate moving things around, and this is easy enough that anyone can do it. . 

Stovetop Kale And Mushroom Frittata

Prep time: 5 minutes

Cook time: 20 minutes

Ingredients(Makes 3 or 4 servings):

  • 12 medium eggs
  • 3/4 cup mushrooms
  • 1/2 an onion, diced
  • 2 Tablespoons oil
  • 1 cup chopped kale
  • Salt to taste

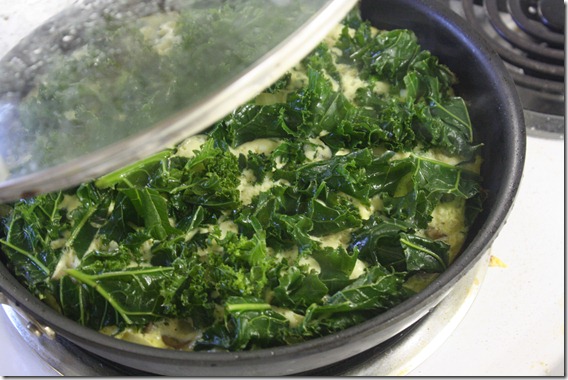
Stovetop-Kale-And-Mushroom-Frittata-Cooking

Method:

  1. In a large bowl, crack and beat the eggs. Set aside.
  2. Heat the oil in a 9 or 10-inch frying pan with a lid over medium heat. Sauté the onions and mushrooms until both are cooked. Remove these from the pan briefly.
  3. Put the pan back on the stove and pour in the beaten eggs. After 10 seconds or so, evenly distribute the mushrooms and onions throughout the batter.
  4. Gently press the kale on top into the raw egg and put the lid on the pan.
  5. Leave the frittata on the stove for 10 or 15 minutes undisturbed as it cooks. It will be ready when the egg in the center of the pan has set.
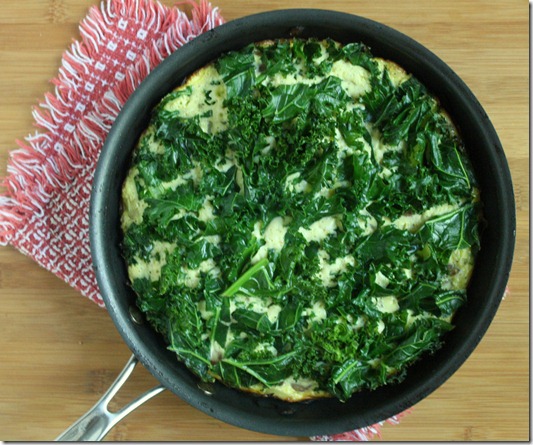
  6. When cooked, remove the pan from the stove and gently jiggle it to unstick the frittata from the bottom. Move to a plate to cut and serve.

Stovetop-Kale-And-Mushroom-Frittata-Pan

I get about 3 meals out of one pan. Frittatas are great because they work for any meal of the day. I’d happily eat this for all 3.

Orange Tempeh

orange-tempeh

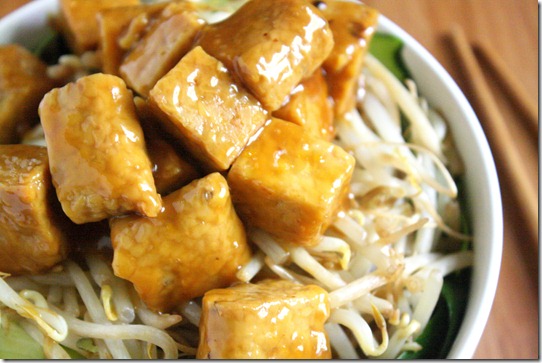
When I was in high school, we didn’t really have a traditional cafeteria; instead, we used a college campus’ union where they had tons of food options inside. Between my freshman and sophomore year, Burger King was moved out and in their place came a Panda Express. I wasn’t quite sure how to feel about that, since I loved the Burger King frozen chocolate pies so much. But one taste of Panda Express’ orange chicken and it was love at first bite.

I can’t count how many times I got that order over the next couple of years. Now I sometimes go back and get a little nostalgic just looking at the Panda Express sign. But since gluten and meat are out, Panda Express’ orange chicken is, too. So that inspired me to make my own; if I could make something half as good as their orange chicken without chicken or wheat, I’d be happy. Luckily I think I came upon with something half as good and more.

orange-tempeh-ingredient

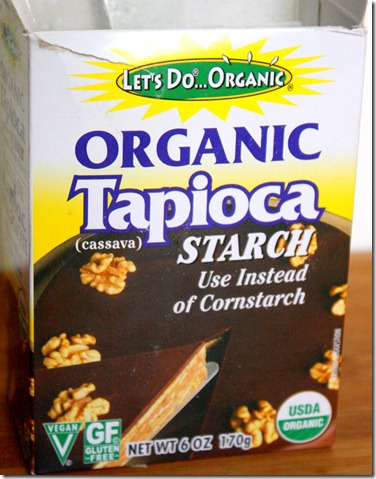
I used tapioca starch for a corn-free dish I was a little worried it wouldn’t be a good replacement, but it worked exactly the same. It’s something I now keep on hand at all times for gluten-free/grain-free baking and cooking.

Orange Tempeh

Prep time: 5 minutes

Cook time: 10 minutes

Ingredients(for 2 servings):

  • 1 block of tempeh, cubed
  • Juice of 1/2 an orange(about 2 Tablespoons)
  • 2 Tablespoons agave, or any sweetener
  • 1 Tablespoon soy sauce(or wheat-free tamari)
  • 1/2 Tablespoon sesame oil
  • 2 teaspoons rice vinegar
  • 1/4 teaspoon salt
  • 1 teaspoon siracha sauce(optional)
  • 1/2 Tablespoon tapioca or corn starch mixed with 2 Tablespoon water

orange-tempeh-bowl

Method

  1. In a small dish, mix together the orange juice, agave, soy sauce, vinegar, salt, sesame oil and siracha if using.
  2. Pour the mixture into a frying pan and heat over a burner set to medium.
  3. When the liquid is hot, add in the tempeh. Brown the tempeh on all sides in the sauce until half the liquid has boiled off, about 5 minutes.
  4. Pour the dissolved starch into the pan and mix it around with the tempeh and sauce to thicken up. If the sauce becomes too thick, add a couple tablespoons of hot water into the pan and mix it in until more of the starch has dissolved and adjust it until it forms a coating over the tempeh.
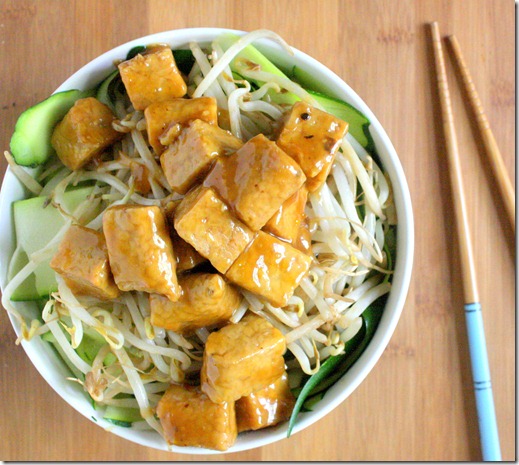
  5. Remove from the heat. Serve over vegetables or rice.

orange-tempeh-cube

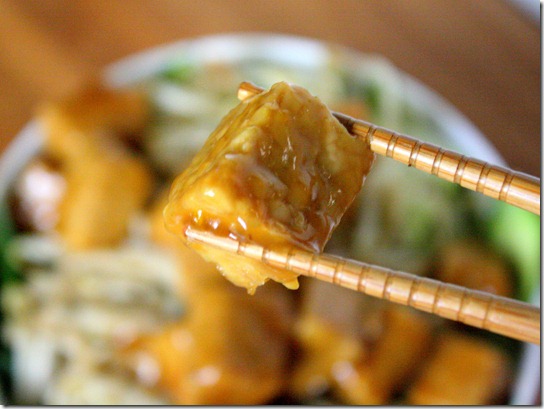
This sauce is slightly less sweet and more orange-flavored than Panda Express’, which I like in terms of complexity but not quite fitting for a Chinese take-out craving. You can play with the sweetness and saltiness by adding more sugar or soy sauce and adjust to taste.

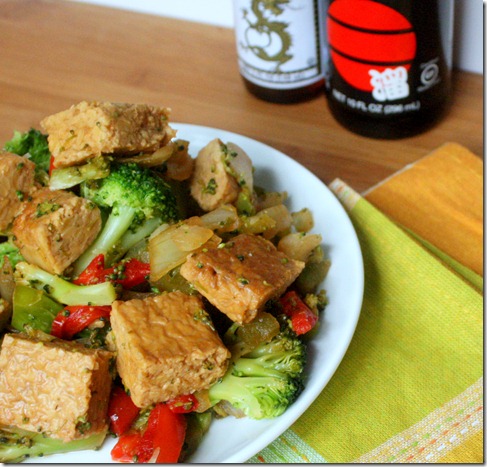
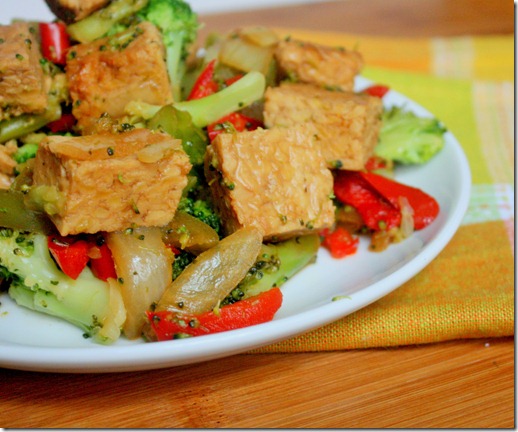
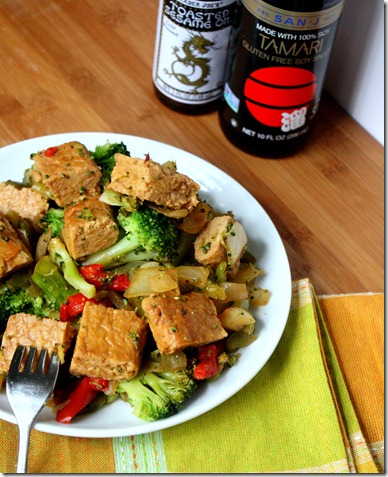
Tempeh And Broccoli

tempeh-and-broccoli

I’ve been getting a lot of questions on tempeh recently. I want to put all my thoughts into a post about it but until then you’ll only get recipes, which is pretty good considering half the time I eat tempeh it’s raw, cold from the fridge. I would not suggest eating it that way if it’s you’re first time; it would be a horrible, bland introduction to something that can be so tasty.

If tofu is soy chicken, tempeh is soy beef. It’s much firmer, earthier and has a chew to it. Naturally it’s a great vegetarian substitute for beef in Asian dishes, like beef and broccoli. Since broccoli was one of the three vegetables I liked growing up(the other being carrots and olives), beef and broccoli was what I always chose on Chinese take-out night. This recipe keeps all those same flavors and textures, but with whole food ingredients anyone can enjoy.

tempeh-and-broccoli-plated

You can substitute rice vinegar in place of apple cider vinegar for a more traditional ingredient list. I like apple cider vinegar here because it replicates the sweet, fruity flavor of plum sauce common in Asian cooking.

Tempeh And Broccoli(inspired by Caitlin)

Prep Time: 5 minutes

Cook Time: 10 minutes

Ingredients(makes 2 servings):

  • 1 block of tempeh, diced
  • 6 Tablespoons apple cider vinegar
  • 1/4 cup plus 1 Tablespoon soy sauce(or wheat-free tamari)
  • 2 Tablespoons agave nectar
  • 1 Tablespoon sesame oil, preferably toasted
  • 1/4 teaspoon chili powder
  • 2 cups broccoli, steamed
  • 1/2 onion, julienned
  • 1 bell pepper, julienned(optional)
  • 1/4 teaspoon garlic powder
  • 1/4 teaspoon salt

tempeh-and-broccoli-tablescape

  1. Combine the tempeh, apple cider vinegar, soy sauce, sesame oil, agave, and chili powder in a large pan and heat it on a burner set to medium-high.
  2. Cook for about 5 minutes flipping once until the liquid thickens up like a sauce.
  3. Add in the broccoli, onion, pepper, and garlic powder. Continue cooking over medium heat until the moisture has boiled off of the pan and the onions turn soft(about 5 minutes).
  4. Remove from the heat and season with salt. Plate and serve hot.

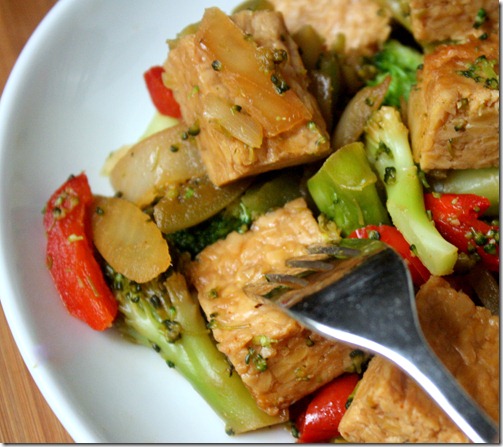
tempeh-and-broccoli-fork

When this is cooked the tempeh should be fork-tender with a sweet, nutty flavor and fall apart in your mouth. It’s a great introduction to a food that could become your best friend.
How To Massage Kale

how-to-massage-kale-serve

I know this is the second kale post in 3 days, but bear with me; it’s that good.

The first time I had massaged kale was at Whole Foods from the salad bar. It was so good I ended up getting it every time I went in. But after a while of paying $7.99 per pound for it I figured it had to be cheaper to make at home.

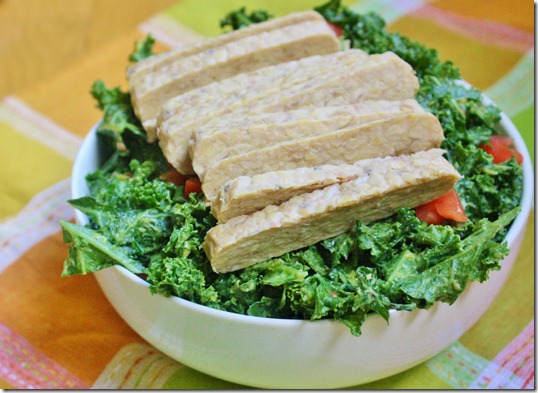
Massaging your own kale takes just a few ingredients and 5 minutes. It breaks down the kale without heating it so the nutrients all remain but the taste is less bitter and bite less sharp. It’s a great nutritious side dish or base for a salad.

how-to-massage-kale-music-candle

It’s totally optional but dimming the lights, lighting a candle, and putting on a slow song really sets the mood. This is a massage after all. 

How To Massage Kale

Prep time: 5 minutes

Cook time: 0 minutes

You’ll need(for 2 side servings)…

  • 2 cups roughly chopped kale
  • 1/2 a large avocado
  • Juice of 1/2 lemon(or lime), about 1 Tablespoon
  • 1 medium tomato, diced
  • 1/4 teaspoon sea salt

how-to-massage-kale-lime

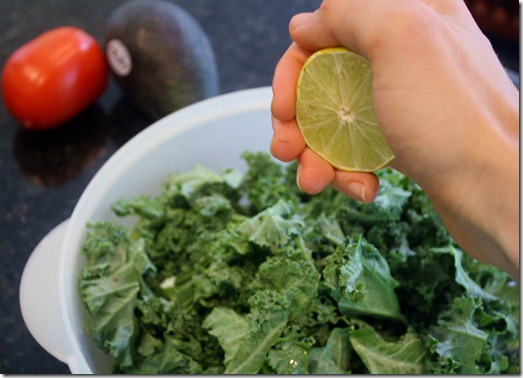
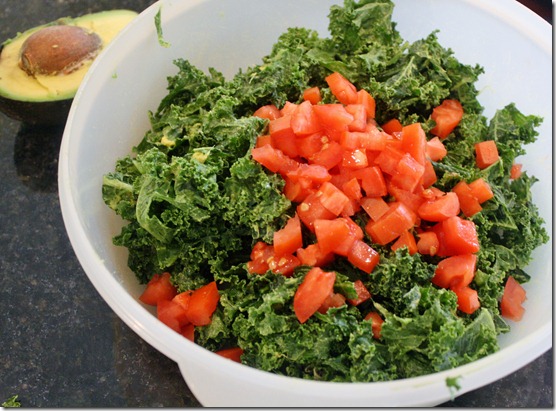
In a large bowl, mix the greens with the citrus juice.

how-to-massage-kale-avocado

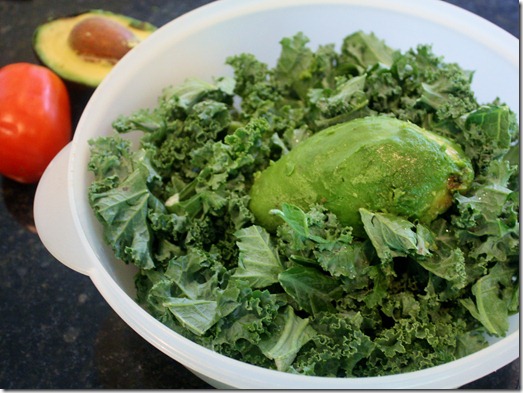
Add in your avocado. Then it’s time to gently massage the avocado into the kale…

how-to-massage-kale-technique

Or, if you’re like me, it’s going to look a lot more like clumsy groping than an actual massage. I guess the two are close enough; one usually leads to the other, right? Anyway, massage the kale by working it with you’re hands, incorporating the avocado and lemon juice. You’ll hear a lot of crunching noise. After about 5 minutes you’ll notice the kale turns from a muted color to a more lively green. That’s when it’s ready.

how-to-massage-kale-tomato-dice

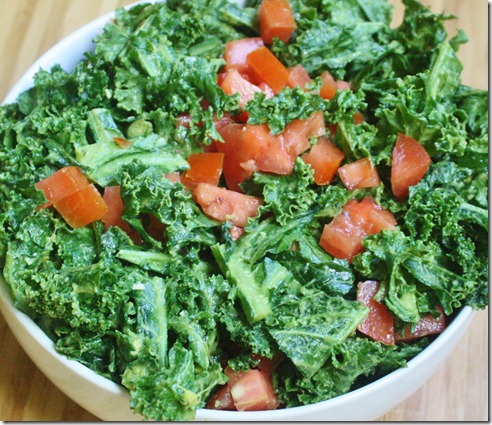
Add in the diced tomato and sea salt and gently fold all of the ingredients together. Serve at room temperature.

how-to-massage-kale

This method is so much cheaper than buying it from the salad bar, and much quicker than I expected, too! Whole Foods uses about twice as much avocado for this much kale. That’s probably why it tastes so much better there.

“What Are Capers?”

what-are-capers

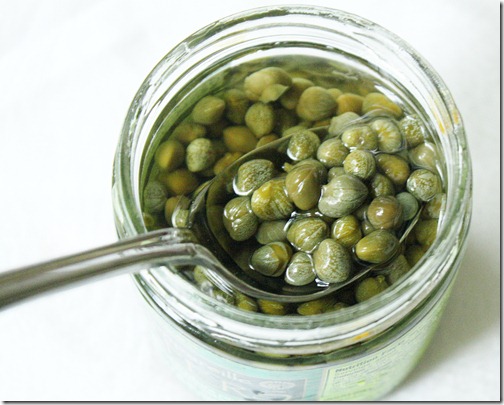
Until I started reading food blogs, I would have sworn capers were a type of fish that came in a can that no one except for old ladies and Nigel Thornberry ate(Does anyone know what I’m talking about?). But then I saw them, green little pearls that sort of look like fish eggs, except they were being used in vegan recipes. That only confused me more.

One day I was working in my restaurant and our job was to make the salsa verde used as a pork topper. The ingredients for it are simple: Parsley, jalapenos, shallots, and capers. I asked my shift manager what capers were, figuring she’d know having gone through culinary school, but her guess was as good as mine.

what-are-capers-trader-joes

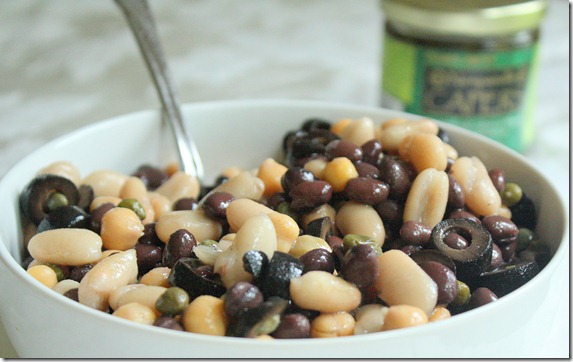
I went home that night and looked it up online and found out that capers are actually buds from the caper bush that are pickled to give a tart flavor to—the perfect touch to any dish(Side note: How did people know things before the internet? Seriously, I have no clue). I was excited to find them in Trader Joes and even more excited to make a dish with them. I’m leaving town on Friday and had a few too many open cans of beans in my refrigerator so I combined them to make this delicious bean salad.

what-are-capers-bean-salad

Bean Salad With Capers

Ingredients(Makes 4 servings:

  • 1 cup chickpeas
  • 1 cup black beans
  • 1 cup cannellini beans
  • 1/3 cup sliced black olives
  • 1 1/2 Tablespoons capers, drained
  • 1 Tablespoon extra virgin olive oil
  • Salt to taste

what-are-capers-recipe

Method

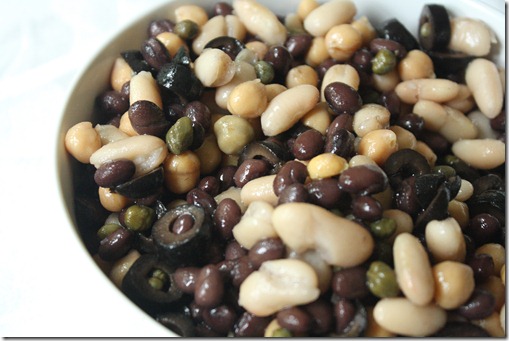
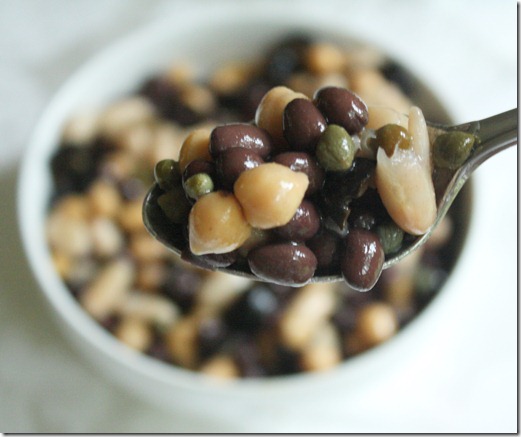
  1. In a large bowl, toss together the beans, olives, capers, and oil until evenly mixed.
  2. Taste and add salt if necessary. Serve room temperature.

what-are-capers-spoonful

If you want to make this starting with unopened cans of beans, use a full can of chickpeas, black beans, and cannellini, 1/2 cup of olives, 2 Tablespoons of capers and the same amount of oil.

Fess up: Did you know what capers are?

Raw Pad Thai

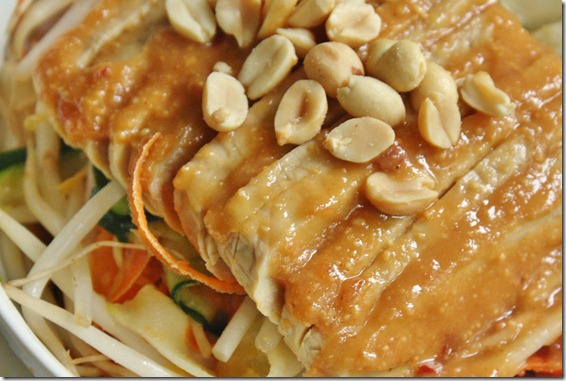
raw-pad-thai

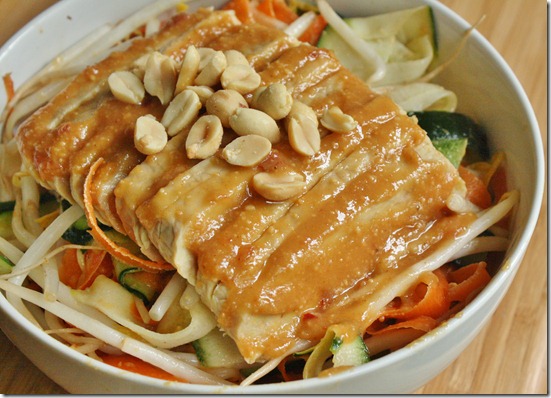
When I shared A Day In The Life Of A Restaurant Intern, a reader wanted to know more about the raw pad Thai bowl I had for lunch. This is something I’ve been making all Summer long and honestly I never blogged about it because I didn’t think it was that exciting. Healthy? Yes. Delicious? No doubt. An excuse to eat peanut butter for every meal? Totally. But not really exciting.
rw-pad-thai-miso

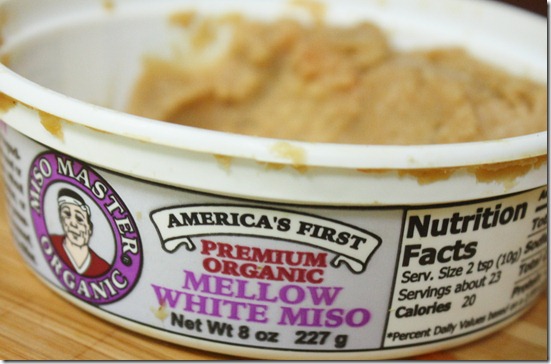
I never really make this the same way, sometimes adding sesame oil, sometimes using chickpeas instead of tempeh—you get the idea. One ingredient I highly recommend investing in is miso paste. I never really knew much about it before a few months ago and certainly never would buy it at the store. Now I wouldn’t keep a refrigerator without it. The salty/savory flavor is truly unique and adds a special depth of flavor that’s crosses cultures. I’ve used this in place of garlic, onions and salt in greens and beans and it tastes just as good. It’s definitely worth the investment.

Raw Pad Thai

Ingredients(For one serving):

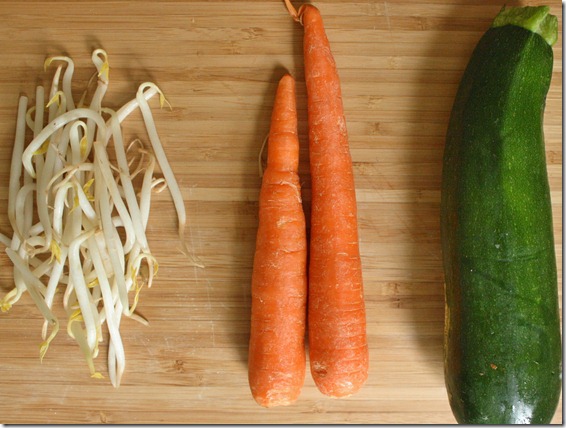
  • 1 zucchini
  • 2 carrots
  • 1/2 cup bean sprouts
  • 1/2 block tempeh
  • peanuts to garnish

For the sauce:

  • 2 Tablespoons peanut butter
  • 2 teaspoons maple syrup
  • 1 Tablespoon rice vinegar
  • 1/2 Tablespoon white miso paste
  • 1 teaspoon siracha sauce(optional)

raw-pad-thai-ingredients

Method:

  1. Using a vegetable peeler, peel the zucchini and carrots into long, thin “noodles” using as much of the vegetables as possible.
  2. Make the sauce by mixing together the peanut butter, maple syrup, vinegar, miso, and siracha if using until smooth. If necessary add a few teaspoons of water until the sauce is runny yet thick.
  3. Toss the sauce with the vegetable “noodles” and bean sprouts in a large bowl reserving about a tablespoon of sauce.
  4. Plate the noodles in a bowl.
  5. Slice the tempeh on a bias and plate it on top of the sauced noodles.
  6. Spread the reserved sauce on top of the tempeh. Garnish with peanuts if desired.

raw-pad-thai-tempeh

Like I said, you can play around with the ingredients to suit what’s in your pantry. I could eat tempeh and peanut butter all day long so this is how I like it best. 

Spicy Maple Baked Beans

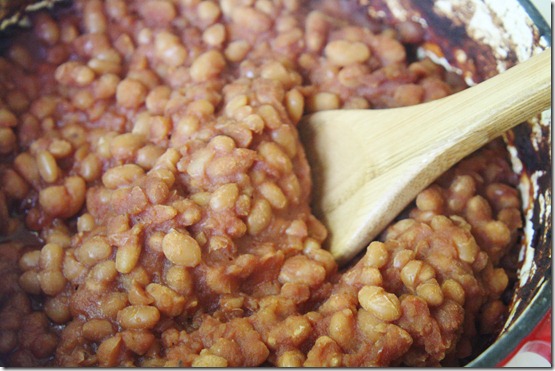
Spicy-Maple-Baked-Beans

I really love making beans from scratch. It’s kind of like the vegetarian version of roasting a chicken: You take something from inedible to edible making the whole house smell great in the process. I probably hadn’t made this recipe for a good year, which is a shame because I liked it so much the first time. The flavor is incomparable to store-bought brands—truly unique. It’s sweet with a spicy kick that lingers.

There’s also a homemade Worcestershire sauce recipe at the bottom since looking for a bottled vegetarian/gluten-free sauce is sort of like looking for the Holy Grail.

Spicy Maple Baked Beans

Ingredients:

  • 1lb dry white beans
  • 1 yellow onion, peeled and halved
  • 2 bayleaves
  • 1 6oz can of tomato paste
  • 2/3 cup maple syrup
  • 1/3 cup Worcestershire sauce
  • 1/2 cup white vinegar
  • 1 teaspoon salt
  • 3/4 teaspoon ground mustard seed
  • 1/2 tablespoon onion powder
  • 1/2 teaspoon cayenne
  • 3/4 teaspoon paprika

Spicy-Maple-Baked-Beans-Pot

Method:

  1. Soak the beans in water for 8 hours or overnight. Drain the water and put the beans in a large pot with new water, the bayleaves, and the onion.
  2. Boil the beans for 70-80 minutes, scooping off the foam that forms on top of the water. Once done boiling, remove the pot from the stove and drain the beans from the water, also removing the bayleaves.
  3. Combine the beans with the rest of the ingredients in an oven-safe pot or a Crockpot. Bake at 350 degrees for 3 hours or simmer on high for the same period of time until the beans have darkened and most of the moisture has evaporated. If the beans dry out too much, add 1/2 cup of water and continue cooking.
  4. Remove from the oven and serve hot when ready.

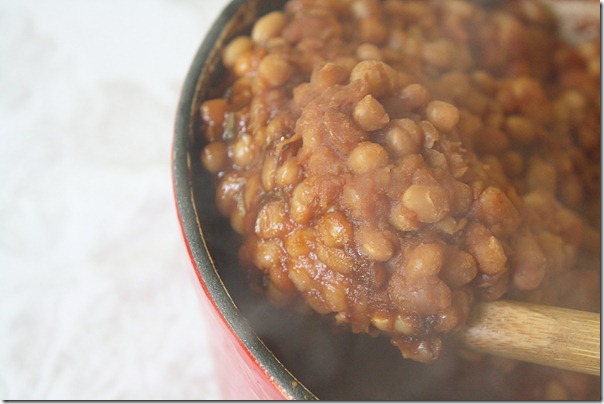
Spicy-Maple-Baked-Beans-Stir

Homemade Worcestershire Sauce

Ingredients(Makes about 1/3-1/2 cup):

    • 1/2 cup apple cider vinegar
    • 1/4 cup soy sauce or wheat-free tamari
    • 1 tablespoon cane sugar
    • 1/2 teaspoon ginger
    • 1/2 teaspoon dry mustard
    • 1/2 teaspoon onion powder
    • 1/2 teaspoon garlic powder
    • 1/4 teaspoon cinnamon
    • 1/4 teaspoon pepper

Method:

  1. Combine all of the ingredients in a small pot over the stove.
  2. Keep between a boil and a simmer for 8-10 minutes until reduced to half its original volume.
  3. Use immediately or store in the refrigerator for up to a week.