Author Archives:

Reese’s Pieces Granola

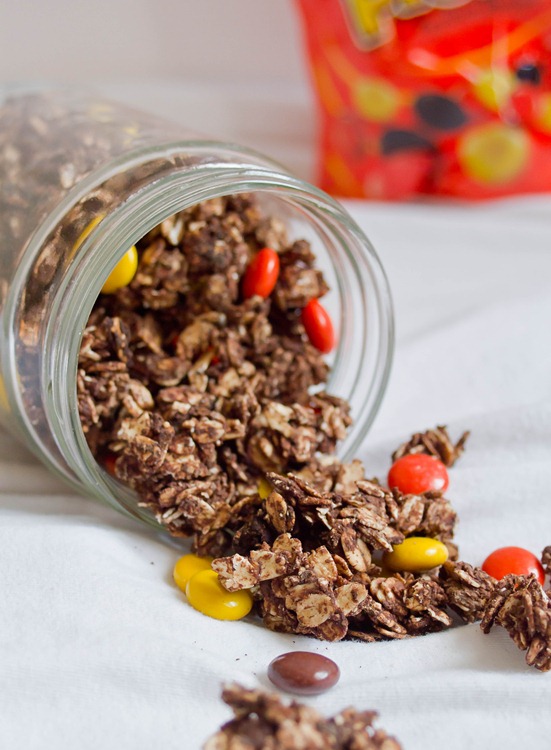
Reese's Pieces Granola

My favorite thing about this time of year is going present shopping for friends and family but boy does it eat up a day. After going to several stores and eventually CVS for wrapping paper and tape, I couldn’t help but do some grocery shopping and pick up the bag of Reese’s Pieces that was conveniently on sale.

I’ve made peanut butter granola before and chocolate granola but never chocolate granola with peanut butter. That was an oversight seeing how peanut butter and chocolate has to be the best combination known to man. Just think of Reese’s cups and Fastbreak bars and—of course—Reese’s Pieces. I’m not quite sure if adding candy to granola still makes it breakfast food but it has peanut butter so it must be healthy.

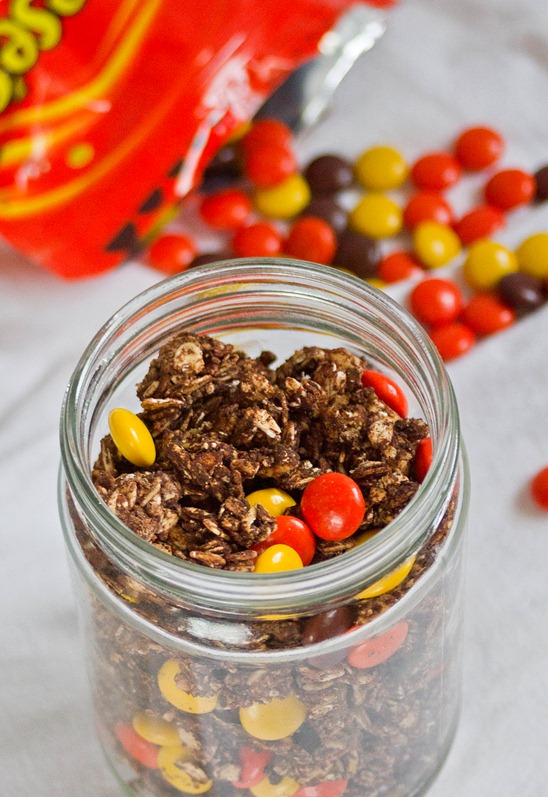
Reese's Pieces Granola Jar 2

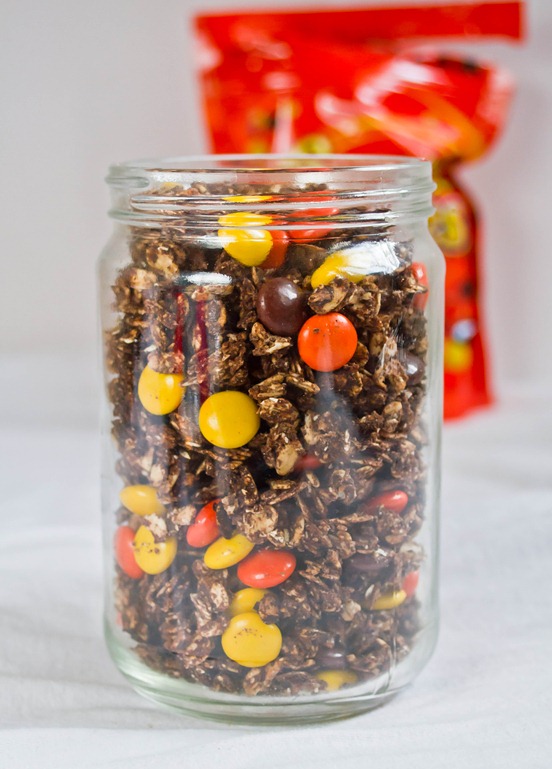
This is a great granola to make if you like granola with clusters since the peanut butter holds the oats together. Just be sure not to break it up too much after it’s done cooking to keep most of the clusters.

Reese’s Pieces Granola

Prep time: 10 minutes

Cook time: 20-25 minutes

Ingredients(Makes about 3 cups):

  • 2 cup rolled oats
  • 6 Tablespoons peanut butter
  • 1/4 cup cocoa powder
  • 6 Tablespoons to 1/2 cup maple syrup(or any liquid sweetener)
  • 1/2 cup Reese’s Pieces
  • 1/2 cup peanuts(optional)

Method:

  1. Preheat your oven to 350 degrees.
  2. In a large bowl mix together the oats, peanut butter, cocoa powder and maple syrup. If the peanut butter you’re using is the no-stir kind, melt it in the microwave briefly before mixing it in.
  3. Spread the oats out onto a non-stick baking tray. Bake for 20-25 minutes until the granola cooks together.
  4. Remove from the oven and break the granola into clusters using a utensil.
  5. Let the granola cool completely before adding in the Reese’s Pieces.
  6. Store in an air-tight container at room temperature.

Reese's Pieces Granola Jar

Dark Chocolate Peppermint Bark

Dark Chocolate Peppermint Bark

I love minty things. Mints, candy canes, mint chocolate—any and all of it makes a perfect after-dinner treat. It’s almost as good as brushing your teeth. Well… almost…

As soon as the stores started selling candy canes I bought the ingredients to make this. It’s not hard and all yet impressive enough to give to friends and family.

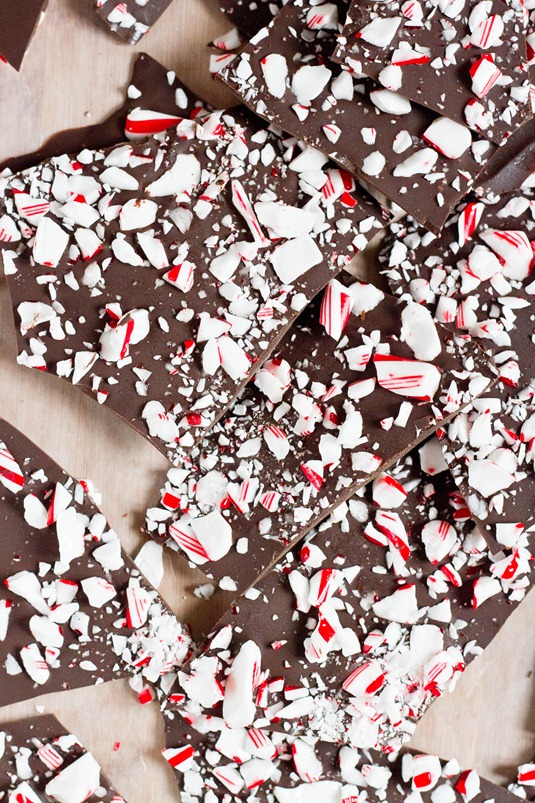
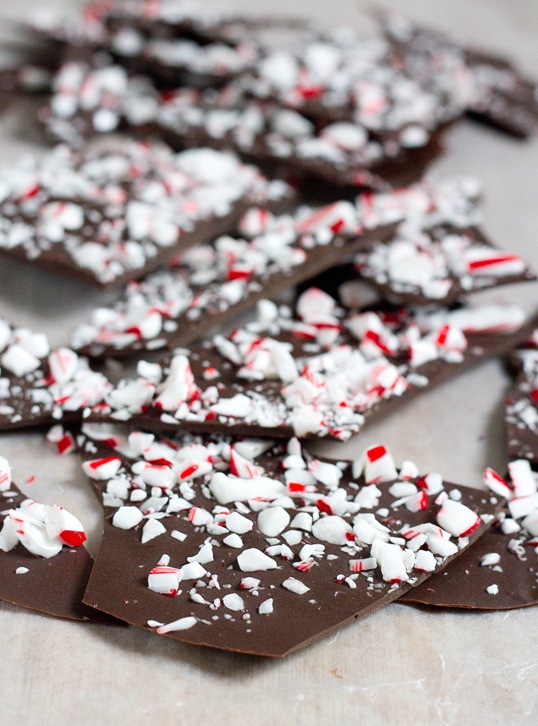
Dark Chocolate Peppermint Bark Broken

This is hardly a recipe. It’s just 3 ingredients and nearly impossible to screw up(don’t burn the chocolate) but still makes a thoughtful gift. If you want to vary things up, use white chocolate instead of dark.

Dark Chocolate Peppermint Bark

Prep time: 10 minutes

Cook time: 0 minutes

Ingredients(Makes about 16 servings):

  • 10oz dark chocolate, chopped OR 1 1/4 cups bittersweet chocolate chips
  • 1/2 teaspoon peppermint extract
  • 4 candy canes, crushed

Dark Chocolate Peppermint Bark Yield

Method:

  1. Melt the chocolate in a microwave or over a double boiler.
  2. Once the chocolate is melted, mix in the peppermint extract until the chocolate is smooth.
  3. Pour the chocolate onto a sheet of wax or parchment paper. Spread it out into a thin layer.
  4. Sprinkle the crushed candy canes on top of the chocolate and press it in lightly.
  5. Refrigerate the bark for 20-30 minutes to let it harden.
  6. Break the bark into 15-20 uneven pieces. Keep refrigerated before ready to serve.

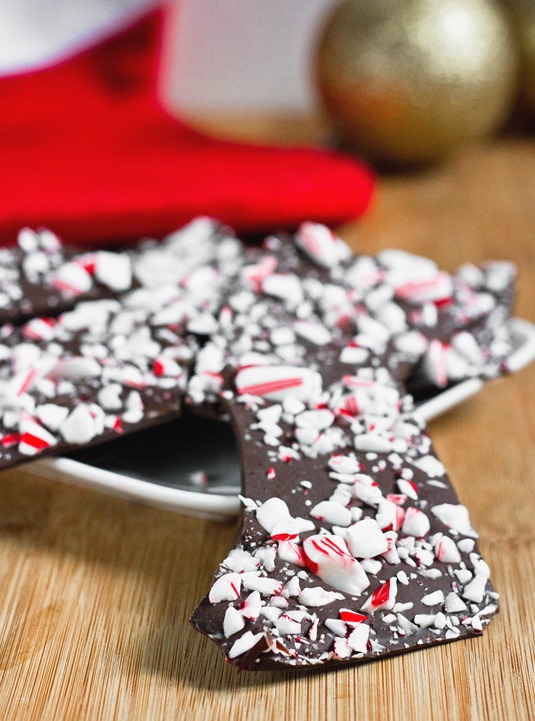
Dark Chocolate Peppermint Bark Serving

‘Tis the season.

Avocado Sour Cream Chip Dip

Kettle Brand Chips asked 14 bloggers to create a recipe of their favorite holiday dip. My favorite holiday dip is guacamole; I could eat it with a spoon. But too much guacamole can be overpowering on the taste buds, especially at parties when you lose track of how much chips and dip you’ve eaten. Sour cream, on the other hand, has that smooth and clean flavor that lets you dip and dip and dip. I don’t usually like to do sponsored posts, but Kettle Brand Chips is a company I can really get behind. They’re dedicated to using natural ingredients without GMOs and their chips are gluten-free, too. They’re also just delicious; have you tried their Salt & Fresh Ground Pepper flavor? Incredible.

For this recipe I’ve added avocado to a fairly simple sour cream dip. It’s no hassle at all to throw together. The avocado adds a light green color and a rich texture. Even though they’re similar, using both onion powder and fresh chives helps to add layers to the flavor of the dip. I paired this with my favorite flavor of chip, Sea Salt and Vinegar. I think it goes perfectly with the tart flavor of vinegar because the chip lends flavor to the dip while the dip cools the chip down. It would also be incredibly good with any spicy flavor like Jalapeno or Spicy Thai™–anything with a strong saltiness to it. Since there’s very little acidity and seasoning in the dip itself, it’s important to use a chip that will bring that to the table. At the end of this post there’s also a giveaway so be sure to read through!

Avocado Sour Cream Chip Dip

Prep time: 10 minutes

Cook time: 0 minutes

Ingredients(Makes about 8 servings):

  • 1 ripe medium avocado, peeled and pitted
  • 3/4 cup sour cream or low-fat sour cream
  • ½ teaspoon onion powder
  • ½ teaspoon salt
  • 3 Tablespoons freshly chopped chives

Method:

  1. In a food processor(or however you’d like to do it), puree the avocado until it’s completely smooth.
  2. Fold together the avocado puree, sour cream, onion powder, salt, and 2 ½ Tablespoons of chopped chives.
  3. Transfer the dip to a serving bowl and garnish with the remaining chives.
  4. Serve with Kettle Brand Chips and veggie crudités

Now it’s your turn to tell me, What is Your favorite holiday dip? Respond to this question with your answer using one of the methods below and you could win a $100 Visa Gift Card!

Rules:

  • No duplicate comments.
  • This giveaway is open to US Residents age 18 or older.
  • Winners will be selected via random draw, and will be notified by e-mail. You have 72 hours to respond otherwise a new winner will be selected.
  • This sweepstakes runs from 11/13-12/31.
  • You may receive (2) total entries by selecting from the following entry methods:

a) Leave a comment answering what’s your favorite holiday dip?

b) Tweet a public message about this promotion including exactly the following unique term in your tweet message: “#SweepstakesEntry” Leave the URL to that tweet in a comment on this post

c) Blog about this promotion, including a disclosure that you are receiving a sweepstakes entry in exchange for writing the blog post, and leave the URL to that post in a comment on this post

d) For those with no Twitter or blog, read the official rules to learn about an alternate form of entry.

The Official Rules are available here.

Be sure to visit the Kettle Brand Chips page on BlogHer.com where you can read other bloggers’ reviews and find more chances to win! Good luck!

Gluten-Free Peanut Butter Cookie Recipes

I’m starting to get the impression that I’ll be craving cookies all December. They’re the perfect dessert to end a meal because they aren’t too decadent or messy but still delicious. I’m always drawn to peanut butter cookies; then again I’m drawn to peanut butter anything.

These are a few of my favorite peanut butter cookies I’ve made before that are tried and true. I’ll be doing a lot of baking over the holidays and I’m sure I’ll need one or a few of these recipes. I hope other people can enjoy them, too.

Chewy-Peanut-Butter-Cookies-Gluten-Free

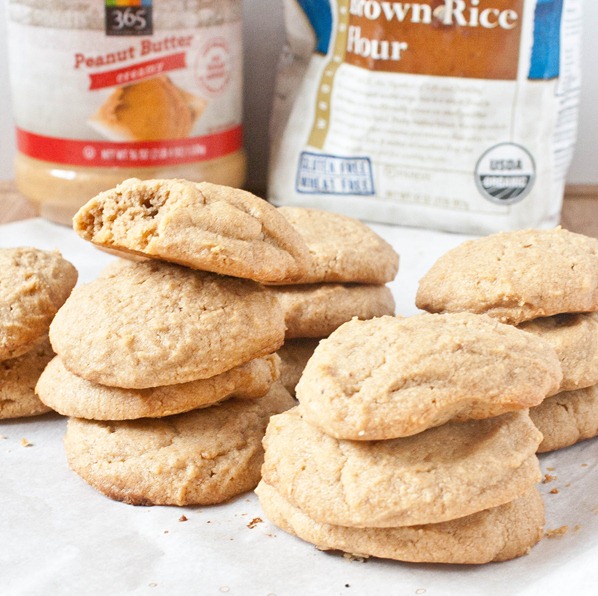
Chewy Gluten-Free Peanut Butter Cookies. I only made these for the first time 2 weeks ago but I’m hooked. The combination of texture and flavor is perfect for a peanut butter cookie. These are the good ol’-fashioned kind.

double-chocolate-peanut-butter-cookies

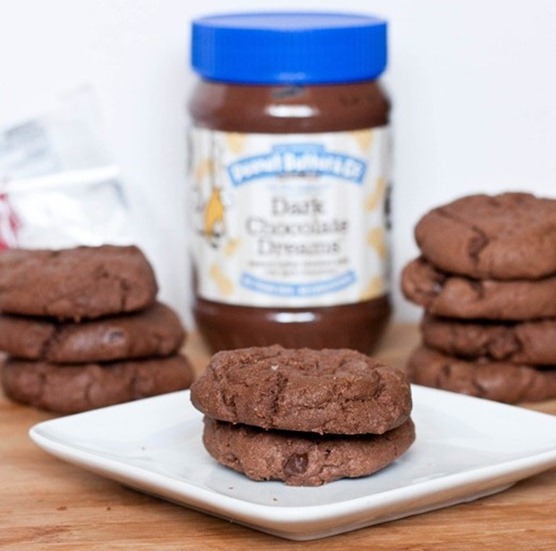
Double Chocolate Peanut Butter Cookies. If anything makes peanut butter cookies better it’s undoubtedly chocolate. So why not use chocolate peanut butter? A perfect mix. 

quadruple-peanut-cookies

Quadruple Peanut Cookies. You have to know a recipe’s going to be good when it involves Reese’s Pieces and peanut butter chips.

July 2nd 004

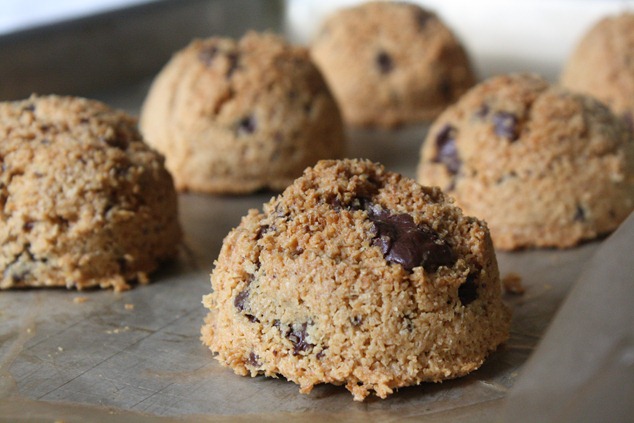
Peanut Butter Chocolate Chip Macaroons. I haven’t made these in over a year which is a crying shame. They’re probably one of the easiest to make for beginning bakers and they’re vegan and gluten-free.

egg-free-peanut-butter-cookies

Egg-Free Peanut Butter Cookies. These are certainly less hearty than the other cookies and more airy. They’re the best for making sandwich cookies with a thick layer of peanut butter buttercream in the middle.

TGIChristmas Cookie Season

Dessert Cream Cheese Ball

Dessert Cream Cheese Ball

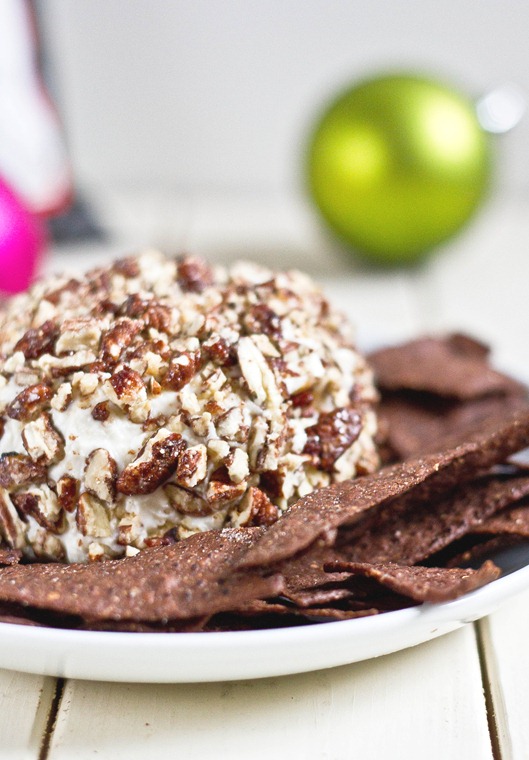
Most people who love cooking have their “signature recipes” that they get asked to make all the time. At the holidays my mom always makes a savory cream cheese ball with onion, green pepper, pineapple and walnuts. As good as that is, if you follow this blog you’ll know I’m much more into sweet than savory. What could really be better than sweet cream cheese?

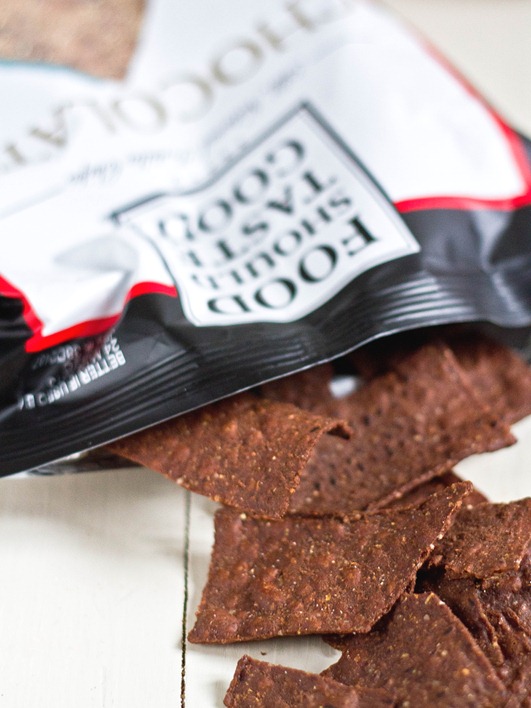
Another thing that prompted me to make this was a bag of Food Should Taste Good chocolate tortillas and wondering what in the world you serve chocolate tortillas with. The crunchy and lightly-sweetened tortillas went perfectly with the smooth cream cheese and powdered sugar. I couldn’t imagine eating this any other way but I’m sure sliced apples or graham crackers would match well, too.

Dessert Cream Cheese Ball Nachos

I used honey glazed roasted pecans from Oh Nuts for the coating. If you don’t have pecans you can use any number of things as a coating. Try sliced almonds or crushed green and red M&Ms, or even holiday-themed sprinkles.

Dessert Cream Cheese Ball

Prep time: 10 minutes

Cook time: 0 minutes

Ingredients(Makes about 12 servings):

  • 1 8oz block cream cheese
  • 1/2 cup + 2 Tablespoons powdered sugar, sifted
  • 1/2 teaspoon vanilla extract
  • 1 Tablespoon half & half
  • pinch of salt
  • 1/2 cup glazed pecans, crushed

Method:

  1. In a large bowl, beat together the cream cheese, powdered sugar, vanilla, half & half and salt.
  2. Scrape the cream cheese mixture onto a sheet of clear plastic wrap. Form the cream cheese mixture into a ball using the wrap to cover your hands and keep it together. Stick the ball in the fridge for 20-30 minutes to set.
  3. Unwrap the cream cheese ball and coat it with the pecans, pressing them in lightly to make sure they stay.
  4. Transfer the cold cream cheese ball to a serving plate. Serve with chocolate nachos, graham crackers, or sliced fruit.

Dessert Cream Cheese Ball Product

We can save worrying about eating healthy for after New Years.

Homemade Chocolate Turtles {+ Giveaway}

Homemade Chocolate Turtles

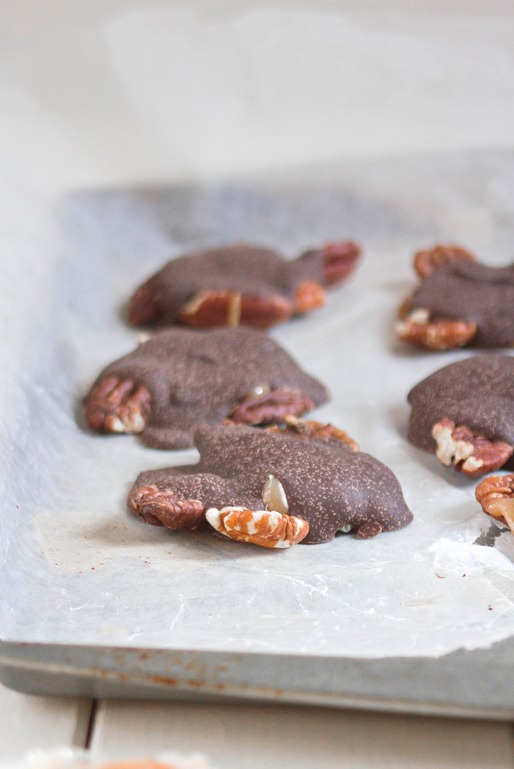
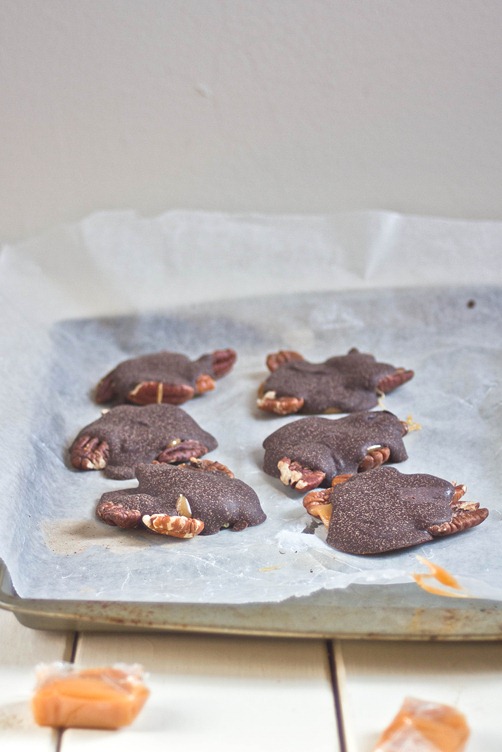
Before Thanksgiving I was thinking of different recipes I could use the American Heritage Chocolate I received on. It’s hard to find old-fashioned recipes that are also gluten-free since I don’t think that was much of a concern in the 18th century. I remembered how much I like old fashioned candy shops and seeing the homemade candies behind a glass case and wanted to try making a favorite: turtles.

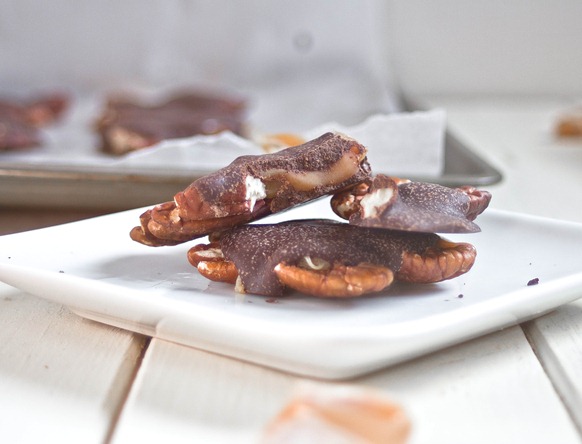
I can’t say I went all-out old-fashioned with this recipe because I cheated a little bit and bought wrapped caramels. Learning how to use a candy thermometer well is something I want to do; this didn’t seem like a good time to start practicing, though. Store-bought or not, the end result was delicious and that’s what really matters, right?

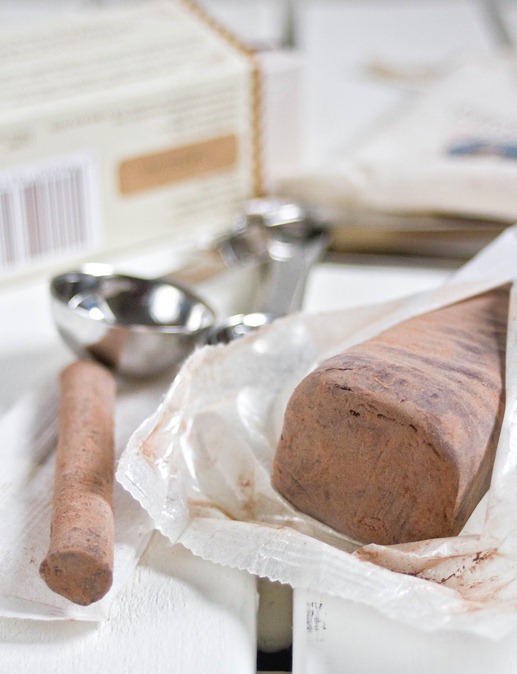
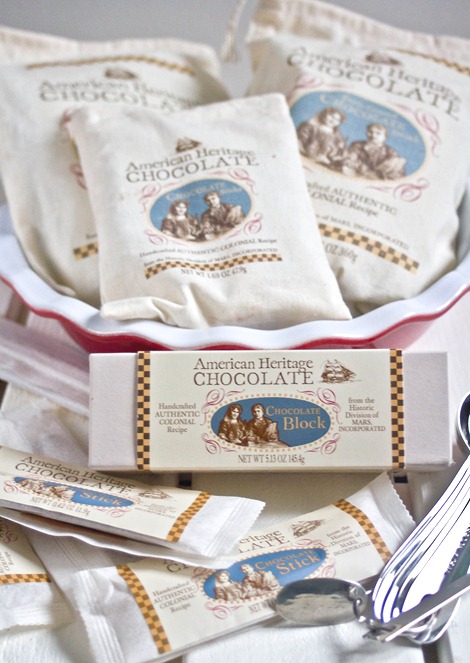
American Heritage Chocolate

Whenever you’re working with high-quality baking chocolate I would suggest melting it over the stove using the double boiler method. Boil water in a small pot and place a fitted bowl on top with the chocolate inside of it, moving the chocolate around to melt it evenly. Chop the chocolate into smaller portions to make it melt faster.

Homemade Chocolate Turtles

Prep time: 15 minutes

Cook time: 0 minutes

Ingredients(Makes 10 turtles)

*I used Trader Joe’s salted old fashioned caramels. Feel free to make your own from scratch if you’re experienced with a candy thermometer.

Homemade Chocolate Turtles Yield

Method:

  1. Lay the pecans out in clusters on a non-stick, greased surface.
  2. Spoon about a Tablespoon of the melted caramel on top of each pecan cluster.
  3. Over a double boiler, melt the chocolate until it is smooth and shiny.
  4. Spoon just enough chocolate on top of the the clusters to cover most of the caramel and pecans.
  5. Move the turtles into the refrigerator or freezer for 20 minutes to set the chocolate.
  6. Serve and store at room temperature.

Homemade Chocolate Turtles Serving

Now for the fun part. American Heritage Chocolate wants to give away some of their finely ground chocolate drink and chocolate sticks to 2 US readers. All you have to do is leave a comment for each entry below and I’ll pick the winners Tuesday, December 4th, at midnight.

Good luck!

Chewy Peanut Butter Cookies {Gluten-Free}

Chewy Peanut Butter Cookies {Gluten-Free}

I came home for the holiday weekend on Wednesday night last week. Normally I cook more for the holidays but by the time I arrived most of Thanksgiving dinner had already been planned. I decided to contribute some ad hoc cookies because, well, when are extra cookies ever a bad thing?

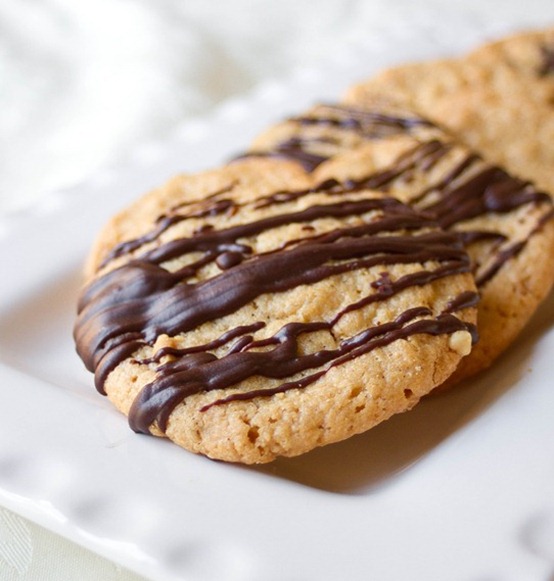
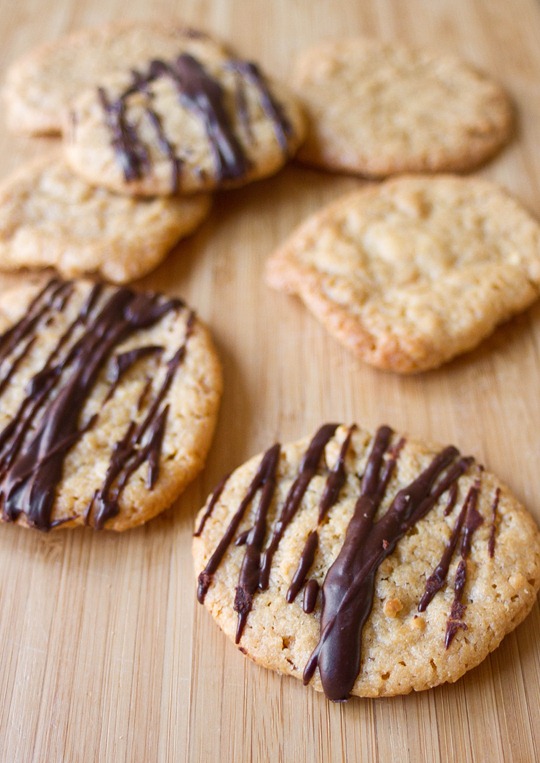
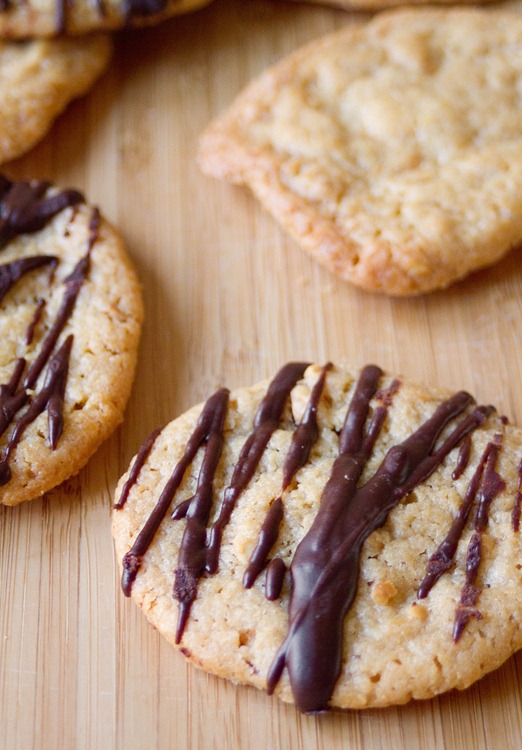
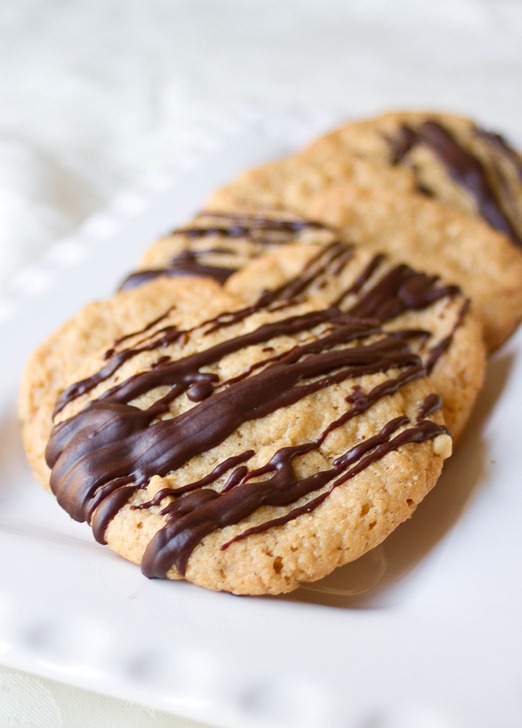
I’m usually a purist when it comes to peanut butter cookies using this recipe. However I wanted to try one with flour and butter for a different texture to mix things up. The added ingredients make a cookie that chewy rather than crispy and slightly richer. On top I added a chocolate drizzle for the chocolate lovers in my family(but mostly for myself).
Chewy Peanut Butter Cookies {Gluten-Free} Yield

Mixed some chopped peanuts or chocolate chips into the batter before baking these for an extra crunch.

Chewy Peanut Butter Cookies {Gluten-Free}

Prep time: 10 minutes

Cook time: 18 minutes

Ingredients(Makes about 14 cookies):

  • 3/4 cup all-purpose gluten-free flour
  • 3/4 cup sugar
  • 1/4 teaspoon salt
  • 6 Tablespoons creamy or chunky peanut butter
  • 1/4 cup butter
  • 1 egg
  • 1/4 cup chocolate chips(optional)

Chewy Peanut Butter Cookies {Gluten-Free} Drizzle

Method:

  1. Preheat your oven to 350 degrees
  2. In a large bowl mix together the sugar, flour, and salt.
  3. In a small bowl, melt together the butter and peanut butter and mix.
  4. Pour the melted butter and peanut butter into the flour mixture and mix it together.
  5. Beat in the egg until all of the ingredients form a dough.
  6. Roll the dough into 1-inch balls and place them 2-3 inches apart on a greased cookie tray.
  7. Bake for 16-18 minutes until the outside is firm to the touch.
  8. Remove from the oven and let the cookies cool completely before moving.
  9. Melt down the chocolate chips and drizzle the melted chocolate on top of the cookies.

Chewy Peanut Butter Cookies {Gluten-Free} Plated

Just Photos: Thanksgiving 2012

Nov. 22nd 021-2

Nov. 22nd 029-2

Nov. 22nd 063

Nov. 22nd 077

Nov. 22nd 087

Nov. 22nd 080

Chocolate Pumpkin Baked Custard

Chocolate Pumpkin Baked Custard

It’s no secret that my favorite food group is chocolate. I could eat it every day and was very excited when American Heritage Chocolate approached me and asked if I’d like to do some baking with their chocolate for Thanksgiving. Their company is all about producing authentic 18th century-style chocolate and what better time to celebrate that then during a holiday established by George Washington himself in the 18th century?

They sent me a package of goodies including hot cocoa mix, chocolate sticks and baking chocolate along with measuring spoons and pie pan. After tasting it and getting familiar with the flavors I tried this recipe and nailed it(if I can say so myself) on the first try.

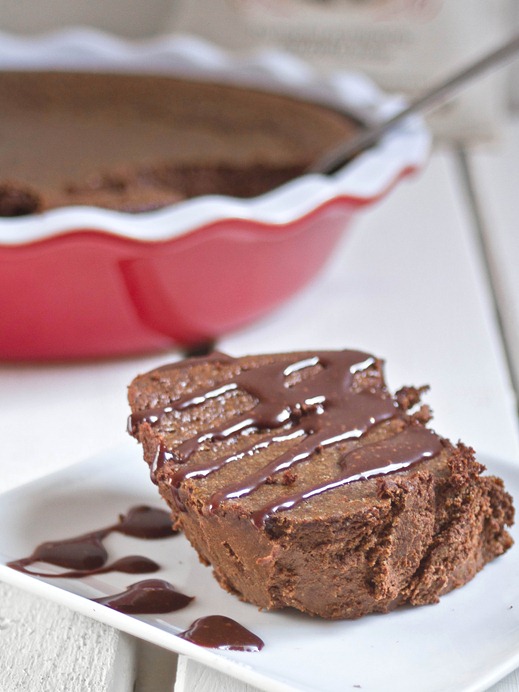
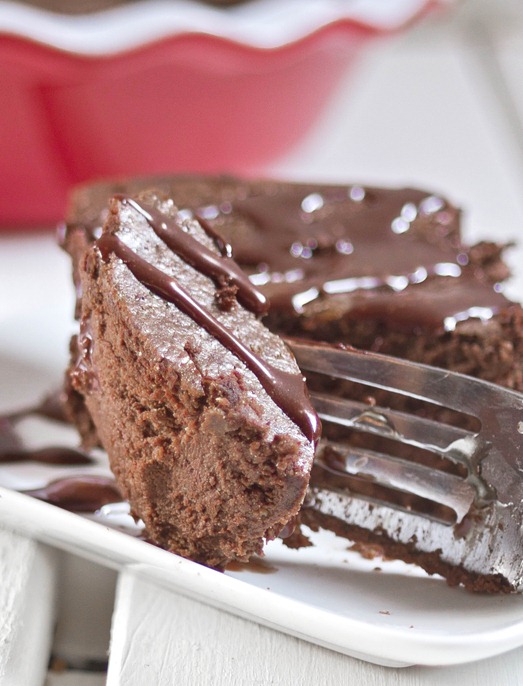
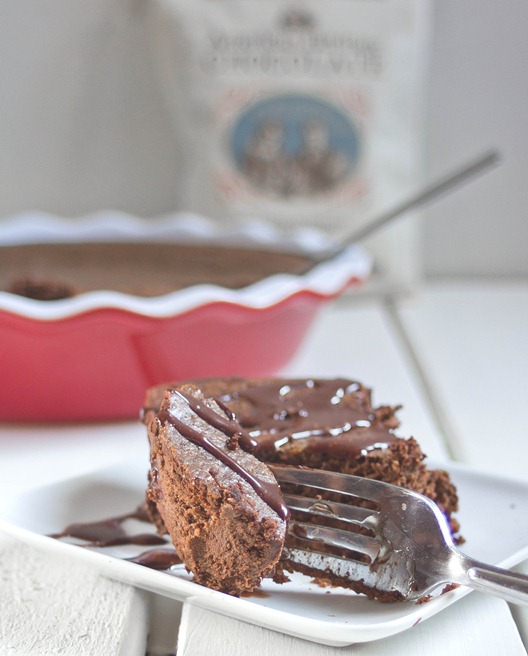
I wasn’t sure exactly what to call this. Technically it’s not a cake since there’s no sort of flour in it, just eggs and dairy which makes it a custard. The texture is very similar to a flourless chocolate cake recipe—super soft and melts in your mouth.

American Heritage Product

My favorite thing about their chocolate is that it’s slightly spicy. They add in anise, cinnamon, nutmeg, orange peel, anise seed, annatto, and red pepper just like chocolate was made in the 18th century, but none of the flavors are too overpowering to take away from the cocoa. If you make this recipe using standard hot cocoa mix, I would recommend adding tiny amounts of any of these spices from your cupboard to make the flavor more enticing.

Chocolate Pumpkin Baked Custard

Prep time: 10 minutes

Cook time: 40-50 minutes

Ingredients(Makes 12-16 servings):

* I roasted and pureed half of a butternut squash. You could also use a canned pumpkin.

Chocolate Pumpkin Baked Custard Fork

Method:

  1. Preheat your oven to 375 degrees.
  2. In a large bowl, beat together all of the ingredients until they’re homogenized. Don’t worry about the chocolate mix dissolving since that will happen as it bakes.
  3. Grease a 9-inch cake or pie pan.
  4. Pour the batter into the pan and bake for 40-50 minutes until the center has set and a cake tester comes out clean.
  5. Remove from the oven and serve hot with whip cream, ice cream, or a chocolate fudge sauce.

Chocolate Pumpkin Baked Custard Bite

Who’s bringing the ice cream?

Gluten-Free Banana Pancakes


It’s been getting harder and harder to get out of bed in the morning lately. I’m used to freezing temperatures in New England by now but I’ve never learned to like them and it’s only getting colder from here on out. Blankets are getting thicker, showers are getting longer, and breakfasts are getting tastier because they’re always the best reason to get out of bed.

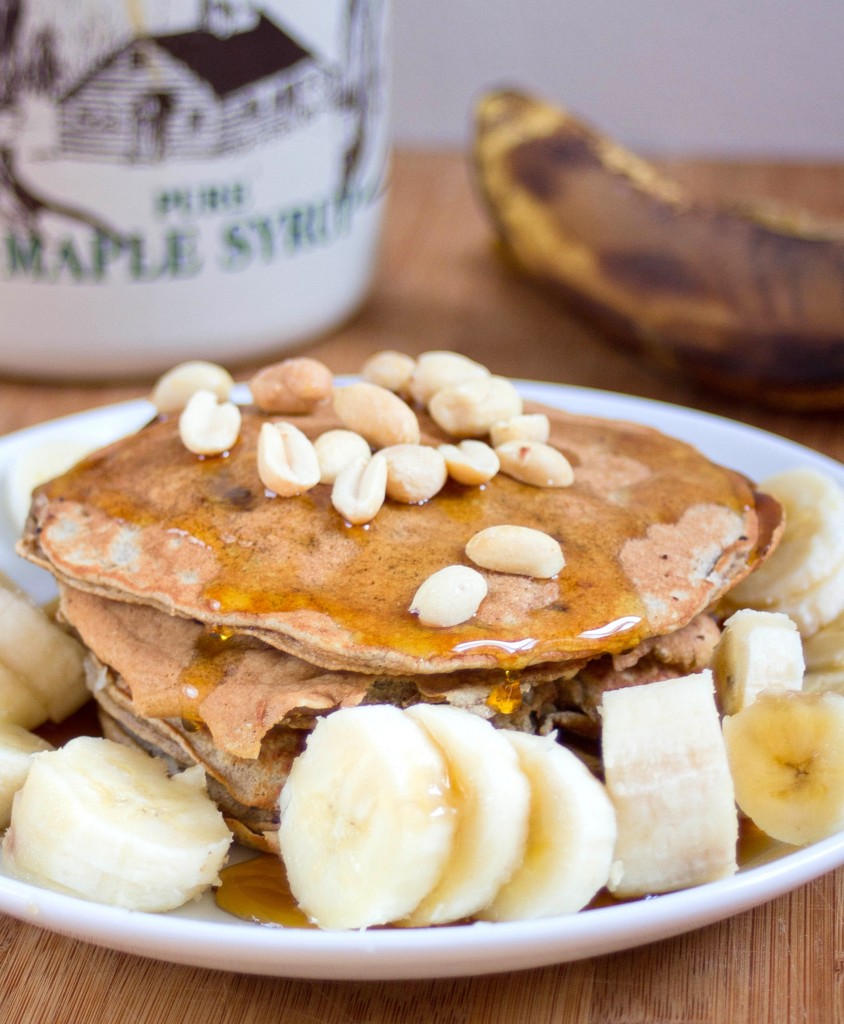
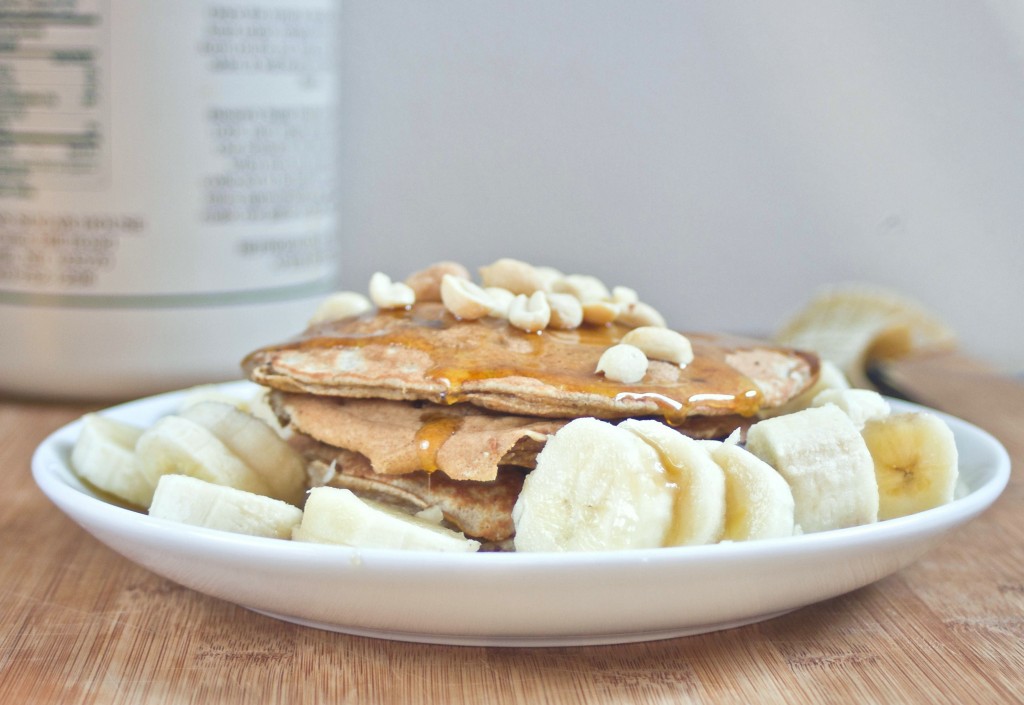
These pancakes are an older recipe that I wanted to revisit and spend more time on. It’s hard to find good gluten-free pancakes and the more flavors you can get the better. They’re entirely naturally sweetened, too, until you pour the maple syrup on top which is a must. A little pat of cinnamon butter and it’d be heaven.

The recipe only makes about one serving. I would recommend doubling or tripling it and storing the extra pancakes in a Ziploc bag in the refrigerator to have extra for another morning.

Gluten-Free Banana Pancakes

Prep Time: 5 minutes

Cook Time: 10 minutes

Ingredients(makes 1 serving):

  • 1/3 cup mashed banana(about a medium-sized banana)
  • 1/2 cup chickpea flour
  • 1 egg
  • 1/4 teaspoon cinnamon
  • 1/4 teaspoon baking soda
  • 1/4-1/3 cup water

Method:

  1. In a mixing bowl combine the mashed banana, chickpea flour, egg, cinnamon, baking soda and 1/4 cup water and mix.
  2. Add more water if necessary to get the consistency somewhere between thick-runny and runny.
  3. Preheat a non-stick pan over medium heat.
  4. Scoop about 1/4 cup batter into the pan for each pancake. Only cook 1 or 2 at a time to avoid overcrowding.
  5. Cook on one side until the top is bubbly, then flip and cook for about another minute. Repeat until all the batter is used.

Definitely worth waking up for.