Yearly Archives: 2011

Chocolate Rum Truffles

chocolate-rum-truffles-bowl

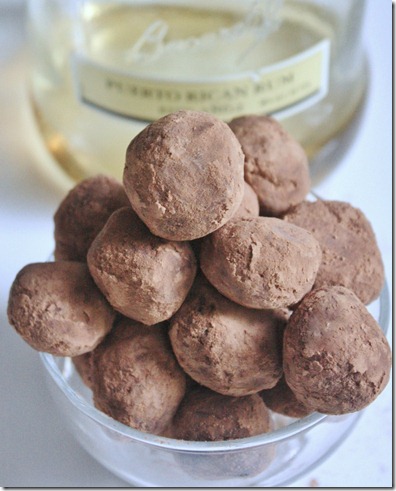
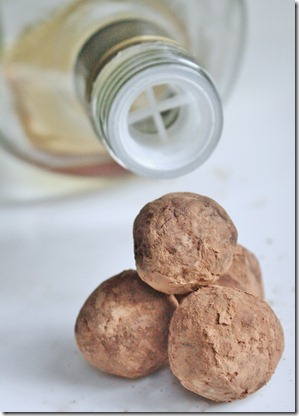
If you’ve been reading for a long time, you know I don’t really like alcohol, unless it’s in dessert and then I go crazy for it. If I wrote It’s a Wonderful Life, the line would have been, “every time chocolate is mixed with liquor, an angel gets its wings.” I think these are that good. The texture is soft and almost chewy, like a chocolate candy with a sweet, seductive twist.

chocolate-rum-truffles

Embarrassingly enough I’m a lightweight and one of these is enough to make me feel way too good. When I was tempering and tasting the chocolate I wasn’t sure there was enough rum in it, but once the truffles were cooled and I took a bite—wow! They pack a punch of flavor.

No rum? No problem. Improvise the recipe with a different liquor. I can’t wait to try these with Kahlua.

Chocolate Rum Truffles

Prep Time: 30 minutes

Cook Time:

Ingredients(makes about 20 truffles):

  • 1 cup plus 2 Tablespoons semi-sweet chocolate chips OR 9.7oz semi-sweet baking chocolate cut into chunks
  • 2oz Bacardi rum
  • 3 Tablespoons cocoa powder plus more for dusting

chocolate-rum-truffles-stack

Method:

  1. Melt the chocolate over a double boiler. Once it’s in a liquid state, slowly incorporate the rum until it’s all combined and evenly mixed.
  2. Cool the chocolate and rum in a refrigerator for 10 minutes until it’s hardened but still sticks to itself.
  3. Sift in the cocoa powder while mixing the chocolate until all the cocoa powder has been used.
  4. Tear off pieces of chocolate and roll it into 1-inch balls.
  5. Fill a shallow bowl with cocoa powder and roll each ball in the powder until covered all around.
  6. Store at room temperature in an air-tight container.

After making these we’re almost out of rum and chocolate chips. That’s what I call an emergency.

The Pioneer Woman—Really?

If you don’t like a little honest, hysterical, and slightly cruel criticism, you should probably stay away from this post. And my Twitter account. And my Tumblr. And maybe we should start seeing other people.
Untitled

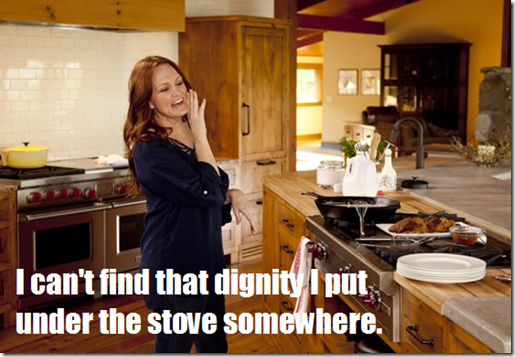
Yesterday The Pioneer Woman premiered on Food Network. My Twitter feed made me feel like I was supposed to be excited because she’s a food blogger who’s used her talents to become famous and that’s cool, right? Meh, I guess. To be honest, I don’t read her blog or know all that much about her. She seems nice but we’re such different people that if we were stuck in a room for an hour no one would say a word. Still, when I saw other bloggers giving rave reviews and tweeting #TeamRee I felt I should watch it. And then when I read this snarky review on Food Network Humor I knew I had to watch it.

I’m not going to sugarcoat this in rainbows and roses: The show was bad. There wasn’t much originality to it. Everything I’ve heard of Ree’s character was washed away either by Food Network or editing. You could have put Paula Deen or Ina Garten in Montana and they would have came up with the same show. The parts that were technically good, I just didn’t like very much on a personal level. Let me break it down for you:

The Food

On the menu was chicken fried steak with gravy, mashed potatoes, and marinated tomato salad. Oh Lordy, where to start?

)

(Source)

She made this meal for her husbands and kids because they worked hard on the ranch all day and she wanted a meal that would “stick to their ribs”. Uhh, are you sure you didn’t mean kill them? The steak looked like a greasy hot mess. I’m sure the potatoes are good, but then again what wouldn’t taste good with 2 sticks of butter and a block of cream cheese? And that’s for 12 servings, people. 12.  Here’s the nutrition info for the recipe:
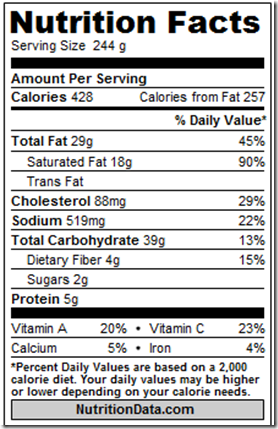
Capture

Yeah, appetizing. At least she made a marinated tomato salad which will take a little longer to kill you. On the show she didn’t use all of her dressing but on Food Network’s website the recipe has a cup of olive oil for 6 servings. Ugh. Somewhere someone is making that recipe and wondering why they’re more well lubed than a car.

The Dialogue

This was more scripted than an episode of Days Of Our Lives, except no one was bitch slapped, shot, or otherwise screwed over by a Dimera. In other words it was a snooze fest.

Funny Apology Ecard: You sound like the type of person who could tell me where the closest Arby's is.

Ree acted like the cookie cut-out humble ranch wife, always proving that she was just like you and me. Except we don’t have millions of fans and a television show, Ree, we just don’t. She shied away from words like chiffonade because they’re “fancy”. Come on, give people a little more credit than that. And if they don’t know what a chiffonade is they can Google it. You do have Google on the ranch, Ree, don’t you? And she pointed out her little “quirks” like mixing salad dressing in a mason jar. Eh, that’s almost interesting enough for me to give a damn.

But what really bugged me was the submissive wife act that’s outdated by about 50 years. She made it pretty clear that her role was in the kitchen spending her time to cater to her working husband and children because that’s what a good wife does. Can you hear me cringing through the computer screen? Because I am. I just wanted to call her up and tell her, “you can legally vote and own property now, you know.”

The Cowboy

Capture2

If you’ve ever had fantasies of a romantic cowboy coming into your life and sweeping you off your feet, this guy will chase those away for you. I’d like to think it’s just how he was edited, but in his short screen time he managed to be pretty rude and obnoxious. There wasn’t enough “please and thank you” and way too much “where’s my dinner?” and “get to work”. Someone like that couldn’t get me to move away from the couch let alone from the city.

In the .0001% chance I become a famous food blogger/chef and meet the Pioneer Woman face to face one day, I’m really going to regret this post, huh? Good thing I’m a risk taker.

Did you watch the show? What did you think? Will you keep tuning in? Not even my love for the word “ya’ll” will have me watching again.

Chocolate Hazelnut Balls

Chocolate-hazelnut-balls

Something exciting happened last week: I went viral for the first time. No, that doesn’t mean I need to be put on antibiotics. My post on Raw/Vegan Chocolate Hazelnut Cake got picked up on StumbleUpon and things got a little crazy. In 3 days it obliterated almost every page view record my tiny little site had. Last I checked it had 26,000 views; I guess people like cake? I posted How To Use StumbleUpon To Promote Blog Content last February and had a little success since then but this was ridiculous.

chocolate-hazelnut-balls-serving

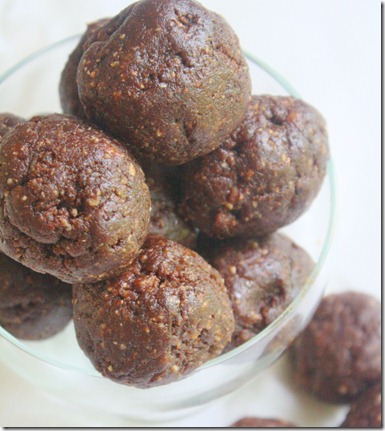
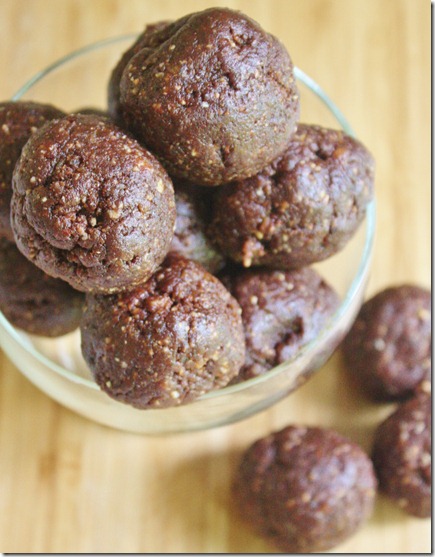
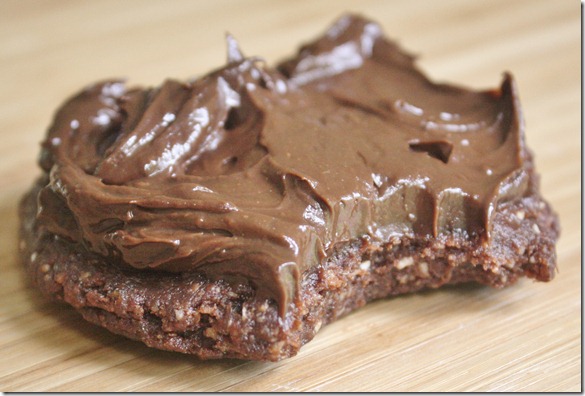
Because of that, I’ve had this cake on my mind pretty much non-stop since. Even though it’s raw and vegan, cake isn’t really a “health food”. I wanted something like it that I could eat any time, any place. These chewy little balls are just that. They’re flavorful, portable, and incredibly delicious. It’s almost like having the real dessert but much more socially acceptable for a mid-afternoon snack… or at 10am when you still haven’t put on clothes for the day.

Make sure when you’re forming the balls that there are no date pits in the final product. Even though store-bought dates are usually pit-free, it’s very likely that one or two slipped by, and those are not nice to bite in to.

Chocolate Hazelnut Balls

Prep Time: 10 minutes

Cook Time: 0 minutes

Ingredients(makes 14 balls):

  • 1 1/4 cup hazelnuts, raw
  • 2 cups pitted dates
  • 3 Tablespoons cocoa powder
  • ~2 Tablespoons water

chocolate-hazelnut-balls-bowl

Method:

  1. Blend the hazelnuts into a fine powder in a food processor
  2. Add in the dates and continue blending until the dates have broken up into smaller pieces
  3. Add the cocoa powder and continue blending
  4. Slowly add water into the processor while blending until the flour starts sticking to itself and becoming a dough. Stop adding water and turn off the food processor as soon as the ingredients hold together and form a giant ball.
  5. Store at room temperature in an airtight container.

These make a perfectly healthy snack…

chocolate-hazelnut-balls-cake

…until you remember you still have leftover frosting and decide to make 2 balls into a cake. Still pretty healthy and incredibly delicious.


Sweet Freedom Bakery Review

August 22nd 152

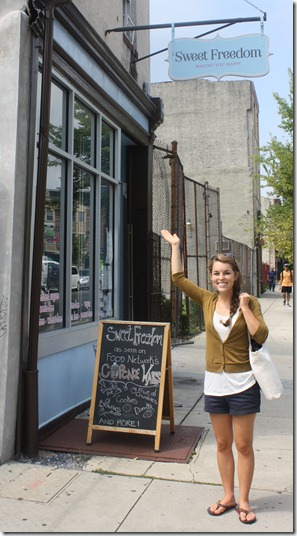
One place that kept coming up when I mentioned that I was going to Philadelphia was Sweet Freedom Bakery. So many readers, bloggers, and tweeters recommended this place that I couldn’t not go. I’m happy with anywhere that sells gluten-free treats, but Sweet Freedom goes above and beyond selling only gluten-free, soy-free, corn-free, and vegan desserts. I visited Sunday morning before lunch with Cynthia and Katie.

August 22nd 155

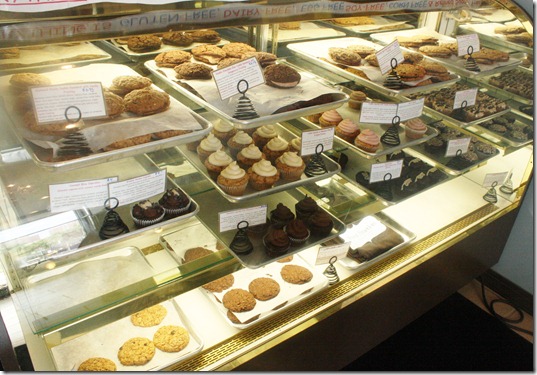
The selection was—in a word—overwhelming. There were cupcakes, cookies, hand pies, brownies, and bars. It took me 10 minutes just to settle on something.

August 22nd 162

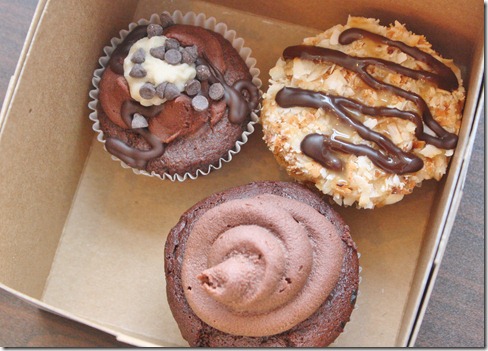
I ended up getting a brownie sundae cupcake(top left) for myself and a Samoas(top right) and chocolate cupcake with chocolate frosting(bottom) for Madeline and Boots.

August 22nd 156

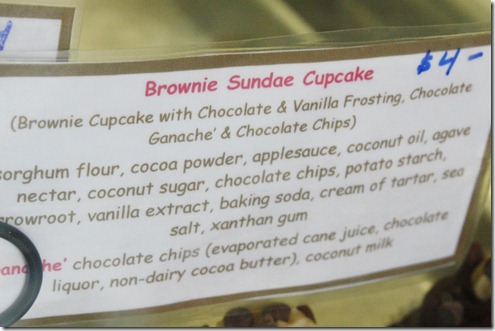
I love that they showed you the ingredients for all of the items. Not only does it help people with allergies know what they can have and can’t, but it helps nosy bakers like me know the secret ingredients of their baking.

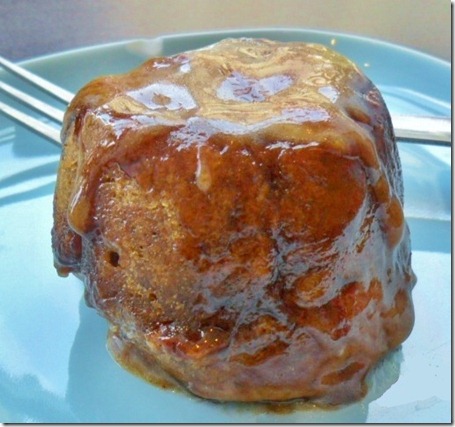
The brownie cupcake was good, but nothing outstanding. The frosting was delicious but then again when isn’t frosting delicious? The Samoas cupcake was seriously impressive, with a coconut cream filling that looked incredible. But the real stand out was the cinnamon bun. 

SAM_7015

Photo from Katie

I wasn’t planning on eating one of these, but Katie bought one and insisted that we share. Twist my arm why don’t ya? There was some serious moaning from our side of the table as we ate this. It wasn’t the best gluten-free, vegan cinnamon bun I’ve ever had; it was the best cinnamon bun I’ve ever had—period. It was so light and fluffy you could tell it had to be fresh and homemade. The glaze was sticky and sweet but didn’t overpower the spiciness of the cinnamon. Every part of it was pure bliss.

August 22nd 163

I can’t lie: I’m as excited as going back to Philadelphia in November for the cinnamon bun as I am the marathon. Carbs have never tasted so good.

7 Things I Learned From The 2011 Healthy Living Summit

1. There’s a Recipe For Good Recipes

The first talk I went to was by Stepfanie Romine about writing a better recipe. A lot of what she said I heard when I attended Techmunch Boston last month, but hearing it again really drove the importance of recipe writing into me. I won’t recap the whole talk; Heather and Courtney already posted great summaries of it. My big takeaway was the importance of prep and cook time in recipes, which I’ll be including in all of mine from now on.

Capture

2. All Your Information Is Already On The Internet

Another one of my favorite sessions was about blogger safety presented by Monica. It was a good reality check on the dangers of social media and oversharing. I learned the internet makes it practically impossible for any of us to remain private with sites like spokeo.com that creates a real security problem for bloggers. I’m not too worried though because I got a yellow belt in Tae Kwon Do in 2nd grade and I have broken board to prove it. Stalk at your own risk.

xexte

Photo from Anne

3. Doughballs Are Delicious

Doughballs have been floating around food blogs since November, and I’m ashamed to say I hadn’t tried them since this past weekend. I’m not a big fan of cookies to begin with and gluten-free cookies often come out flat and with a bad texture. Katie completely proved me wrong with her gluten-free and vegan doughballs. I can’t think of a better cookie I’ve ever had. I’ve already bookmarked her recipe and plan to make it soon. Which brings me to…

IMG_2578

Photo from Brittany

4. Bloggers Are The Best Bakers

After lunch there was a flurry of desserts floating around, and all of them were baked by bloggers. There were sugar cookies from Courtney, granola bars and macaroons from Diana, cake pops from Paige, doughballs from Katie, and sunflower balls from Shana. I only got to taste the doughballs but all of them got rave reviews. Where else but at a blogging conference could people accept baked goods from total strangers and not even think twice?

014_thumb

IMG_7930-533x800_thumb

IMG_8019-800x533_thumb

Photos from Anne and Monica

5. Healthy Living Bloggers Are Some Of The Most Fun People Out There

I wouldn’t really call myself a healthy living blogger. If anything, I’m a food blogger. But I read just as many healthy living blogs as I do food blogs and feel a much stronger connection with healthy living bloggers than food bloggers. It was great seeing people again(or meeting face to face for the first time) whose blogs and twitter feeds I follow religiously as well as befriending people who I didn’t know at all but quickly connected with.

IMG_1585

Photo from Meghann

6. I Love Running, But Not At 5am

Another reason that I went to Philly besides the conference is because I’m running the Philadelphia marathon in 3 months. The group run was an excellent chance to get a feel for Philly’s climate and terrain. I ended having a great 16-mile training run, part of the time running with other bloggers training for races. The one stinger was the 4:45am wake-up call and feeling a little like a zombie that night and the next morning. My love for running has a time frame, and apparently that’s between 7am and 5pm.

7. The More Fun You’re Having, The Less Pictures You’ll Take

I probably took less than 20 photos this weekend in total, which is why all of these photos are borrowed from other bloggers. I didn’t think to take photos at the cocktail party, or dining at El Vez. I took hardly any photos of my day with Madeline and Boots, who are two of my favorite people ever, because it was too much fun just to be with them(also because they put me to work making dinner while they watched Project Runway(just kidding, I volunteered)). If you want to read all about that, you’ll have to check out Madeline’s post.

Were you there this weekend? If so, what was your favorite takeaway?

Chocolate Peanut Butter Swirl Brownies

The last time I posted was 5 days ago. There’s a reason for my absence. I spent all week in Philadelphia at the Healthy Living Summit living it up with some great friends. I learned and did so many things in Philly that I can’t wait to share. But not yet. I got home late last night and my head(and bedroom floor) are currently a mess.

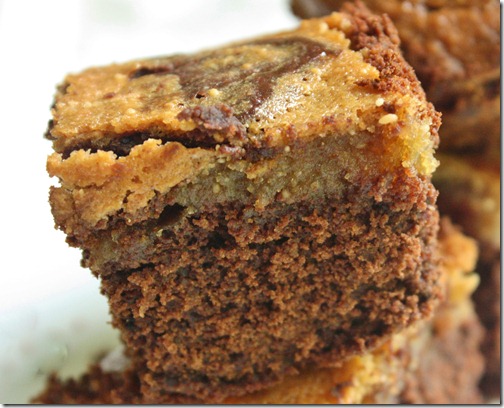
chocolate-peanut-butter-swirl-brownies

One thing I can share is this brownie recipe. Like the almond flour brownie recipe, I baked these and packed them up to bring to Philly and share with bloggers. Most of all I was excited to share these with Cynthia, who also has food allergies(gluten, soy, almond, hazelnut, refined sugar, and dairy). I didn’t have a recipe that avoided all of those allergens, so I made one up and said a little prayer. At first I worried they came out too cakey for my preference, but one taste and I was sold. The only question remaining was how would other people like them.

Capture

The response to these was overwhelming. As soon as I tweeted out, the brownies started selling like hotcakes(but way better because they’re brownies, duh). Cynthia really enjoyed them, as did Meghann, Julie, and too many other bloggers to count. I don’t care how good food tastes; nothing feels as good as sharing it with others. 

If you’re baking for someone with a peanut or tree nut allergy, sunflower seed butter makes a great substitute for peanut butter.

chocolate-peanut-butter-swirl-brownies-top

Chocolate Peanut Butter Swirl Brownies

Prep Time: 20 minutes

Cook Time: 40 minutes

Ingredients(makes 16 brownies):

  • 4.5oz unsweetened baking chocolate(I used Scharffen Berger because it’s soy-free)
  • 1 3/4 cups maple syrup, divided
  • 1 cup unsweetened peanut butter, divided
  • 1/4 teaspoon baking powder
  • 1/8 teaspoon salt
  • 1 cup all-purpose flour(I used Bob’s Red Mill gluten-free all purpose flour)
  • 1/4 cup cocoa powder
  • 3 eggs
  • 1/3 cup water

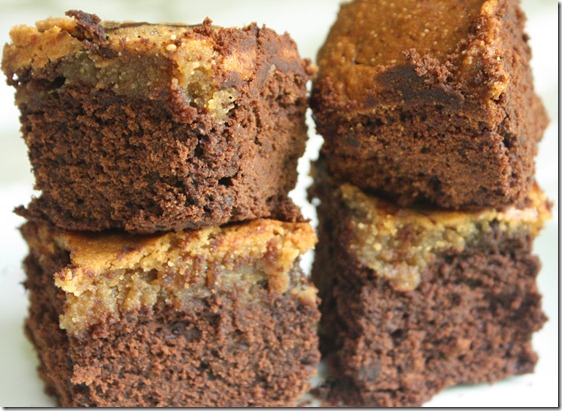
chocolate-peanut-butter-swirl-brownies-stack

Method:

  1. Preheat your oven to 350 degrees.
  2. Melt the chocolate and whisk in 1 1/4 cup maple syrup and 1/2 cup peanut butter. Set aside.
  3. In a large bowl, sift together the baking powder, salt, flour, and cocoa powder. Whisk in 2 eggs and 1/3 cup of water.
  4. Mix the chocolate-peanut butter mixture into flour and eggs until completely combines. Pour this into a greased 8×8 baking pan. If the batter is too thick to pour, add extra water until it’s runny but still thick.
  5. Make the peanut butter part by whisking together the remaining maple syrup, peanut butter, and egg.
  6. Pour the peanut butter mixture on top of the brownies and lightly swirl the two batters together a couple times, making sure not to over mix them.
  7. Bake for 40 minutes or until a cake tester inserted in the center comes out clean.
  8. Cool completely before cutting.

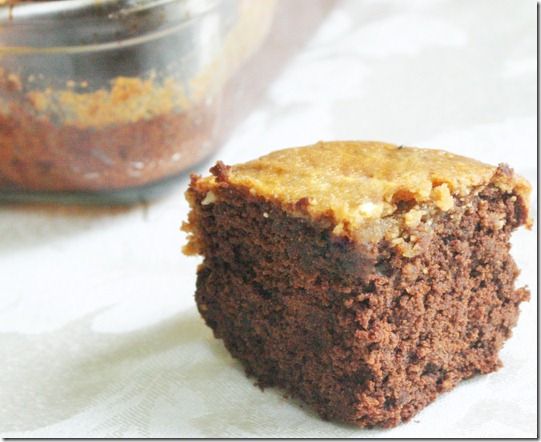
chocolate-peanut-butter-swirl-brownies-slice

Make sure to share these after making them. That way they’ll taste all the better.

Almond Flour Brownies

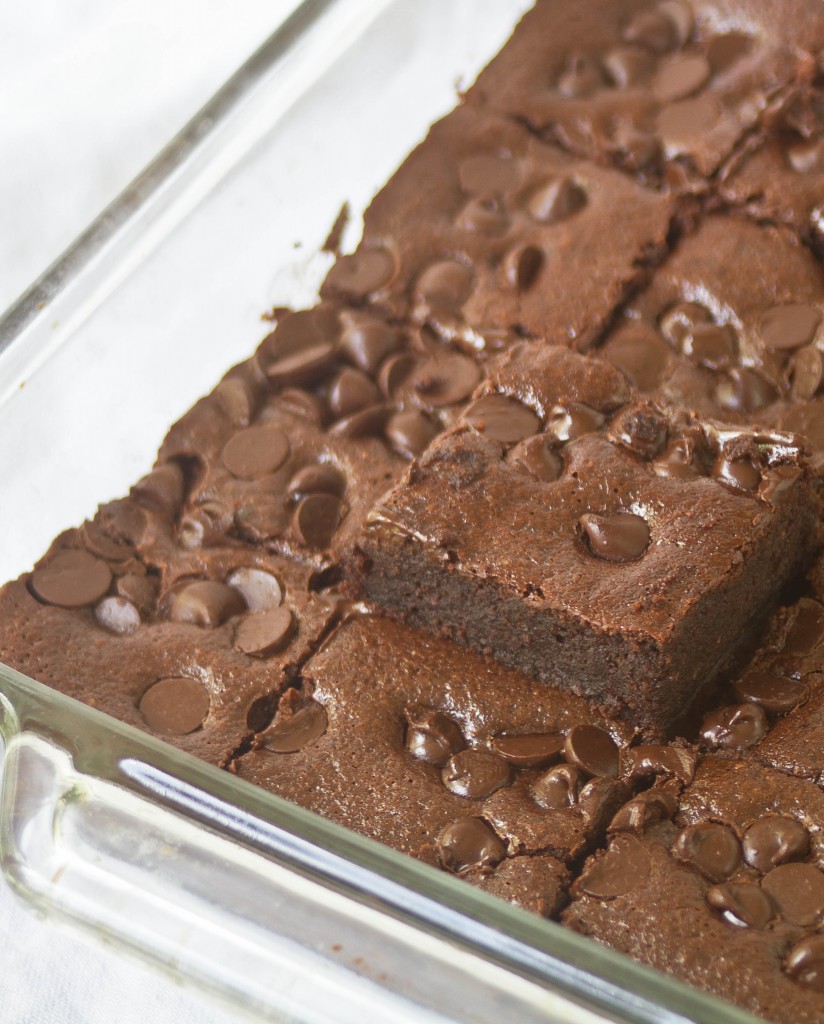
This week I made brownies for the first time in months. MONTHS. Who am I? The thing is these aren’t even for me; I’m still trying to get in better shape for marathon training. The last thing I need on my plate(literally) is brownies.

I’m not saying I didn’t steal a taste, but as soon as these were cooled, cut, and photographed I sealed them up to bring to the Healthy Living Summit to share with friends and this girl for hosting me for a night. If you’re going, too, please find me and say hi. I’ll be the one trying to buy friends with brownies.

 I made these by modifying my outrageous triple chocolate brownies recipe and—dare I say?—I like these better. Cooked they taste the same but the raw batter is much more delicious since it doesn’t have that funky gluten-free flavor to it. And it requires no special flour/starch blend, just plain old almond flour. Since I always keep these ingredients on hand, I can tell this will be my new go-to brownie recipe. 

Almond Flour Brownies

Prep time: 15 minutes

Cook time: 30 minutes

Ingredients(Makes 1 8 x 8 pan):

  • 3/4 cup almond flour
  • 1/4 teaspoon salt
  • 2 tablespoons unsweetened cocoa powder
  • 1/2 teaspoon baking powder
  • 3/4 cup sugar*
  • 3 large eggs
  • 1 teaspoon vanilla
  • 1 teaspoon instant coffee granules(optional)
  • 1/2 cup butter
  • 7oz semisweet or bittersweet baking chocolate, divided OR 3/4 cup chocolate chips

*You can replace the cane sugar in this recipe with 1/2 cup + 2 Tablespoons of liquid sweetener like maple syrup, honey, agave, or corn syrup. 

Method:

  1. Preheat your oven to 350 degrees.
  2. Mix together the almond flour, salt, cocoa powder, and baking powder and set aside.
  3. In a separate bowl, melt together 4 ounces of chocolate or a scant 1/2 cup chocolate chips with the butter.
  4. While the chocolate is melting, beat together the eggs, sugar, vanilla and coffee granules if using.
  5. Slowly pour the melted chocolate and butter into the egg/sugar mixture while whisking until fully incorporated. Don’t go too fast so that the raw eggs don’t cook upon contact.
  6. Add the chocolate mixture in with the dry ingredients and mix completely.
  7. Pour the batter in an 8 x 8 pan.
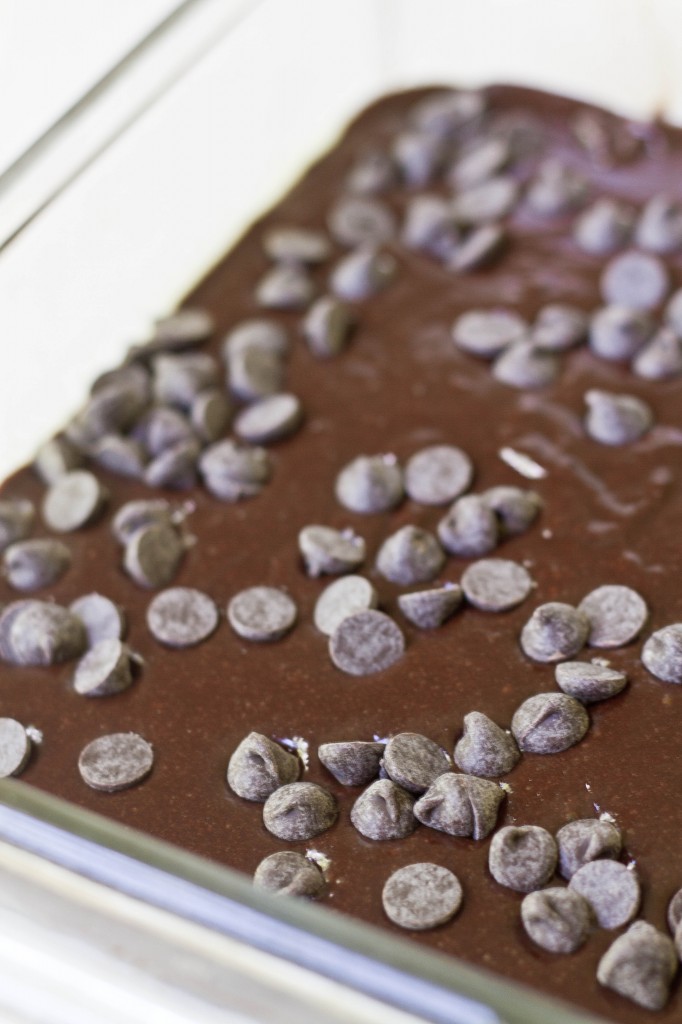
  8. Sprinkle the top with the remaining chocolate and gently press it into the batter.
  9. Bake for 30 minutes or until a toothpick poked into the center comes out clean. Let these cool completely before cutting in.

The first time I made these I took them out of the oven after only 25 minutes. 2 hours later I cut in to a gooey and basically raw center. Oops. I stuck them back into the oven and—of course—got distracted, baking them a little too long and burning the tops of the ones towards the back. The lesson is bake as I say, not as I do.

“What Are Capers?”

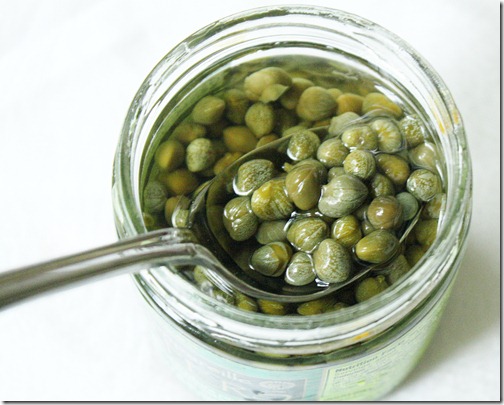
what-are-capers

Until I started reading food blogs, I would have sworn capers were a type of fish that came in a can that no one except for old ladies and Nigel Thornberry ate(Does anyone know what I’m talking about?). But then I saw them, green little pearls that sort of look like fish eggs, except they were being used in vegan recipes. That only confused me more.

One day I was working in my restaurant and our job was to make the salsa verde used as a pork topper. The ingredients for it are simple: Parsley, jalapenos, shallots, and capers. I asked my shift manager what capers were, figuring she’d know having gone through culinary school, but her guess was as good as mine.

what-are-capers-trader-joes

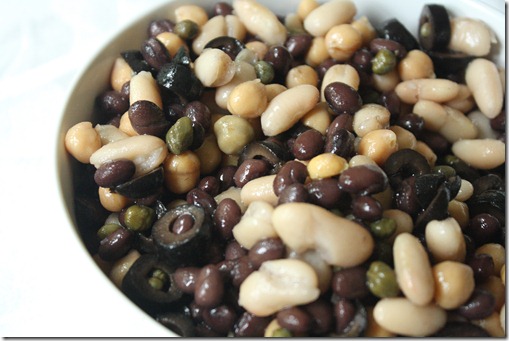
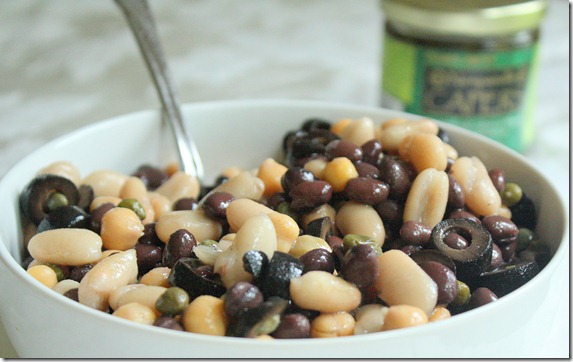
I went home that night and looked it up online and found out that capers are actually buds from the caper bush that are pickled to give a tart flavor to—the perfect touch to any dish(Side note: How did people know things before the internet? Seriously, I have no clue). I was excited to find them in Trader Joes and even more excited to make a dish with them. I’m leaving town on Friday and had a few too many open cans of beans in my refrigerator so I combined them to make this delicious bean salad.

what-are-capers-bean-salad

Bean Salad With Capers

Ingredients(Makes 4 servings:

  • 1 cup chickpeas
  • 1 cup black beans
  • 1 cup cannellini beans
  • 1/3 cup sliced black olives
  • 1 1/2 Tablespoons capers, drained
  • 1 Tablespoon extra virgin olive oil
  • Salt to taste

what-are-capers-recipe

Method

  1. In a large bowl, toss together the beans, olives, capers, and oil until evenly mixed.
  2. Taste and add salt if necessary. Serve room temperature.

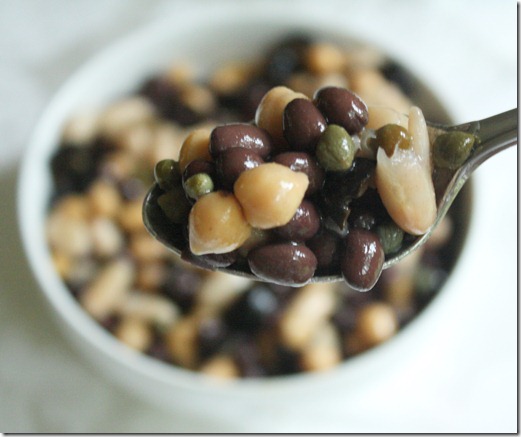
what-are-capers-spoonful

If you want to make this starting with unopened cans of beans, use a full can of chickpeas, black beans, and cannellini, 1/2 cup of olives, 2 Tablespoons of capers and the same amount of oil.

Fess up: Did you know what capers are?

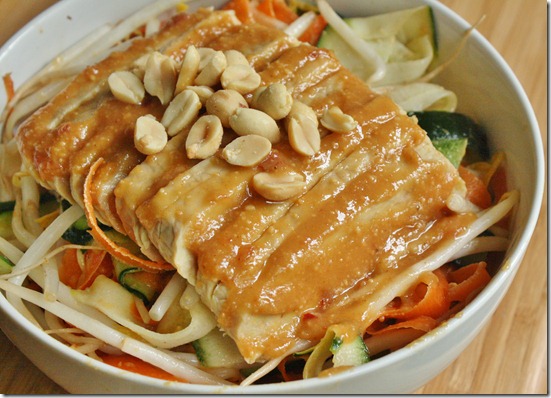
Raw Pad Thai

raw-pad-thai

When I shared A Day In The Life Of A Restaurant Intern, a reader wanted to know more about the raw pad Thai bowl I had for lunch. This is something I’ve been making all Summer long and honestly I never blogged about it because I didn’t think it was that exciting. Healthy? Yes. Delicious? No doubt. An excuse to eat peanut butter for every meal? Totally. But not really exciting.

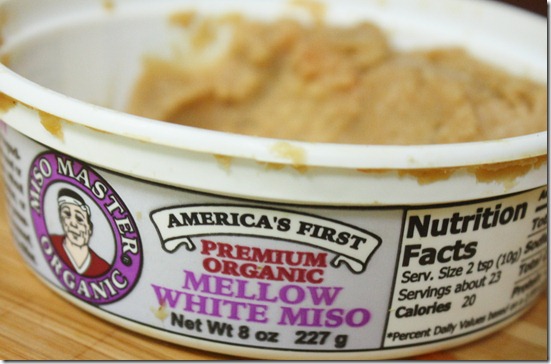
rw-pad-thai-miso

I never really make this the same way, sometimes adding sesame oil, sometimes using chickpeas instead of tempeh—you get the idea. One ingredient I highly recommend investing in is miso paste. I never really knew much about it before a few months ago and certainly never would buy it at the store. Now I wouldn’t keep a refrigerator without it. The salty/savory flavor is truly unique and adds a special depth of flavor that’s crosses cultures. I’ve used this in place of garlic, onions and salt in greens and beans and it tastes just as good. It’s definitely worth the investment.

Raw Pad Thai

Ingredients(For one serving):

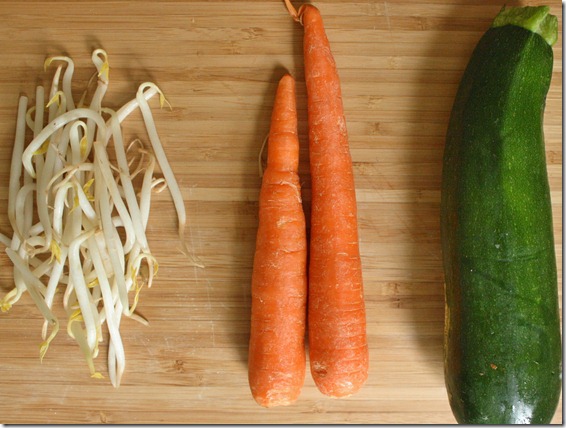
  • 1 zucchini
  • 2 carrots
  • 1/2 cup bean sprouts
  • 1/2 block tempeh
  • peanuts to garnish

For the sauce:

  • 2 Tablespoons peanut butter
  • 2 teaspoons maple syrup
  • 1 Tablespoon rice vinegar
  • 1/2 Tablespoon white miso paste
  • 1 teaspoon siracha sauce(optional)

raw-pad-thai-ingredients

Method:

  1. Using a vegetable peeler, peel the zucchini and carrots into long, thin “noodles” using as much of the vegetables as possible.
  2. Make the sauce by mixing together the peanut butter, maple syrup, vinegar, miso, and siracha if using until smooth. If necessary add a few teaspoons of water until the sauce is runny yet thick.
  3. Toss the sauce with the vegetable “noodles” and bean sprouts in a large bowl reserving about a tablespoon of sauce.
  4. Plate the noodles in a bowl.
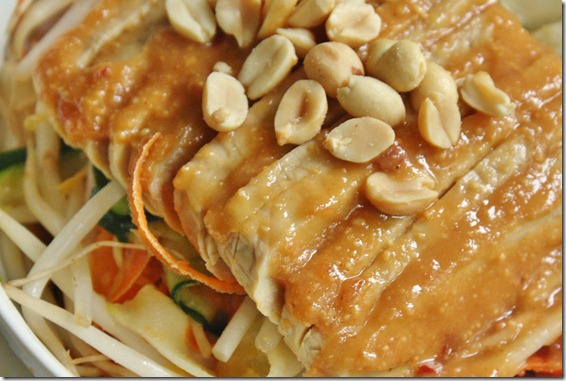
  5. Slice the tempeh on a bias and plate it on top of the sauced noodles.
  6. Spread the reserved sauce on top of the tempeh. Garnish with peanuts if desired.

raw-pad-thai-tempeh

Like I said, you can play around with the ingredients to suit what’s in your pantry. I could eat tempeh and peanut butter all day long so this is how I like it best. 

Hazelnut Chocolate Cake {Raw/Vegan}

hazelnut-chocolate-cake

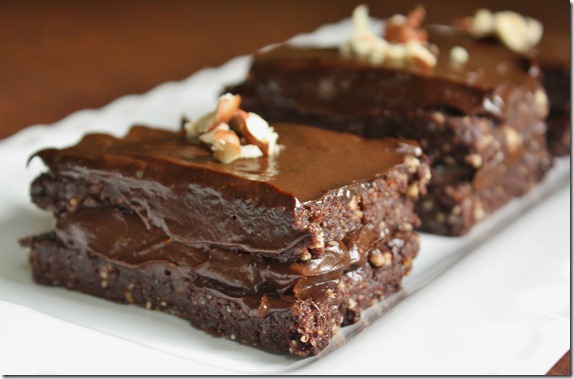
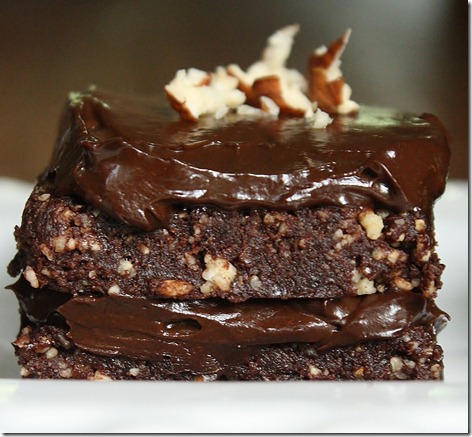
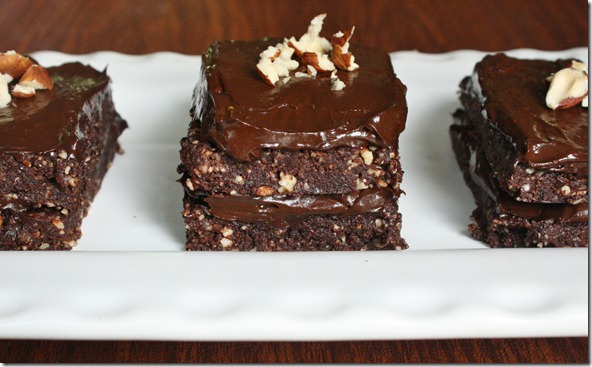
Saturday night we had a special dinner with family friends. For one weekend all 8 of us were around before starting vacations and school again; one of is even spending a year studying at Oxford(no, it’s not me; yes, I’m jealous). That called for cake. I had been wanting to make this recipe for a while and wanted to wait until just the right celebration. Everyone loved it, although when I told them the frosting involved avocado you would have thought I told them my own hair was in it. They started eating it again 2 seconds later when they remembered how good it was and decided you couldn’t taste the avocado.

hazelnut-chocolate-cake-front

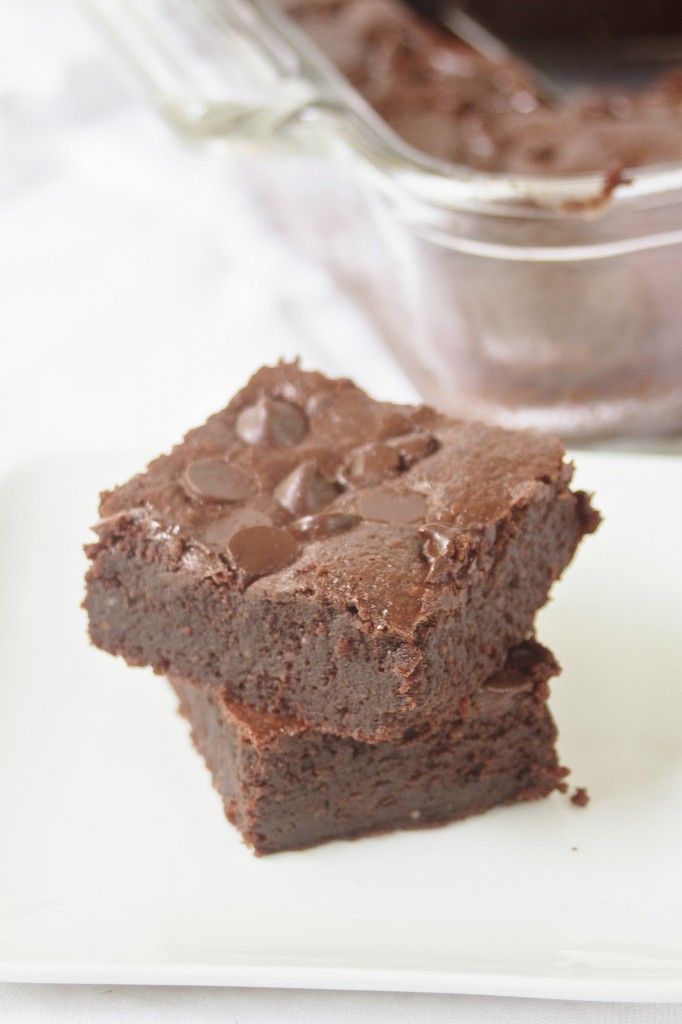
I actually made this cake for Father’s Day last year and featured it as a guest post on Gena’s blog. Since then I’d completely forgotten about it and had to go look it up to remember how to make it. Now that I remembered, I kind of wish I could forget again. The ones that we didn’t give away didn’t last long in this house. It’s hard to say no to a piece of cake, and even harder when you can tell yourself it’s “healthy” because it has fruits and nuts in it.
Hazelnut Chocolate Cake {Raw/Vegan}

Prep time: 20 minutes

Cook time: 0 minutes

Ingredients(makes 5 2×3-inch frosted cakes):

  • 2 cups hazelnuts
  • 1 cup pitted dates
  • 3/4 cup cocoa powder, divided
  • 1/2 cup + 2 tablespoons maple syrup, divided
  • 1 medium avocado
  • Crushed hazelnuts for garnish

hazelnut-chocolate-cake-plated

Method:

  1. Pulse the hazelnuts in a food processor until finely ground into a flour
  2. Add in the dates, 1/2 cup cocoa powder, and 1/4 cup maple syrup and process until it forms into a thick dough that sticks together.
  3. Lay the dough out between two sheets of parchment paper and roll to about 3/4-inch thickness.
  4. With a sharp knife, cut the dough into either 8 or 10 equal sized rectangles. If there’s excess dough you can form it into a ball, roll it out, and cut again.
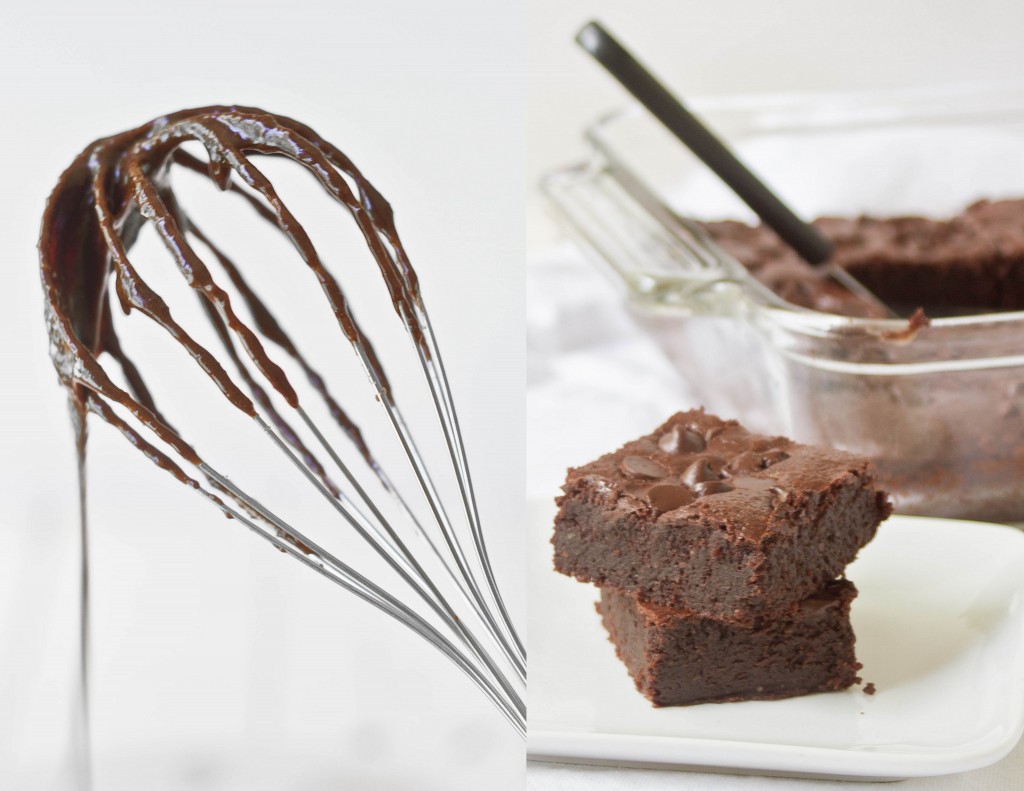
  5. Make the frosting by blending together the remaining maple syrup, cocoa powder, and the meat from the avocado until it’s uniform in color and texture. Taste it and adjust the sweetness if need be.
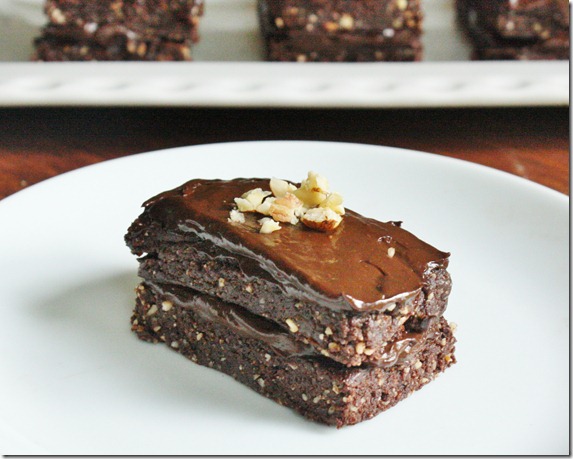
  6. Spread about 2 tablespoons of frosting over half of the cakes. Layer with another slice and spread an equal amount of frosting on top of that piece.
  7. Garnish with crushed hazelnuts.

hazelnut-chocolate-cake-slice

These took from start to finish about 20 minutes to make, maybe a little more than that because I was distracted. Even so these are much quicker to make than traditional cake and certainly have all the show-stopping qualities.